Create a Flow
In this page you will learn how to setup a new verification flow on Zyphe platform.
1. Login to the admin panel
Login to the Zyphe Dashboard and navigate to the Flows section.
2. Click on the "Create Flow" button
Click on the Create Flow button on the top right.
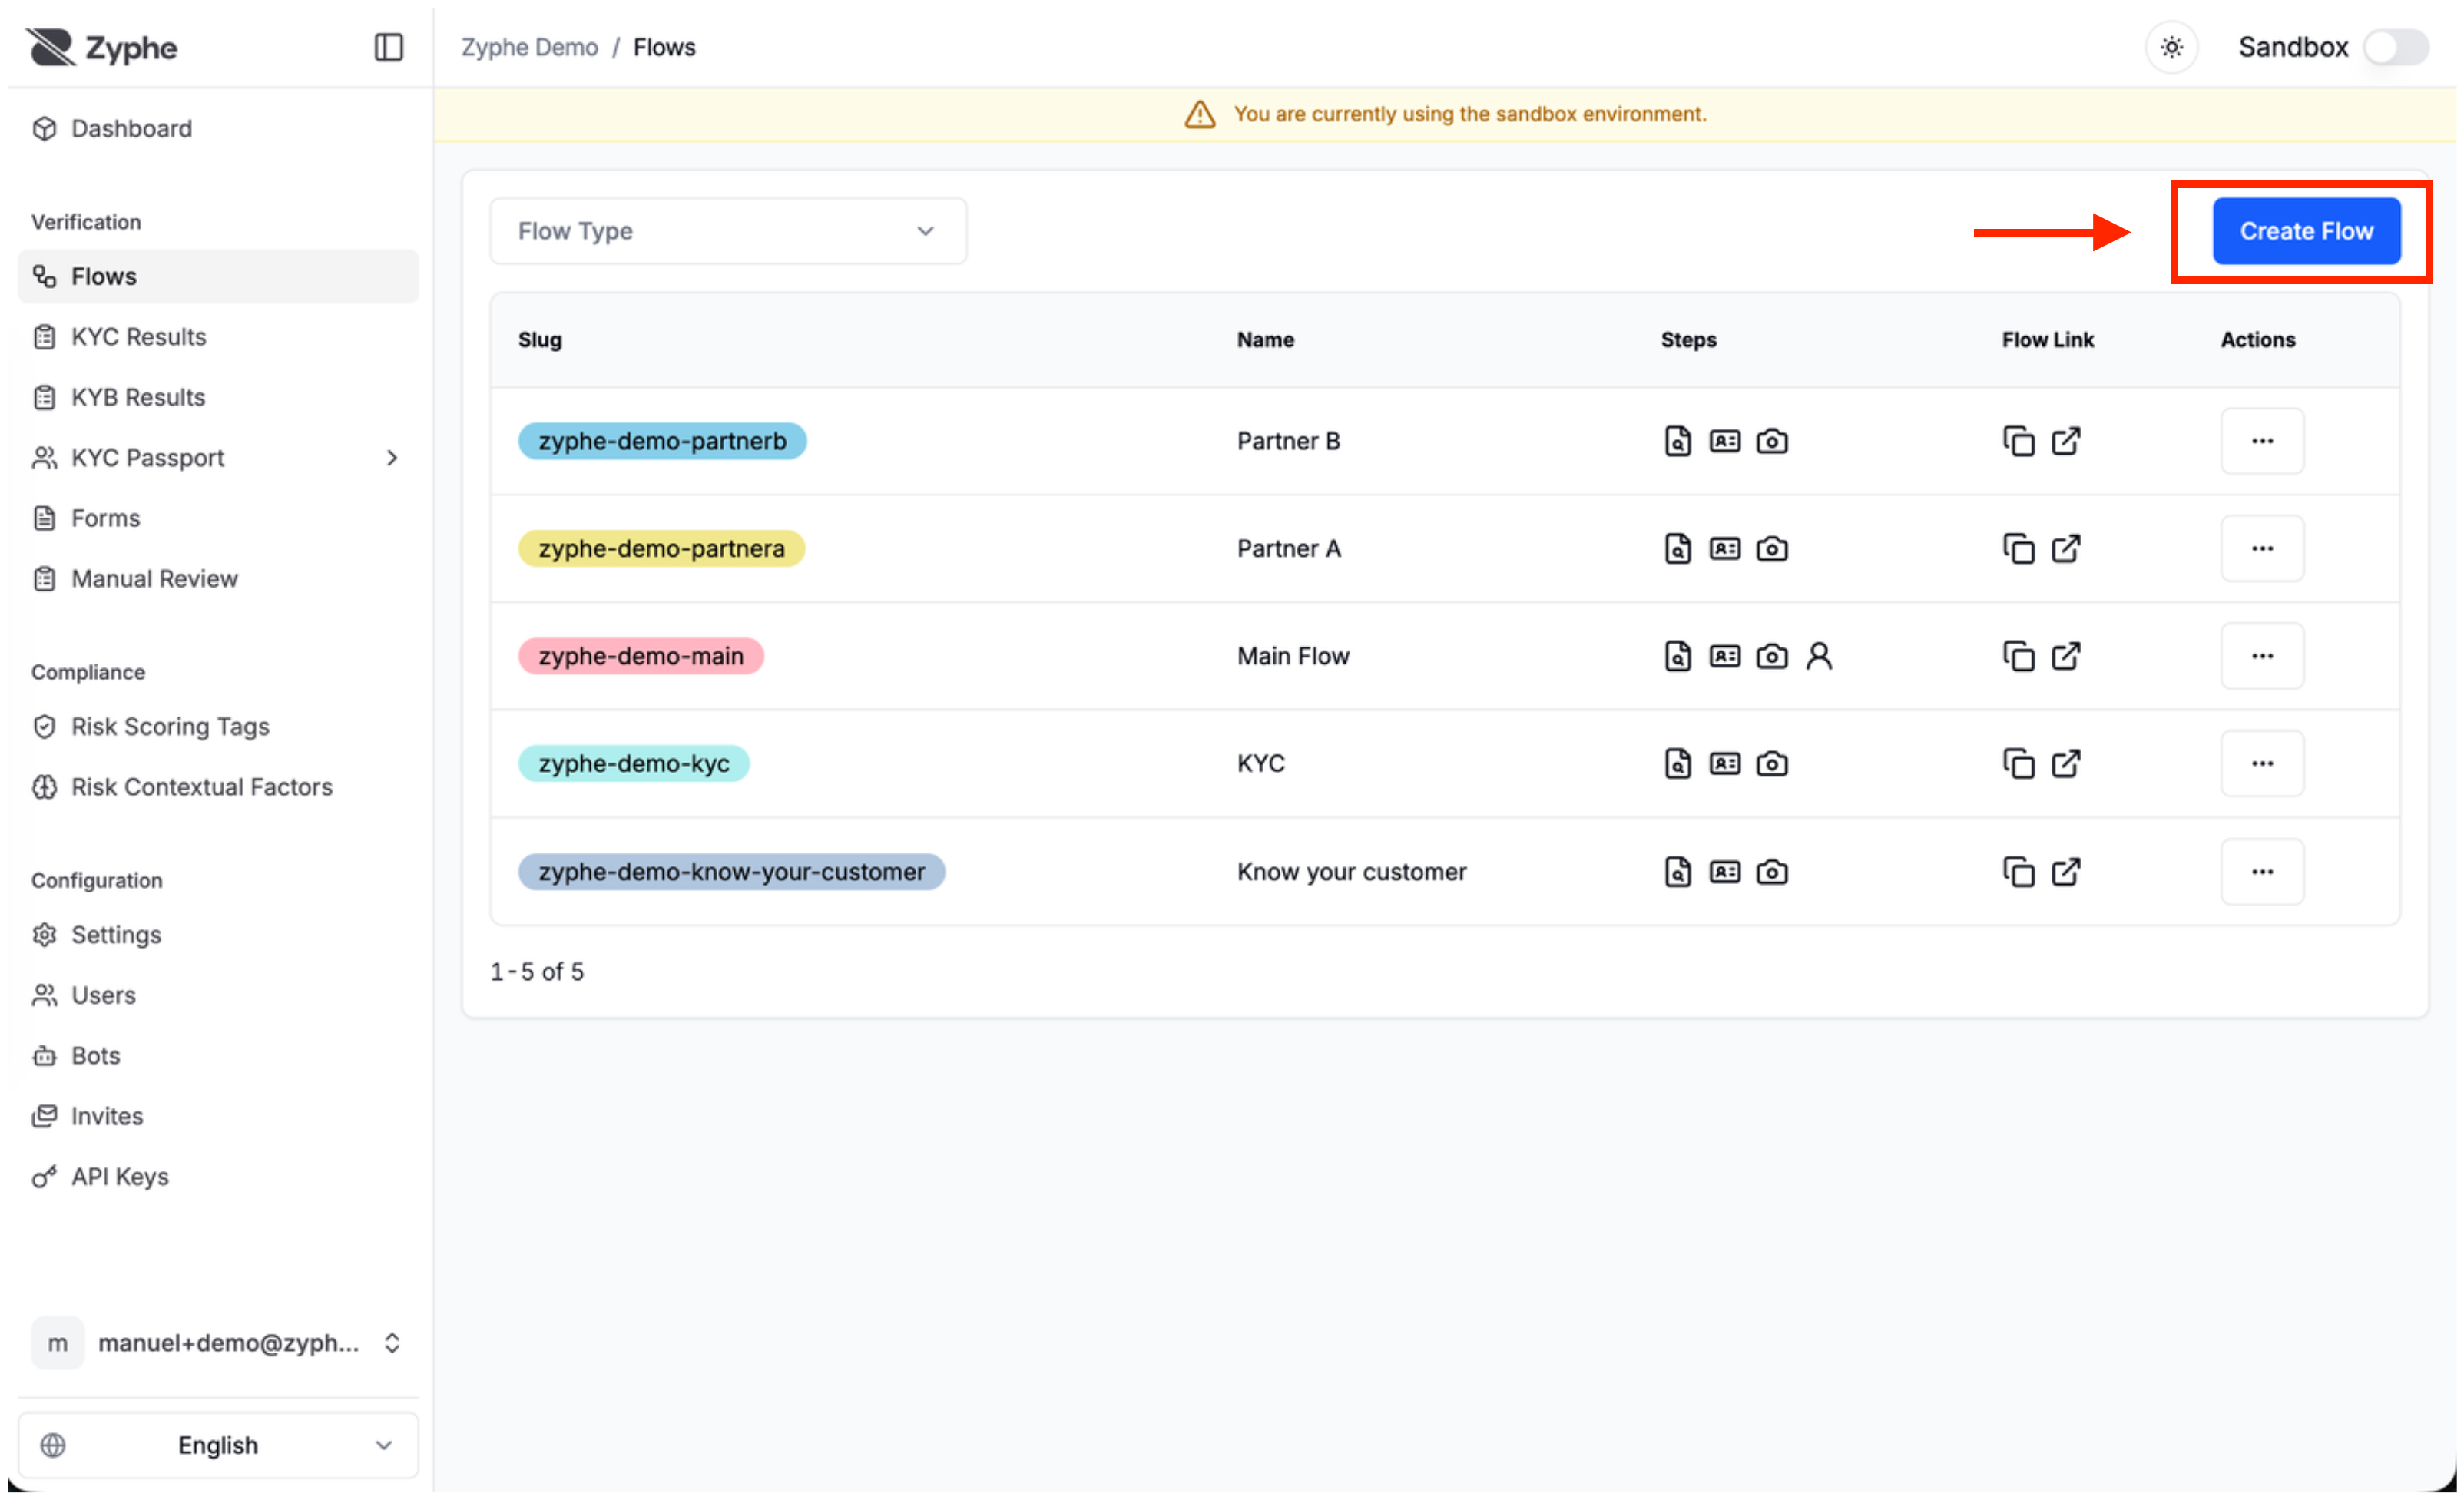
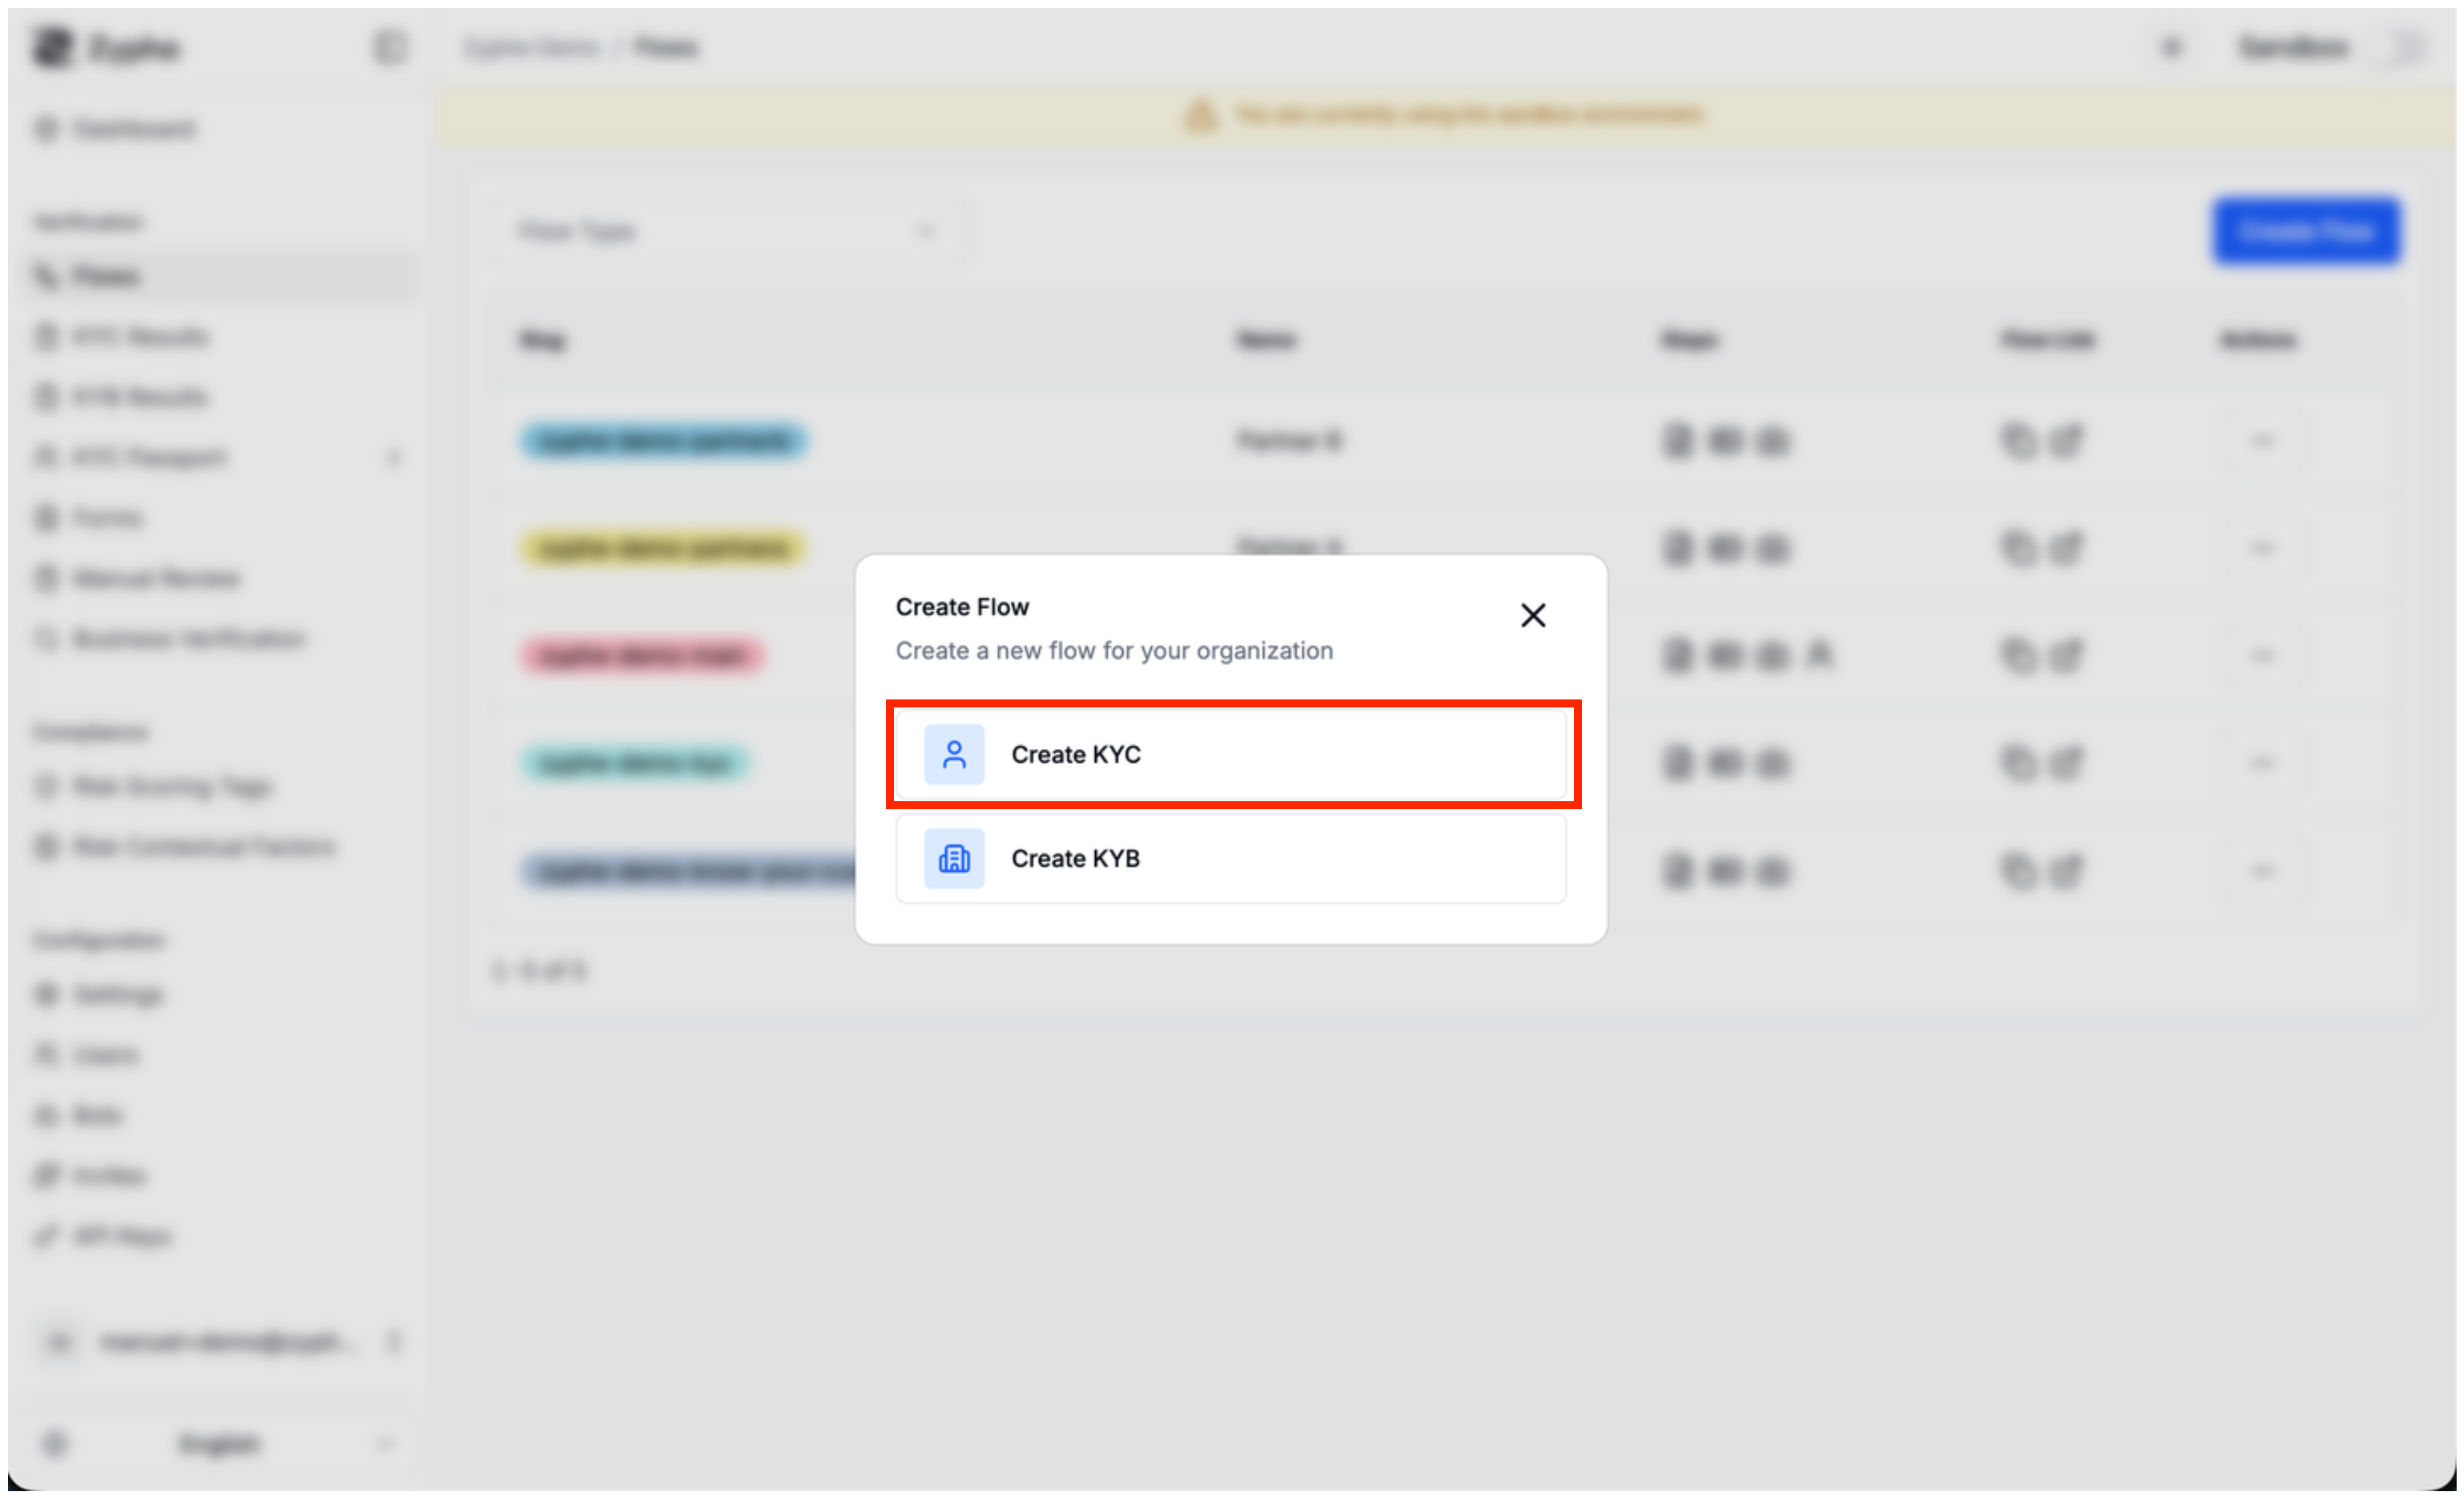
Zyphe supports two types of flows:
- KYC: Use this flow type to verify individuals.
- KYB: Use this flow type to verify businesses.
For this tutorial, we will create a KYC flow.
3. Configure the flow
Customize the flow settings:
- Name: the name of the flow.
- Slug: a short identifier for the flow. It will be used to identify the flow within the link that is going to be shared with the end users that goes through the verification process.
- Success URL: the link where we redirect the users once the verification process is completed.
- Webhook URL: the URL of the webhook to be called when relevant events (such as verification completion or failure) happens on the current flow.

4. (Optional) Invite Partner Organizations
If you want to share verification results with partner organizations, you can enable KYC Passport for this flow. This allows you to create a trusted ecosystem where verified identity data is securely shared with authorized partners.
KYC Passport enables you to invite partner organizations to access KYC verification results from your flow. When users complete verification, they provide consent for their data to be shared with all approved partners, eliminating the need for repeated verification across your ecosystem.
For a detailed walkthrough with screenshots on how to invite partner organizations, see the KYC Passport: Inviting Partner Organizations guide.
For technical details about how KYC Passport works, including security considerations and use cases, see the KYC Passport technical documentation.
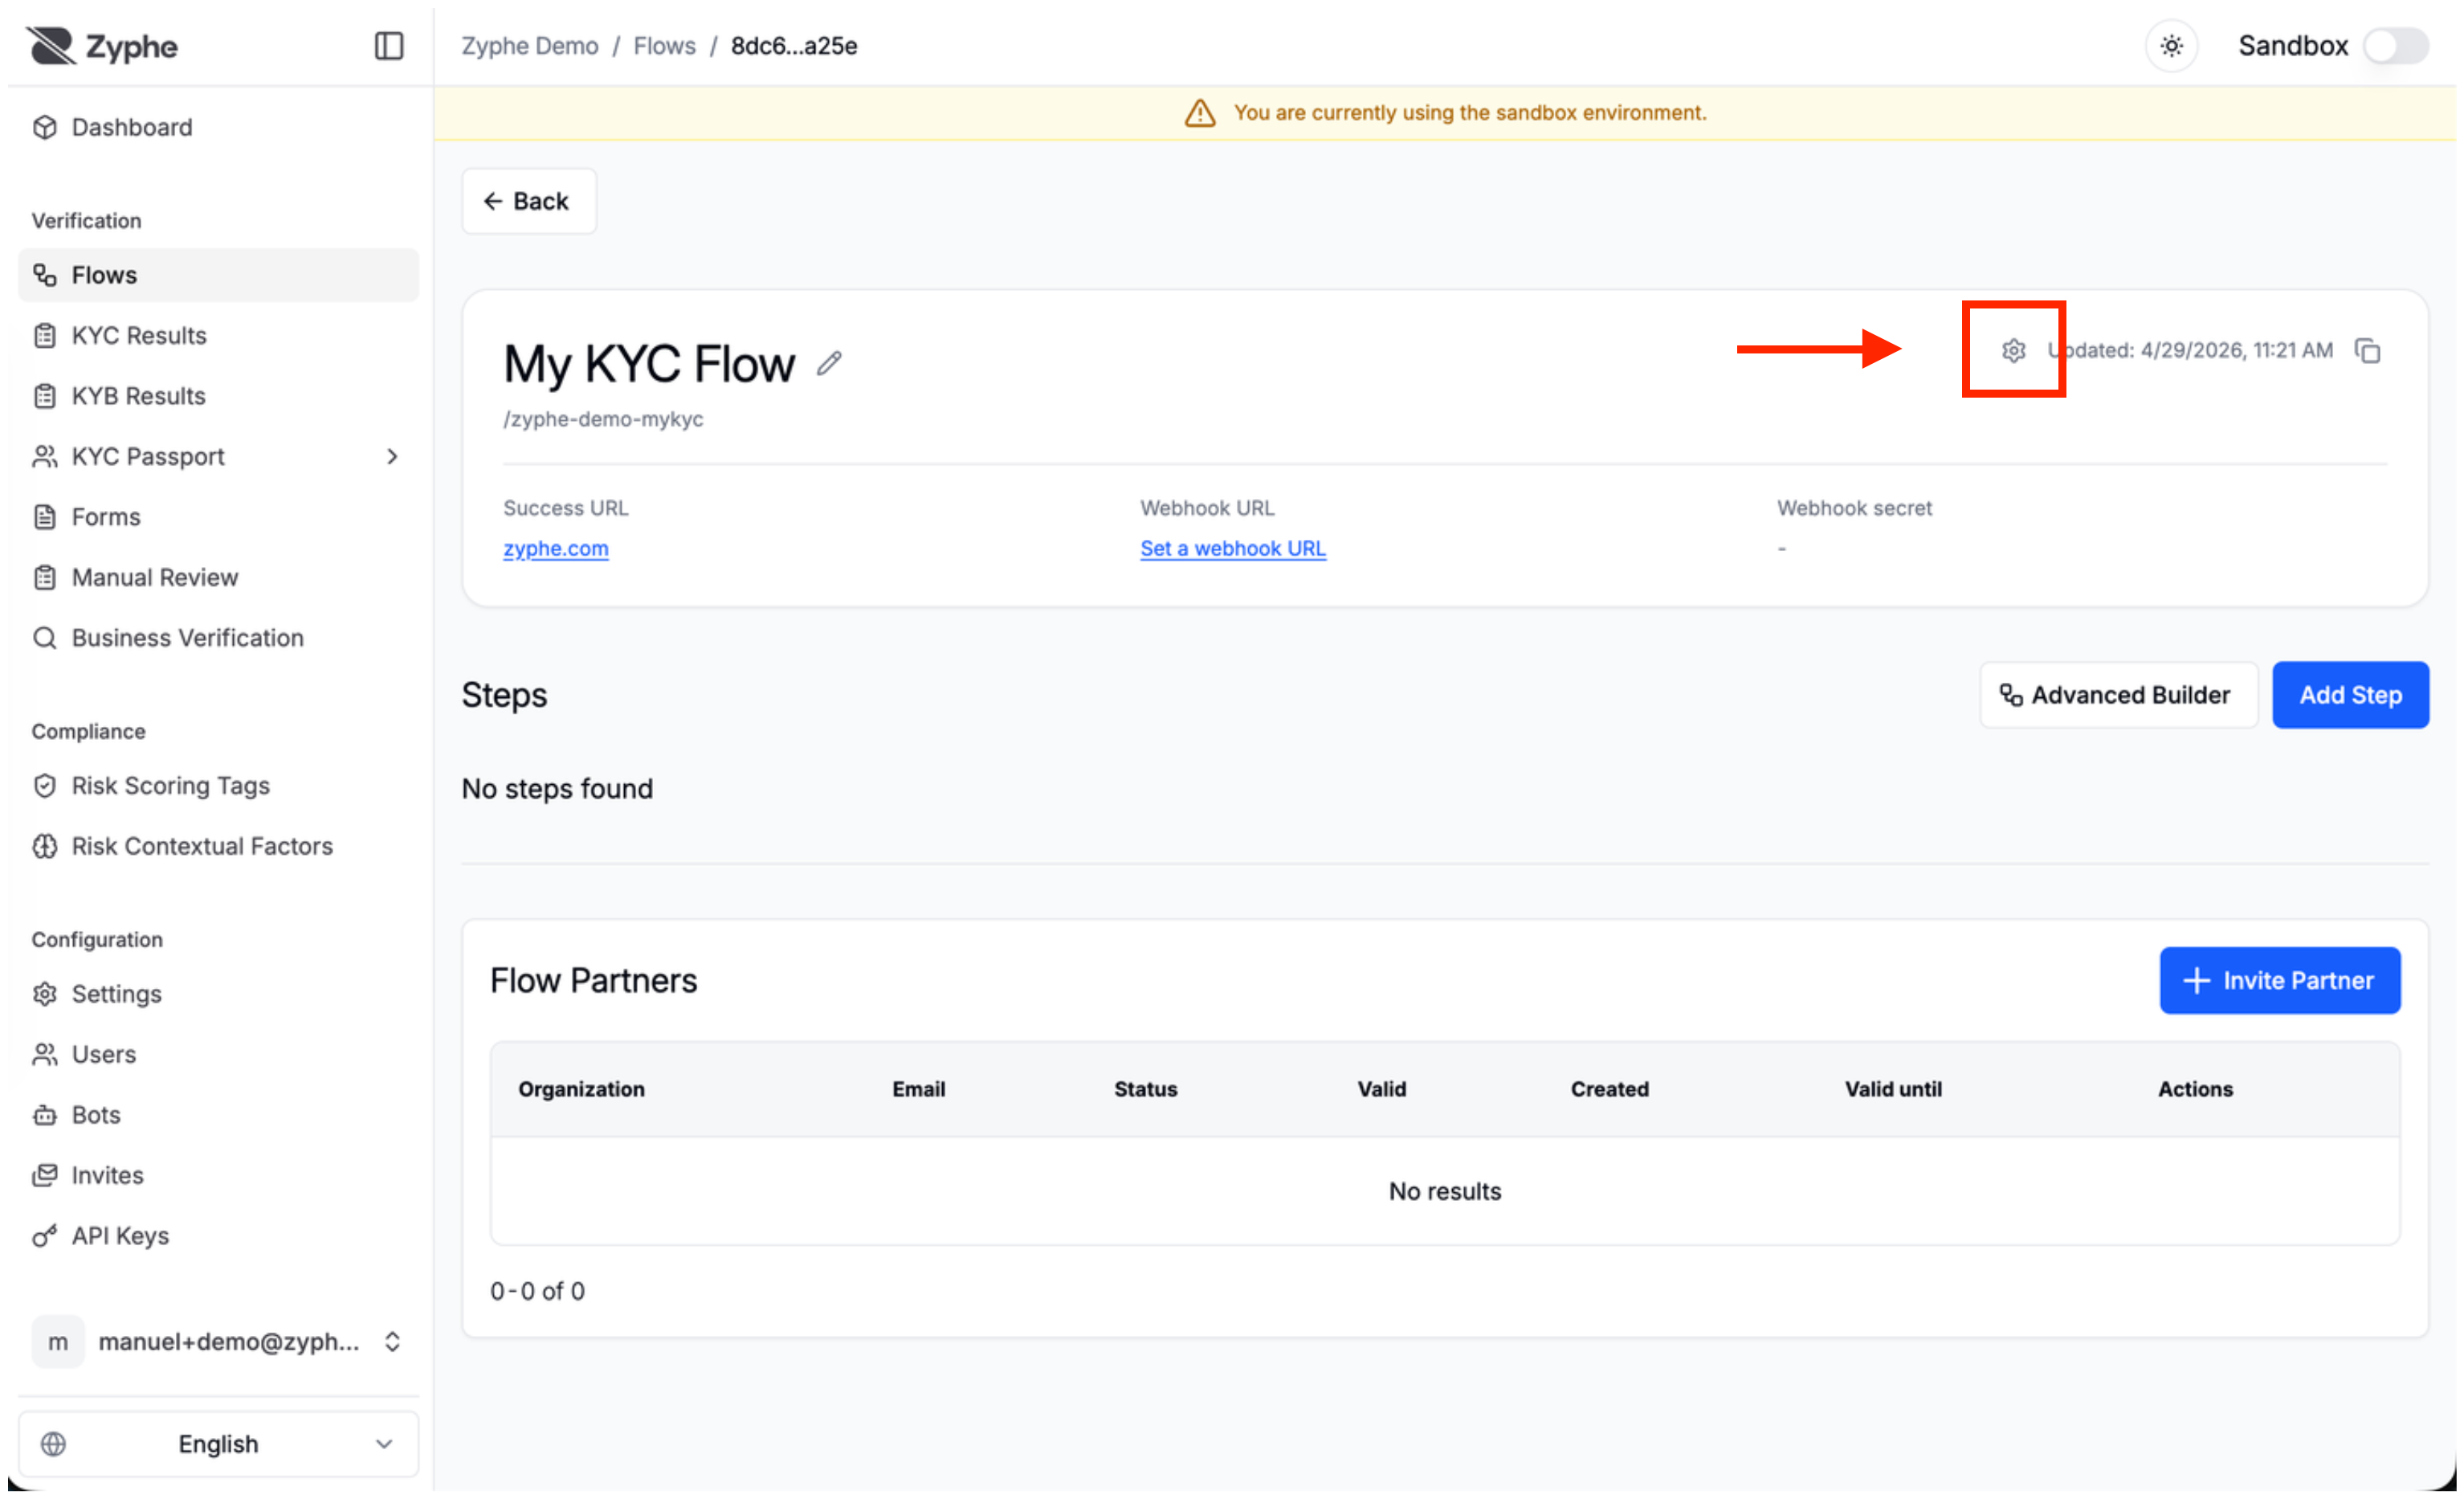
5. Configure the flow settings
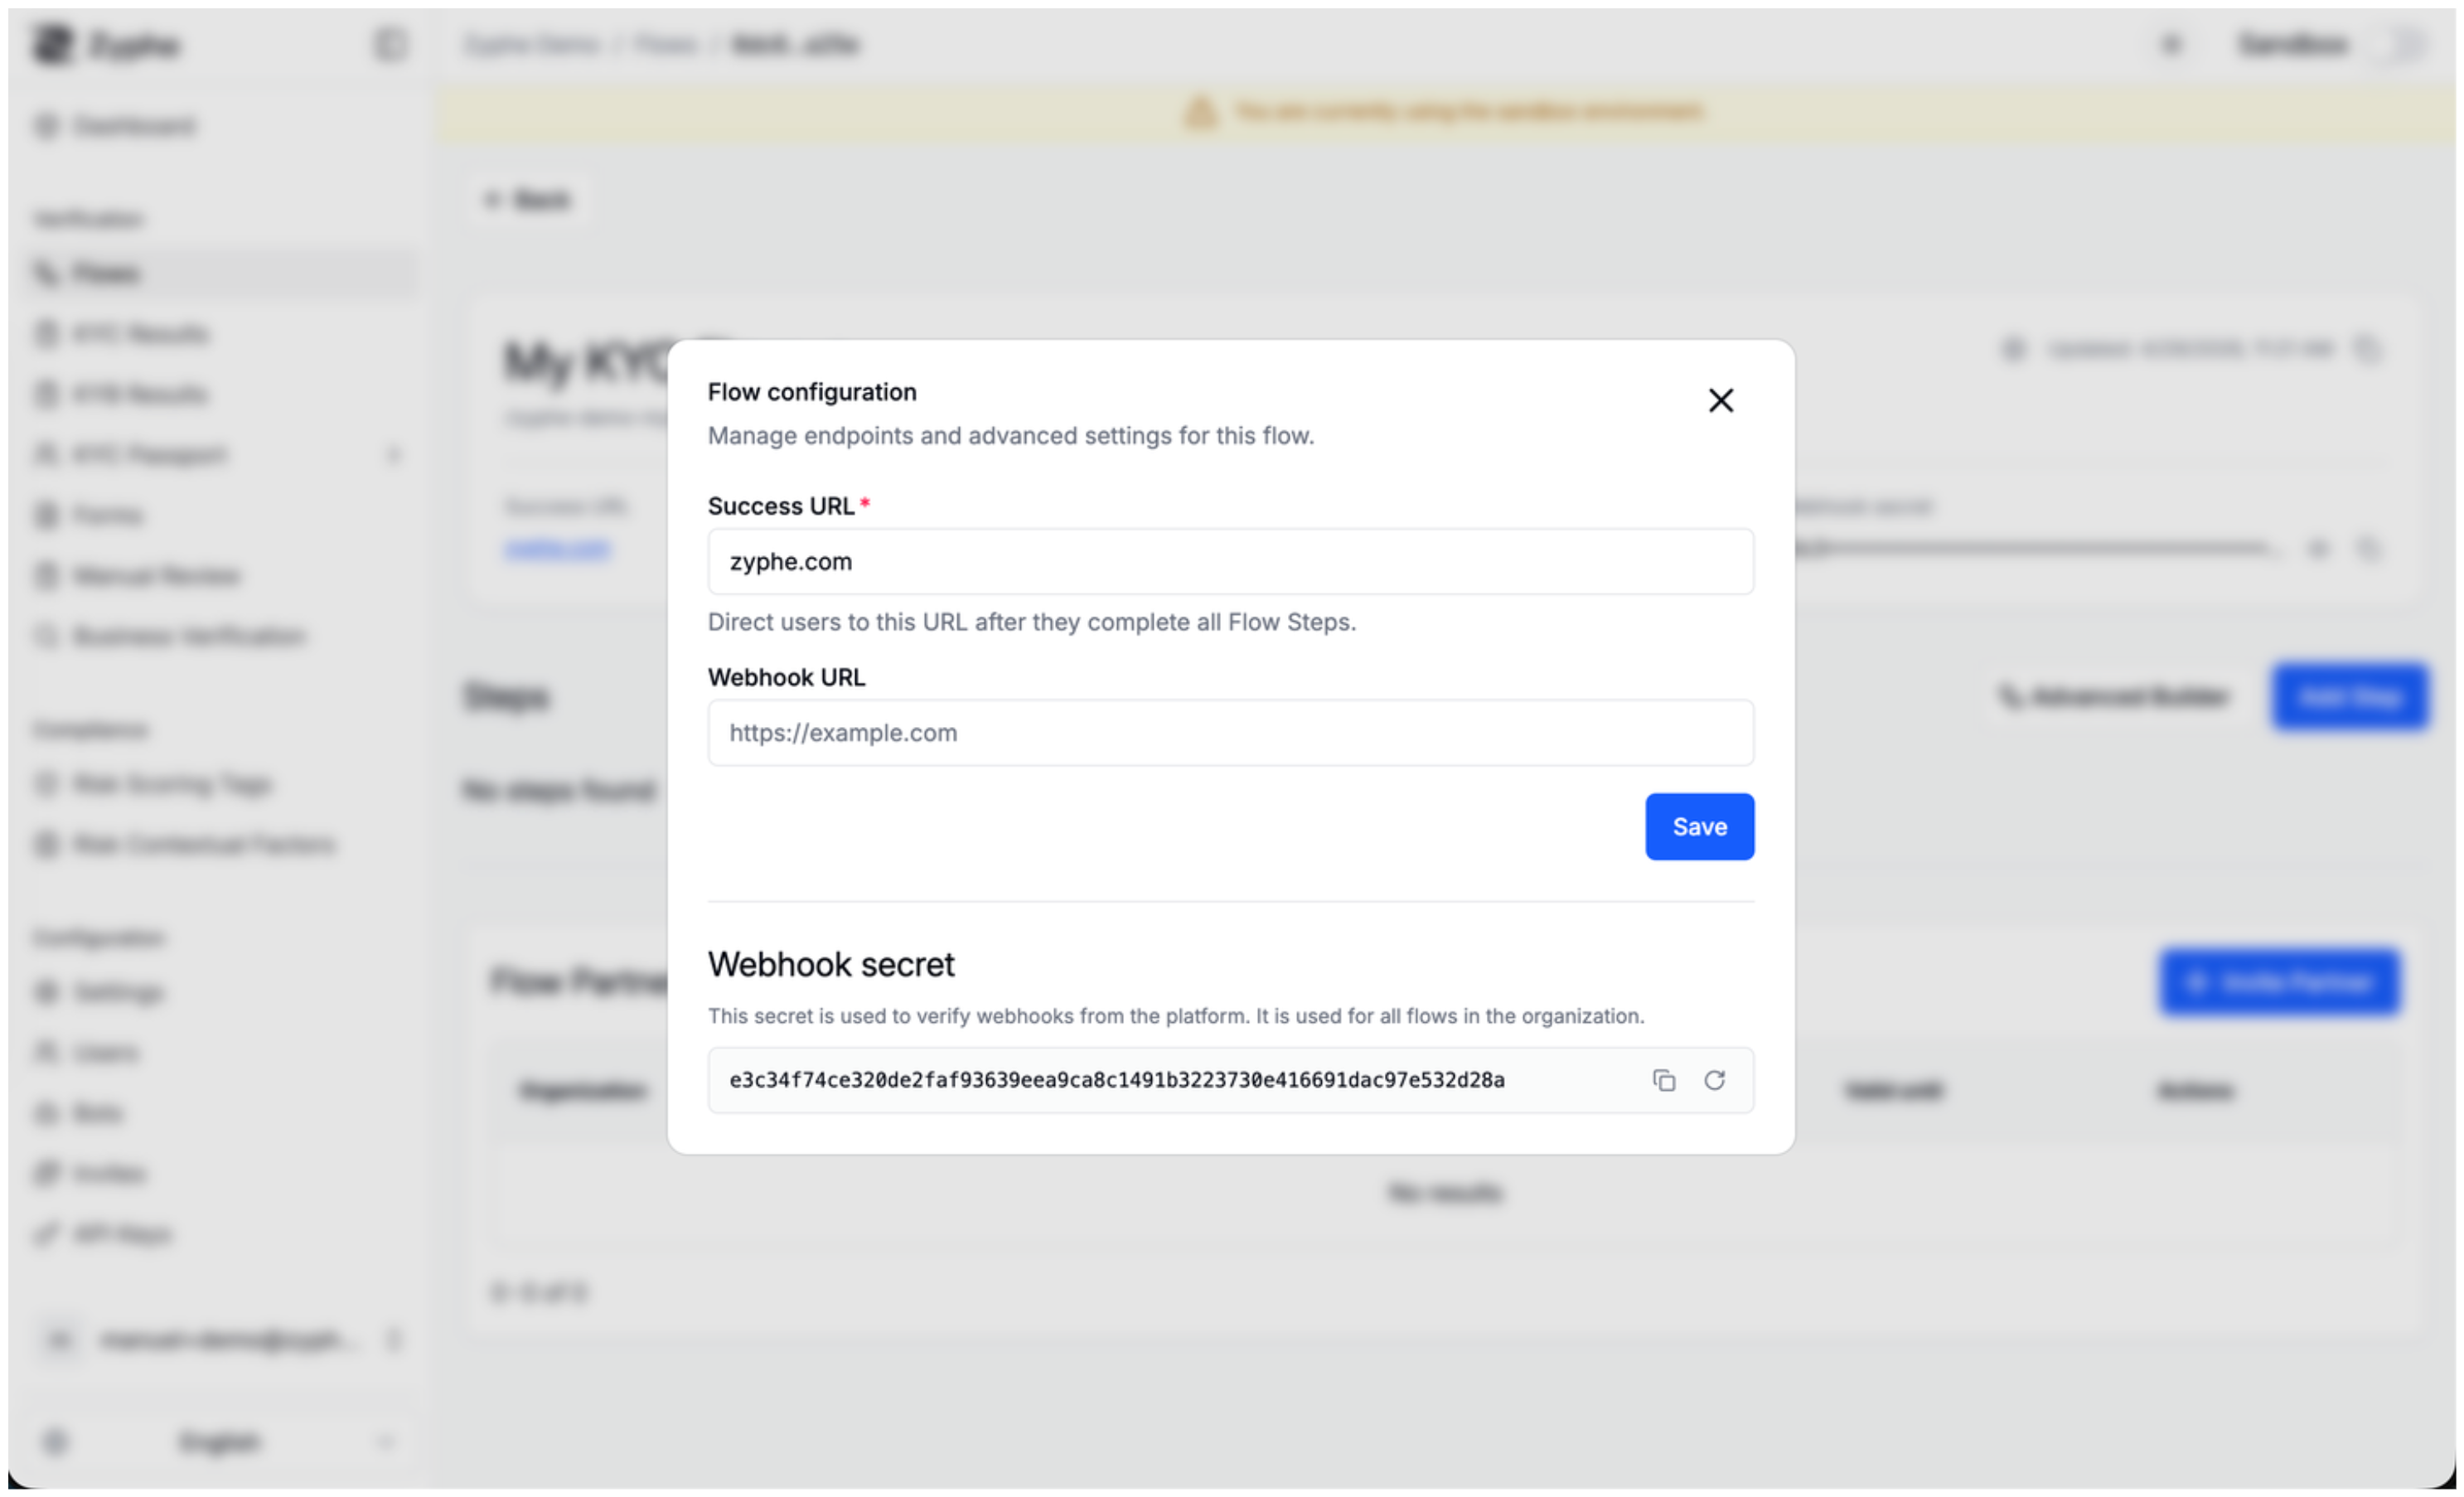
Use the flow configuration panel to update the flow endpoints and advanced settings after the flow has been created.
- Success URL: the page where users are redirected after they complete all flow steps.
- Webhook URL: the endpoint that receives webhook events for the flow.
- Webhook secret: the secret used to verify webhooks sent by the platform.
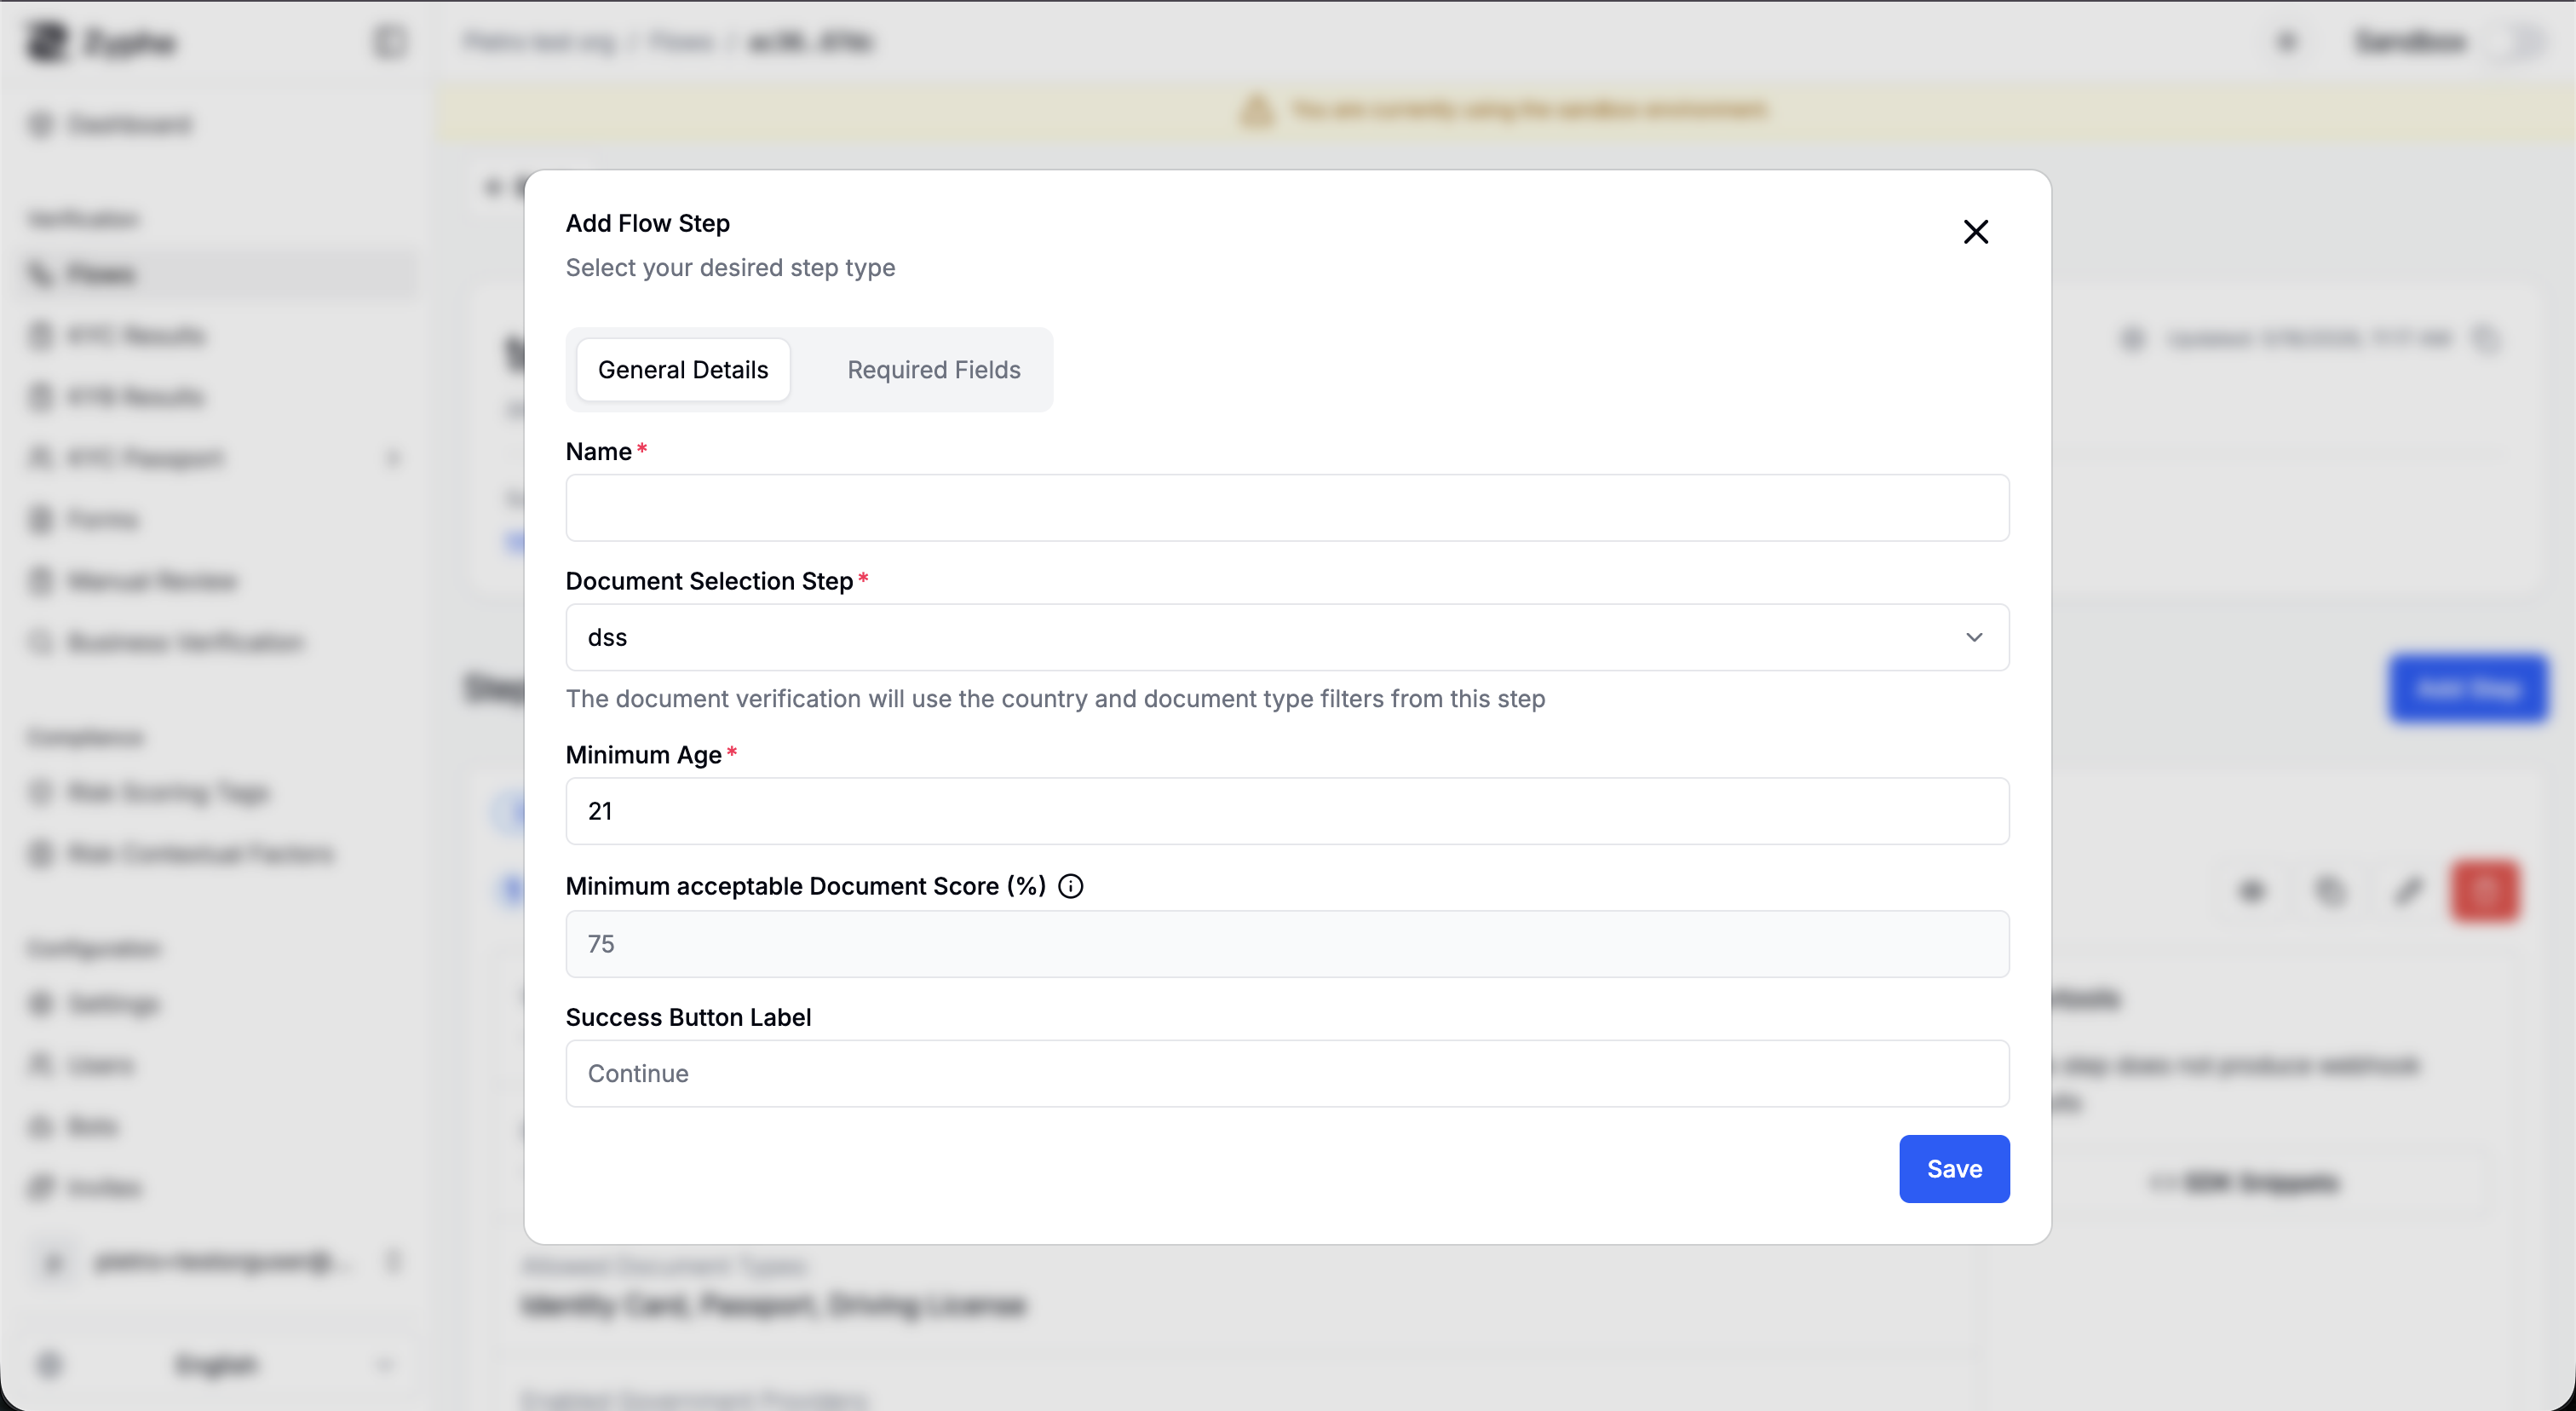
6. Create a Flow Step
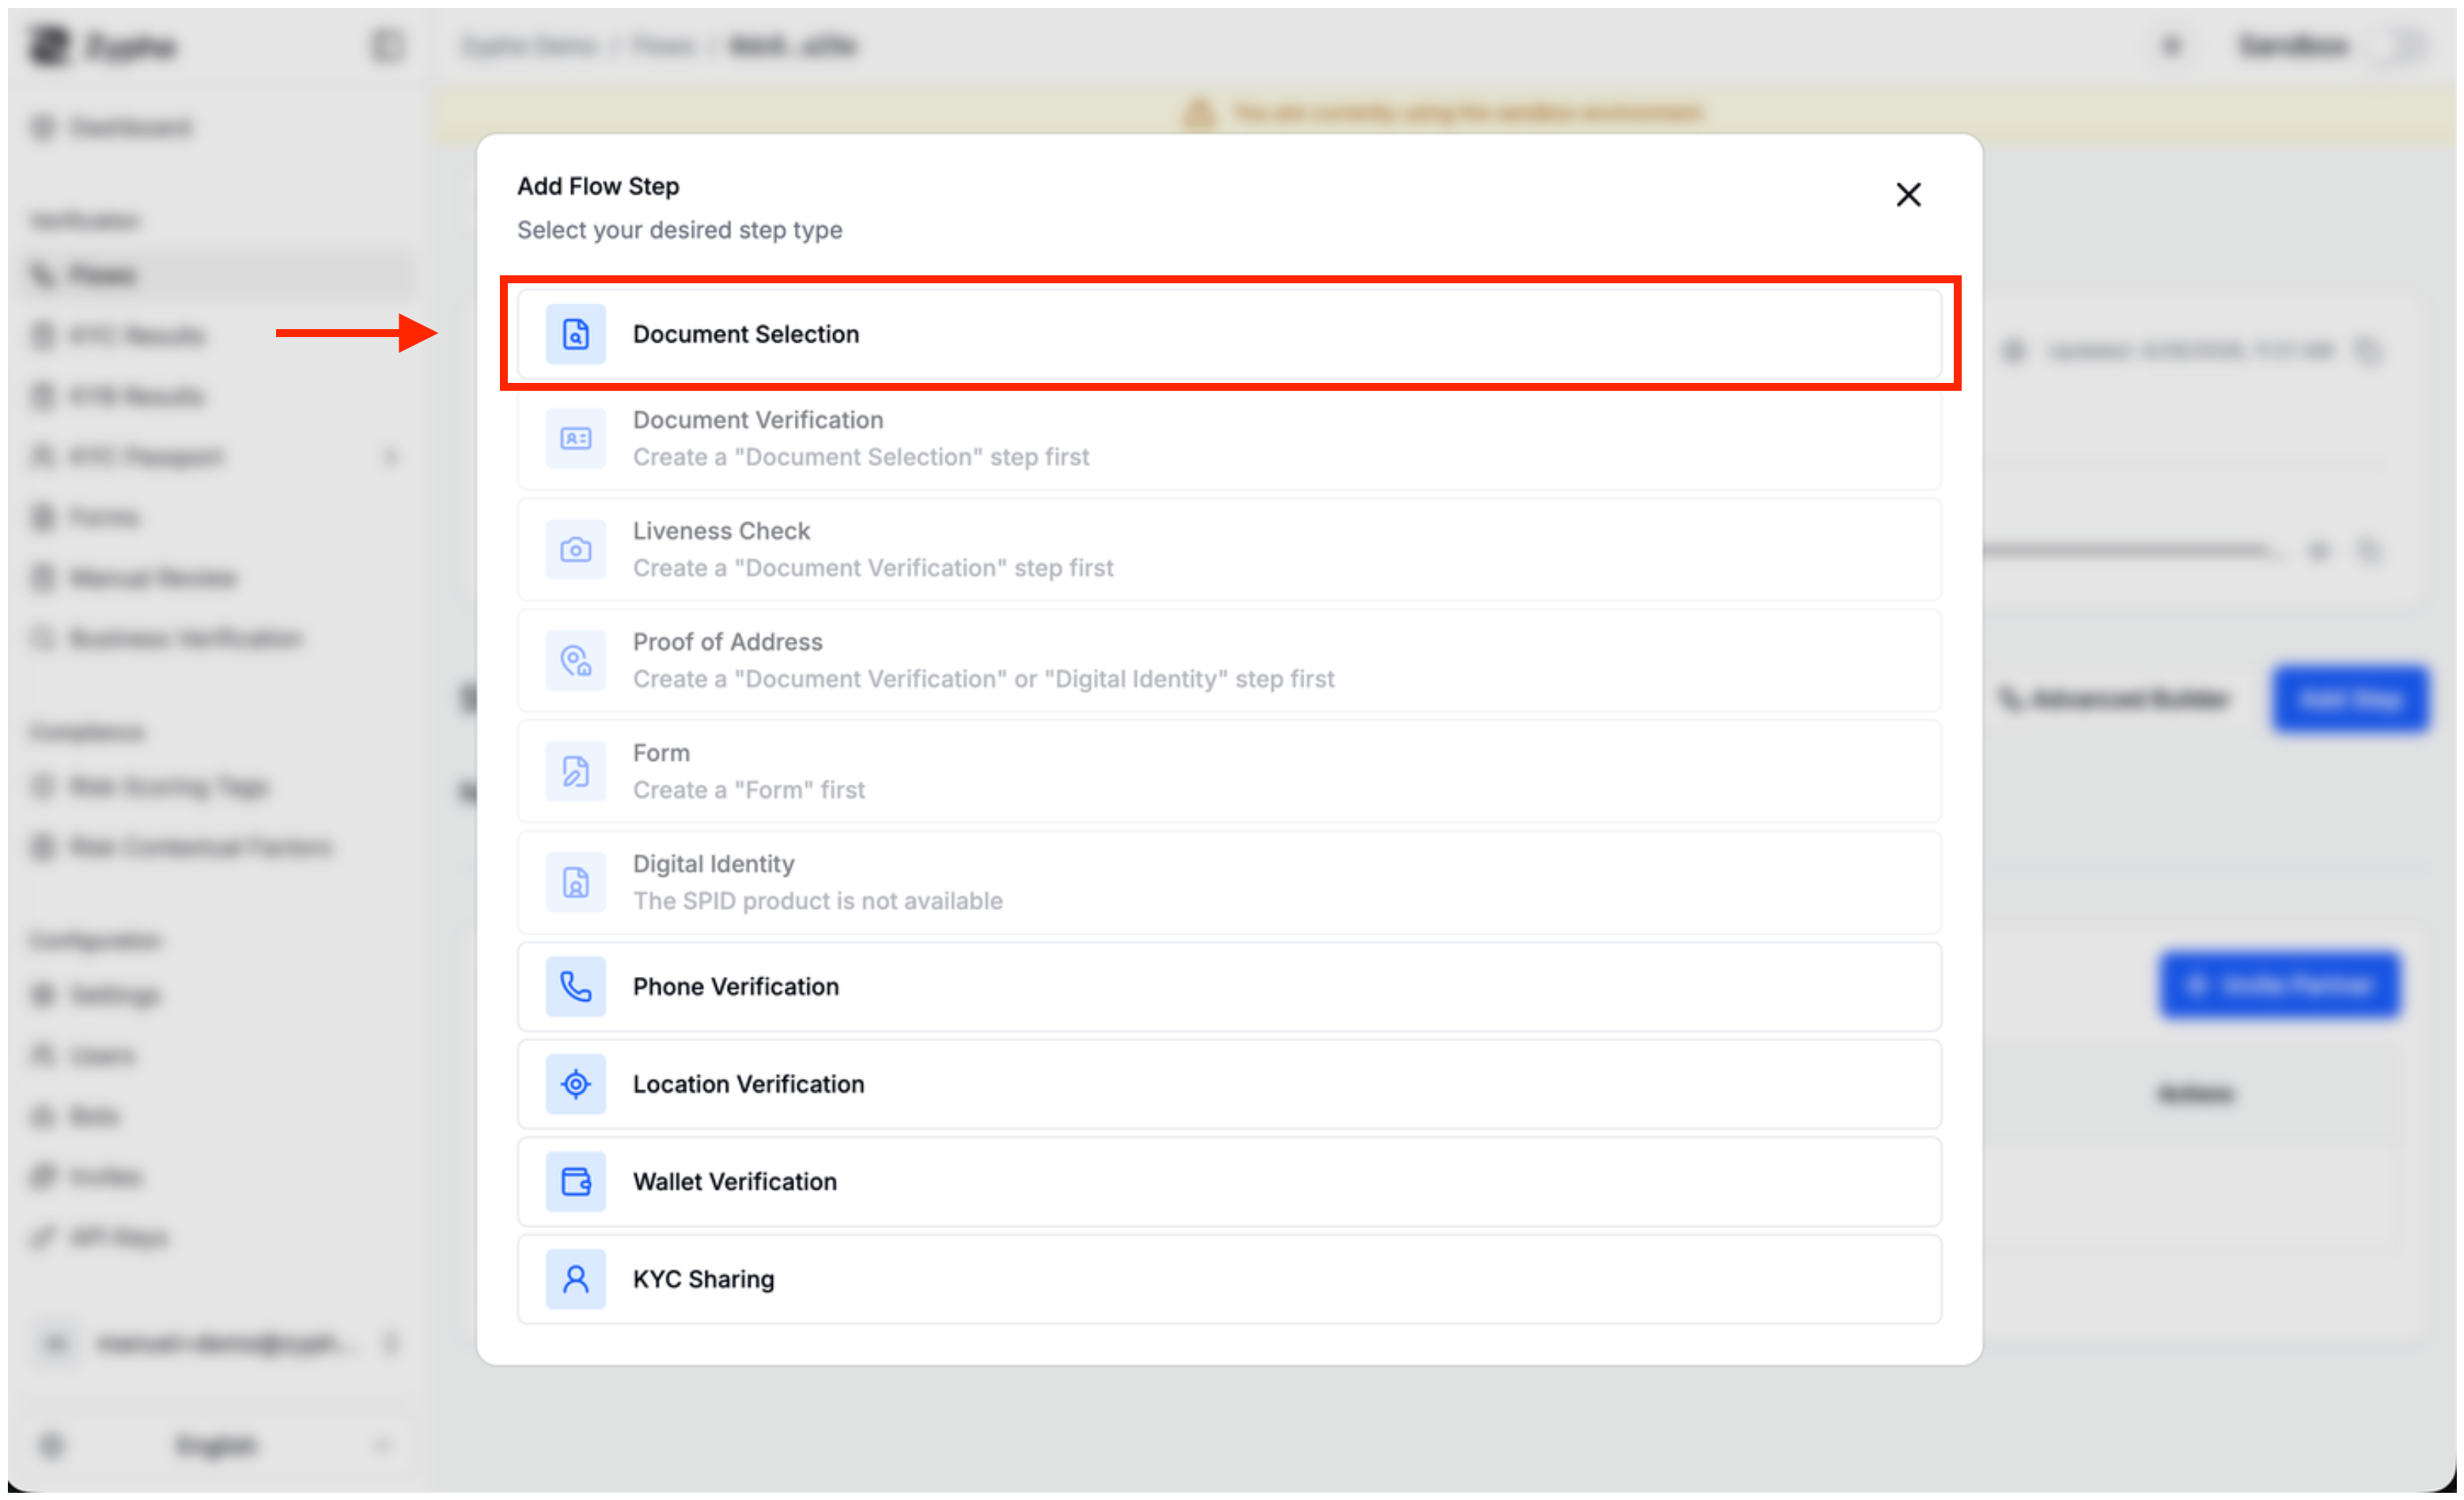
Click Add Step to start creating the verification steps for the current flow. A common KYC setup starts with Document Selection and then adds Document Verification.
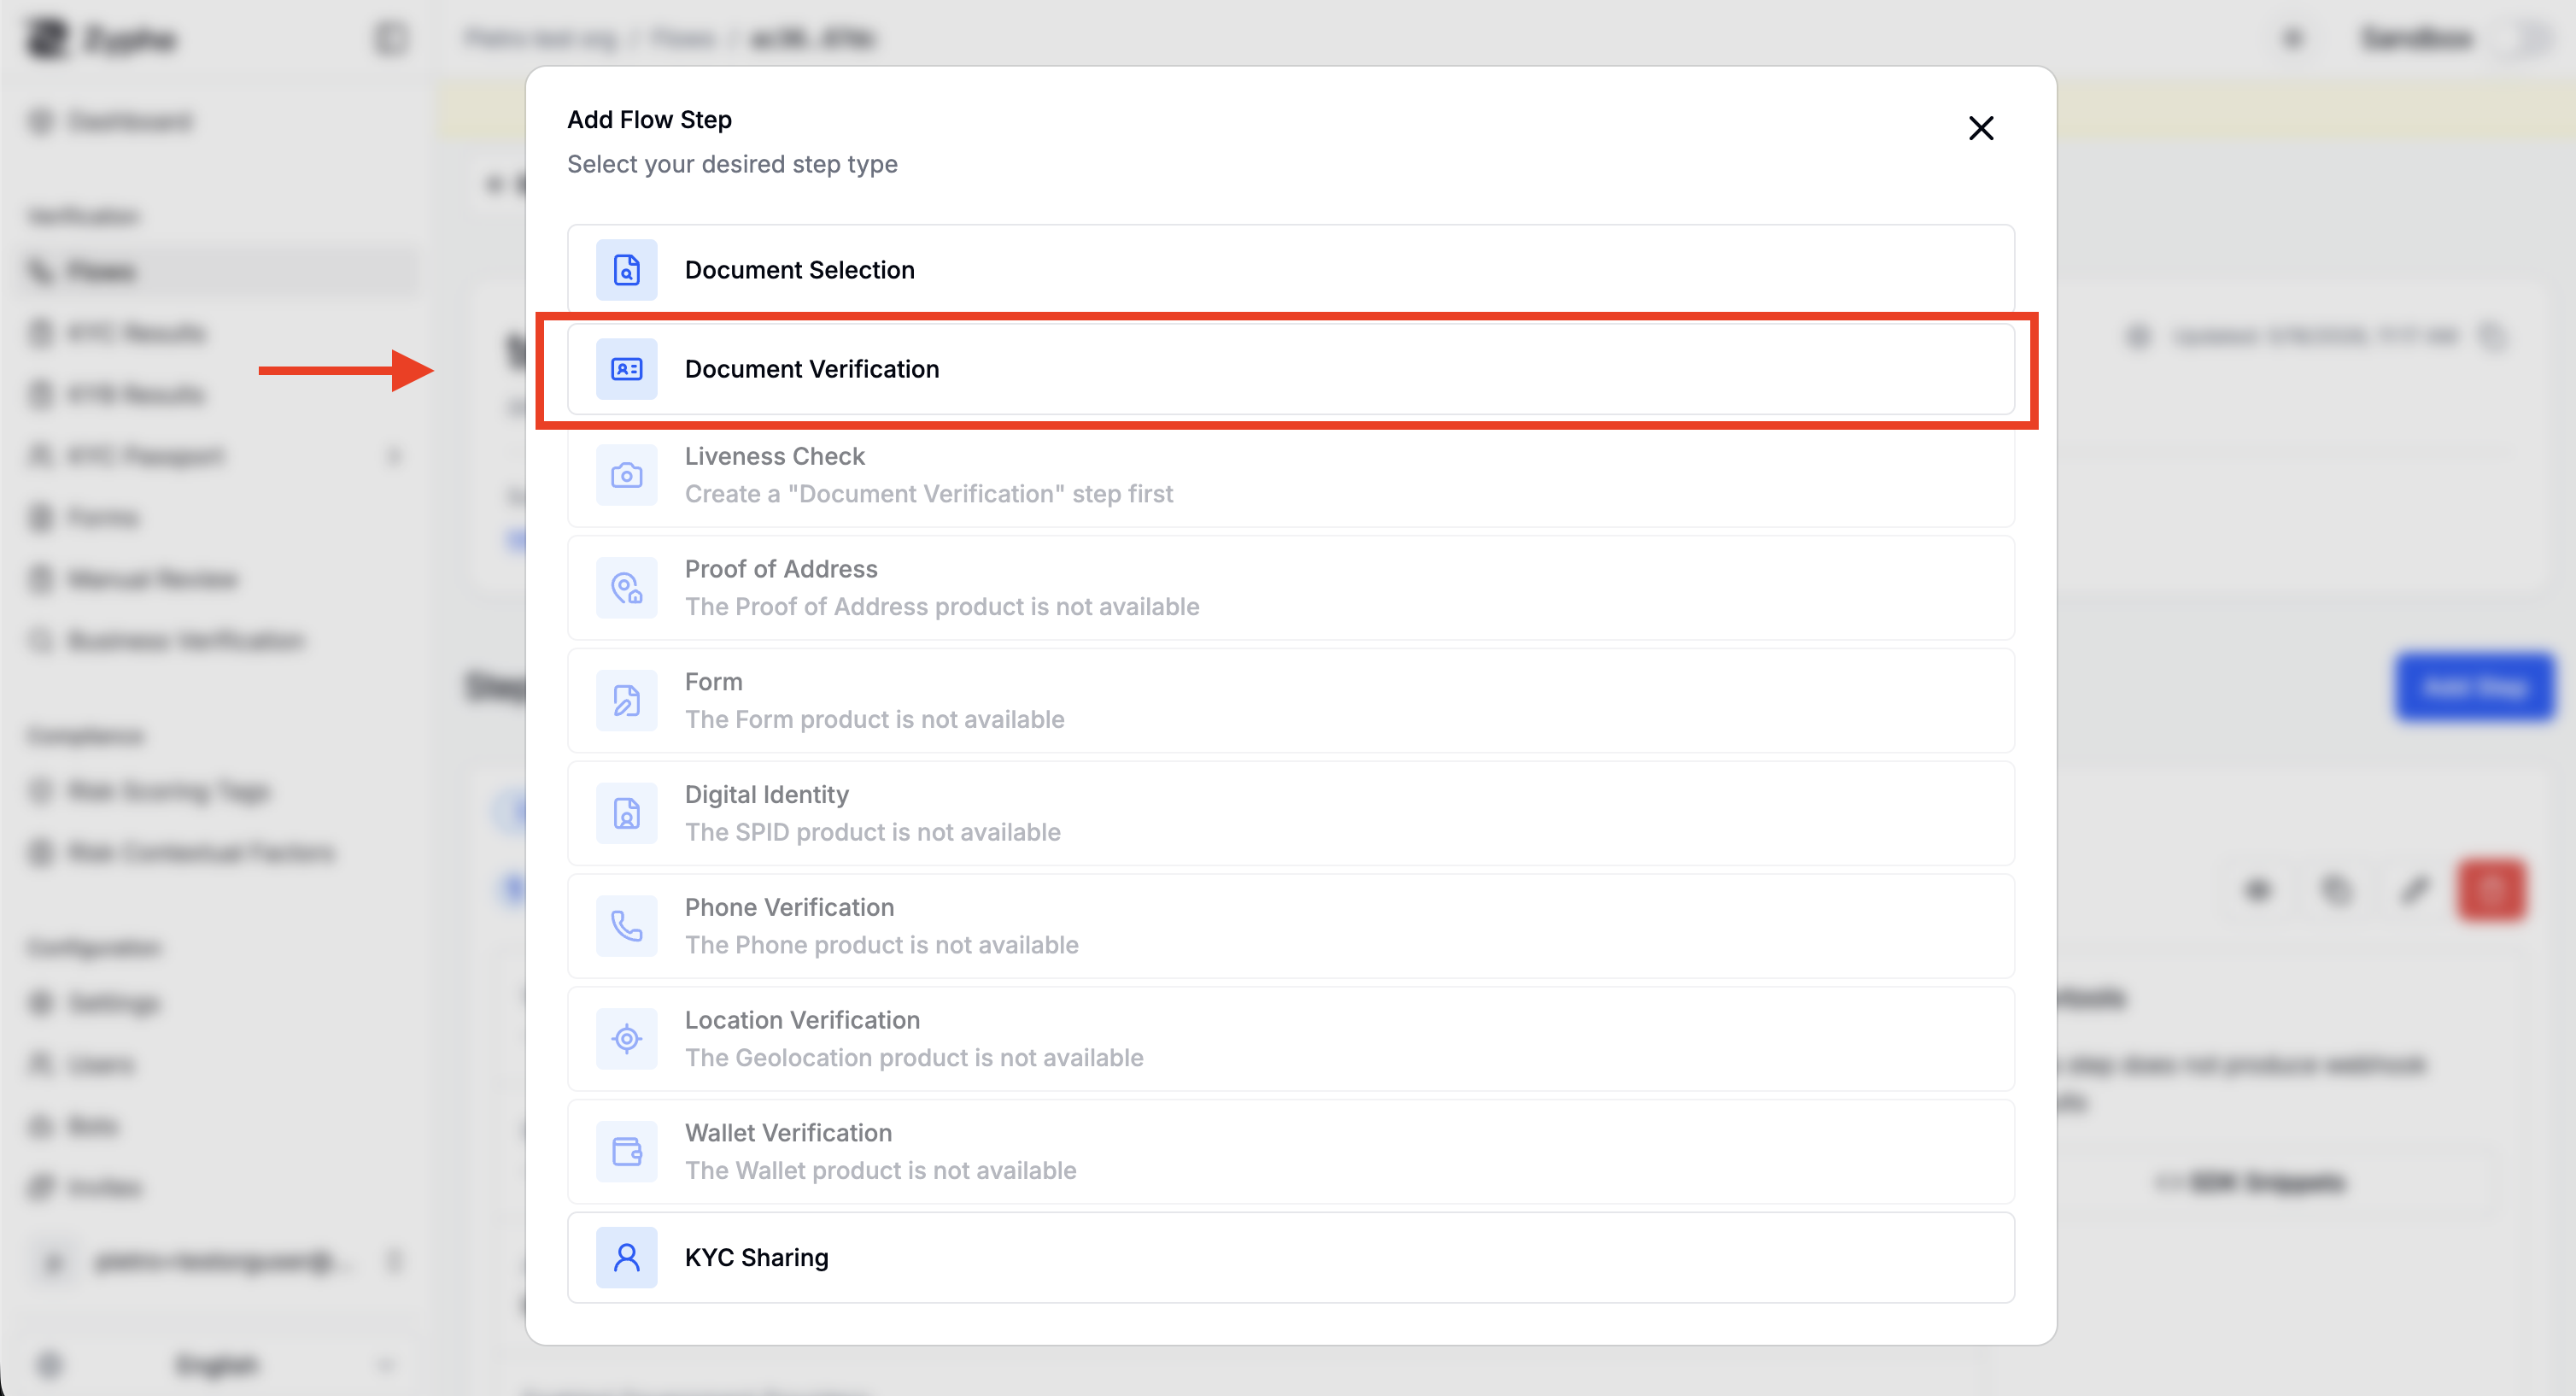
- Document Verification: Scans and validates identity documents using the phone camera. Extracts information from documents and performs authenticity checks. Supports documents from 190+ countries including ID cards, passports, and driver's licenses.
- Liveness Verification: Performs active liveness detection to ensure the person is real and matches the portrait in their identity document. Must be linked to a Document Verification step.
- In order to add a Liveness Verification step, you need to first add a Document Verification step.
- Proof of Address: Allows the users to submit documents that attest their residency such as utility bills, pay slip, financial documents and others.
- In order to add a Proof of Address step, you need to first add a Document Verification step or a SPID step.
- Phone Verification: Allows users to verify their phone number through an SMS-based OTP (One-Time Password) authentication flow.
- Please contact support to enable this step type.
- Form: Allows to collect additional information. The form step allows to embed any form that has been created with the Form builder.
- In order to add a form step, you first need to create a Form with the Form builder.
- Wallet Verification: Allows users to prove ownership of their cryptocurrency wallet by connecting their wallet and signing a cryptographic message. Supports Ethereum and Solana networks.
- SPID: Allows the users to submit their SPID (Italian digital identity card) to verify their identity.
- Please contact support to enable this step type.
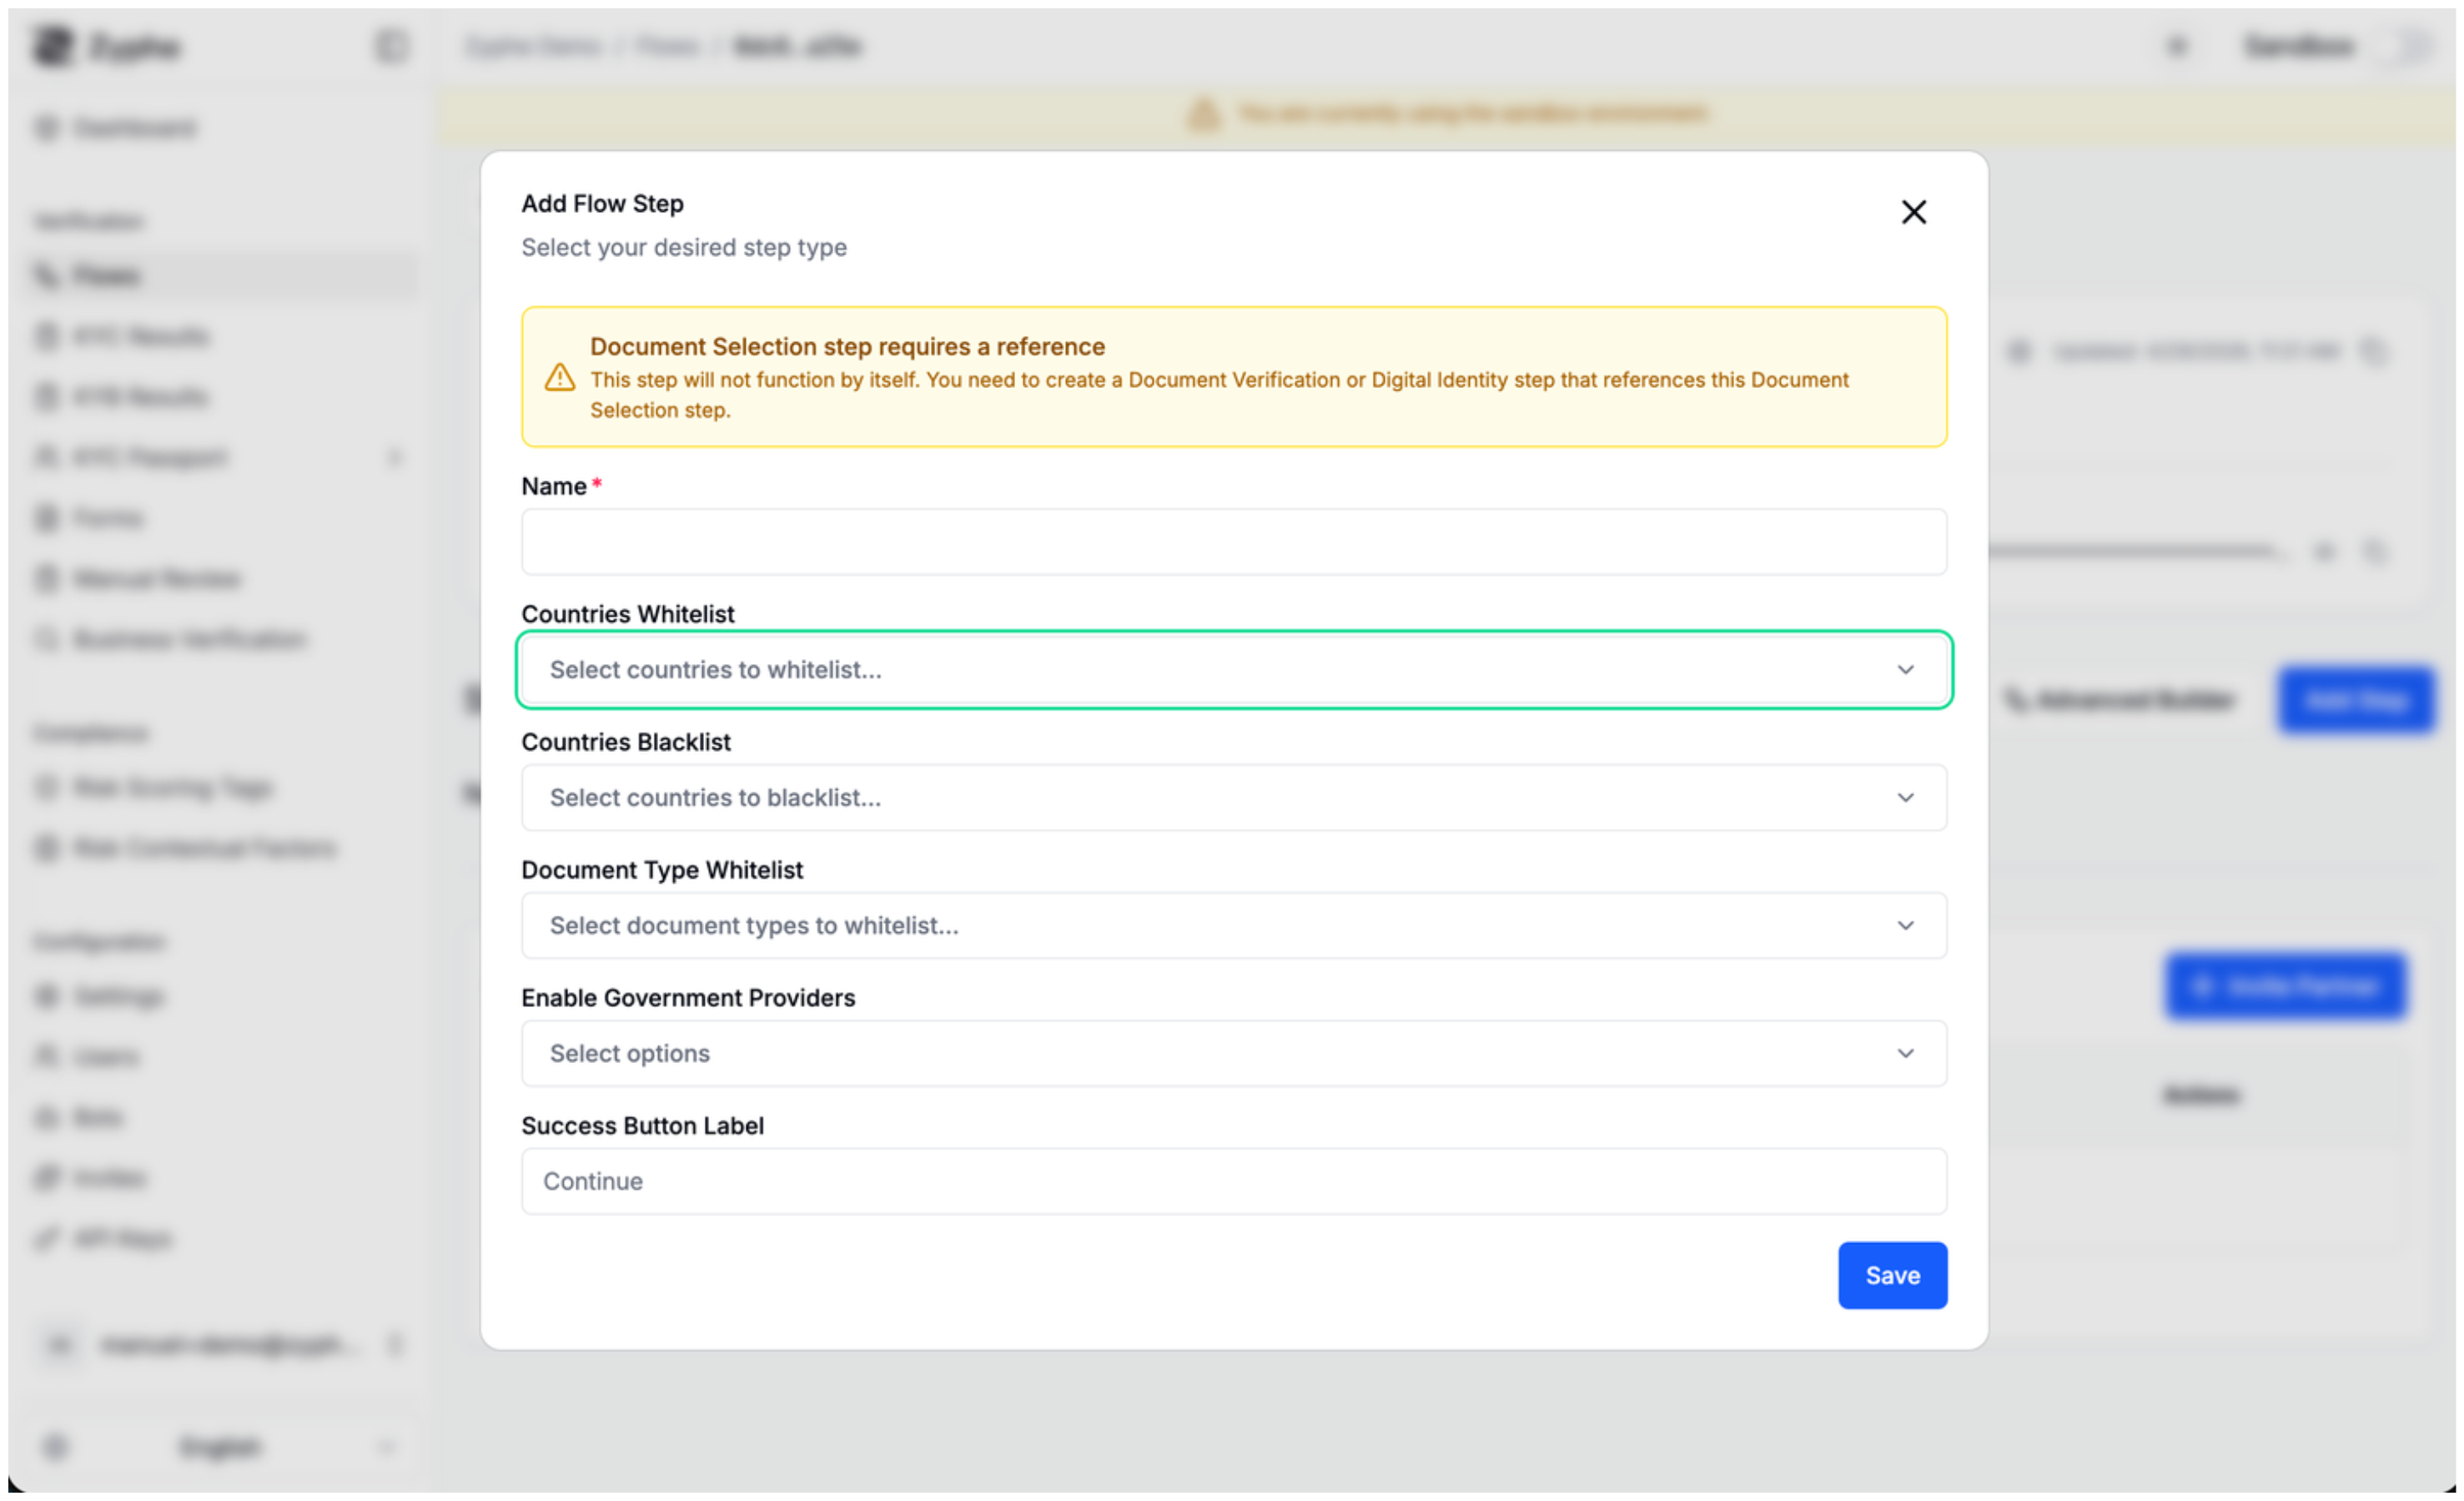
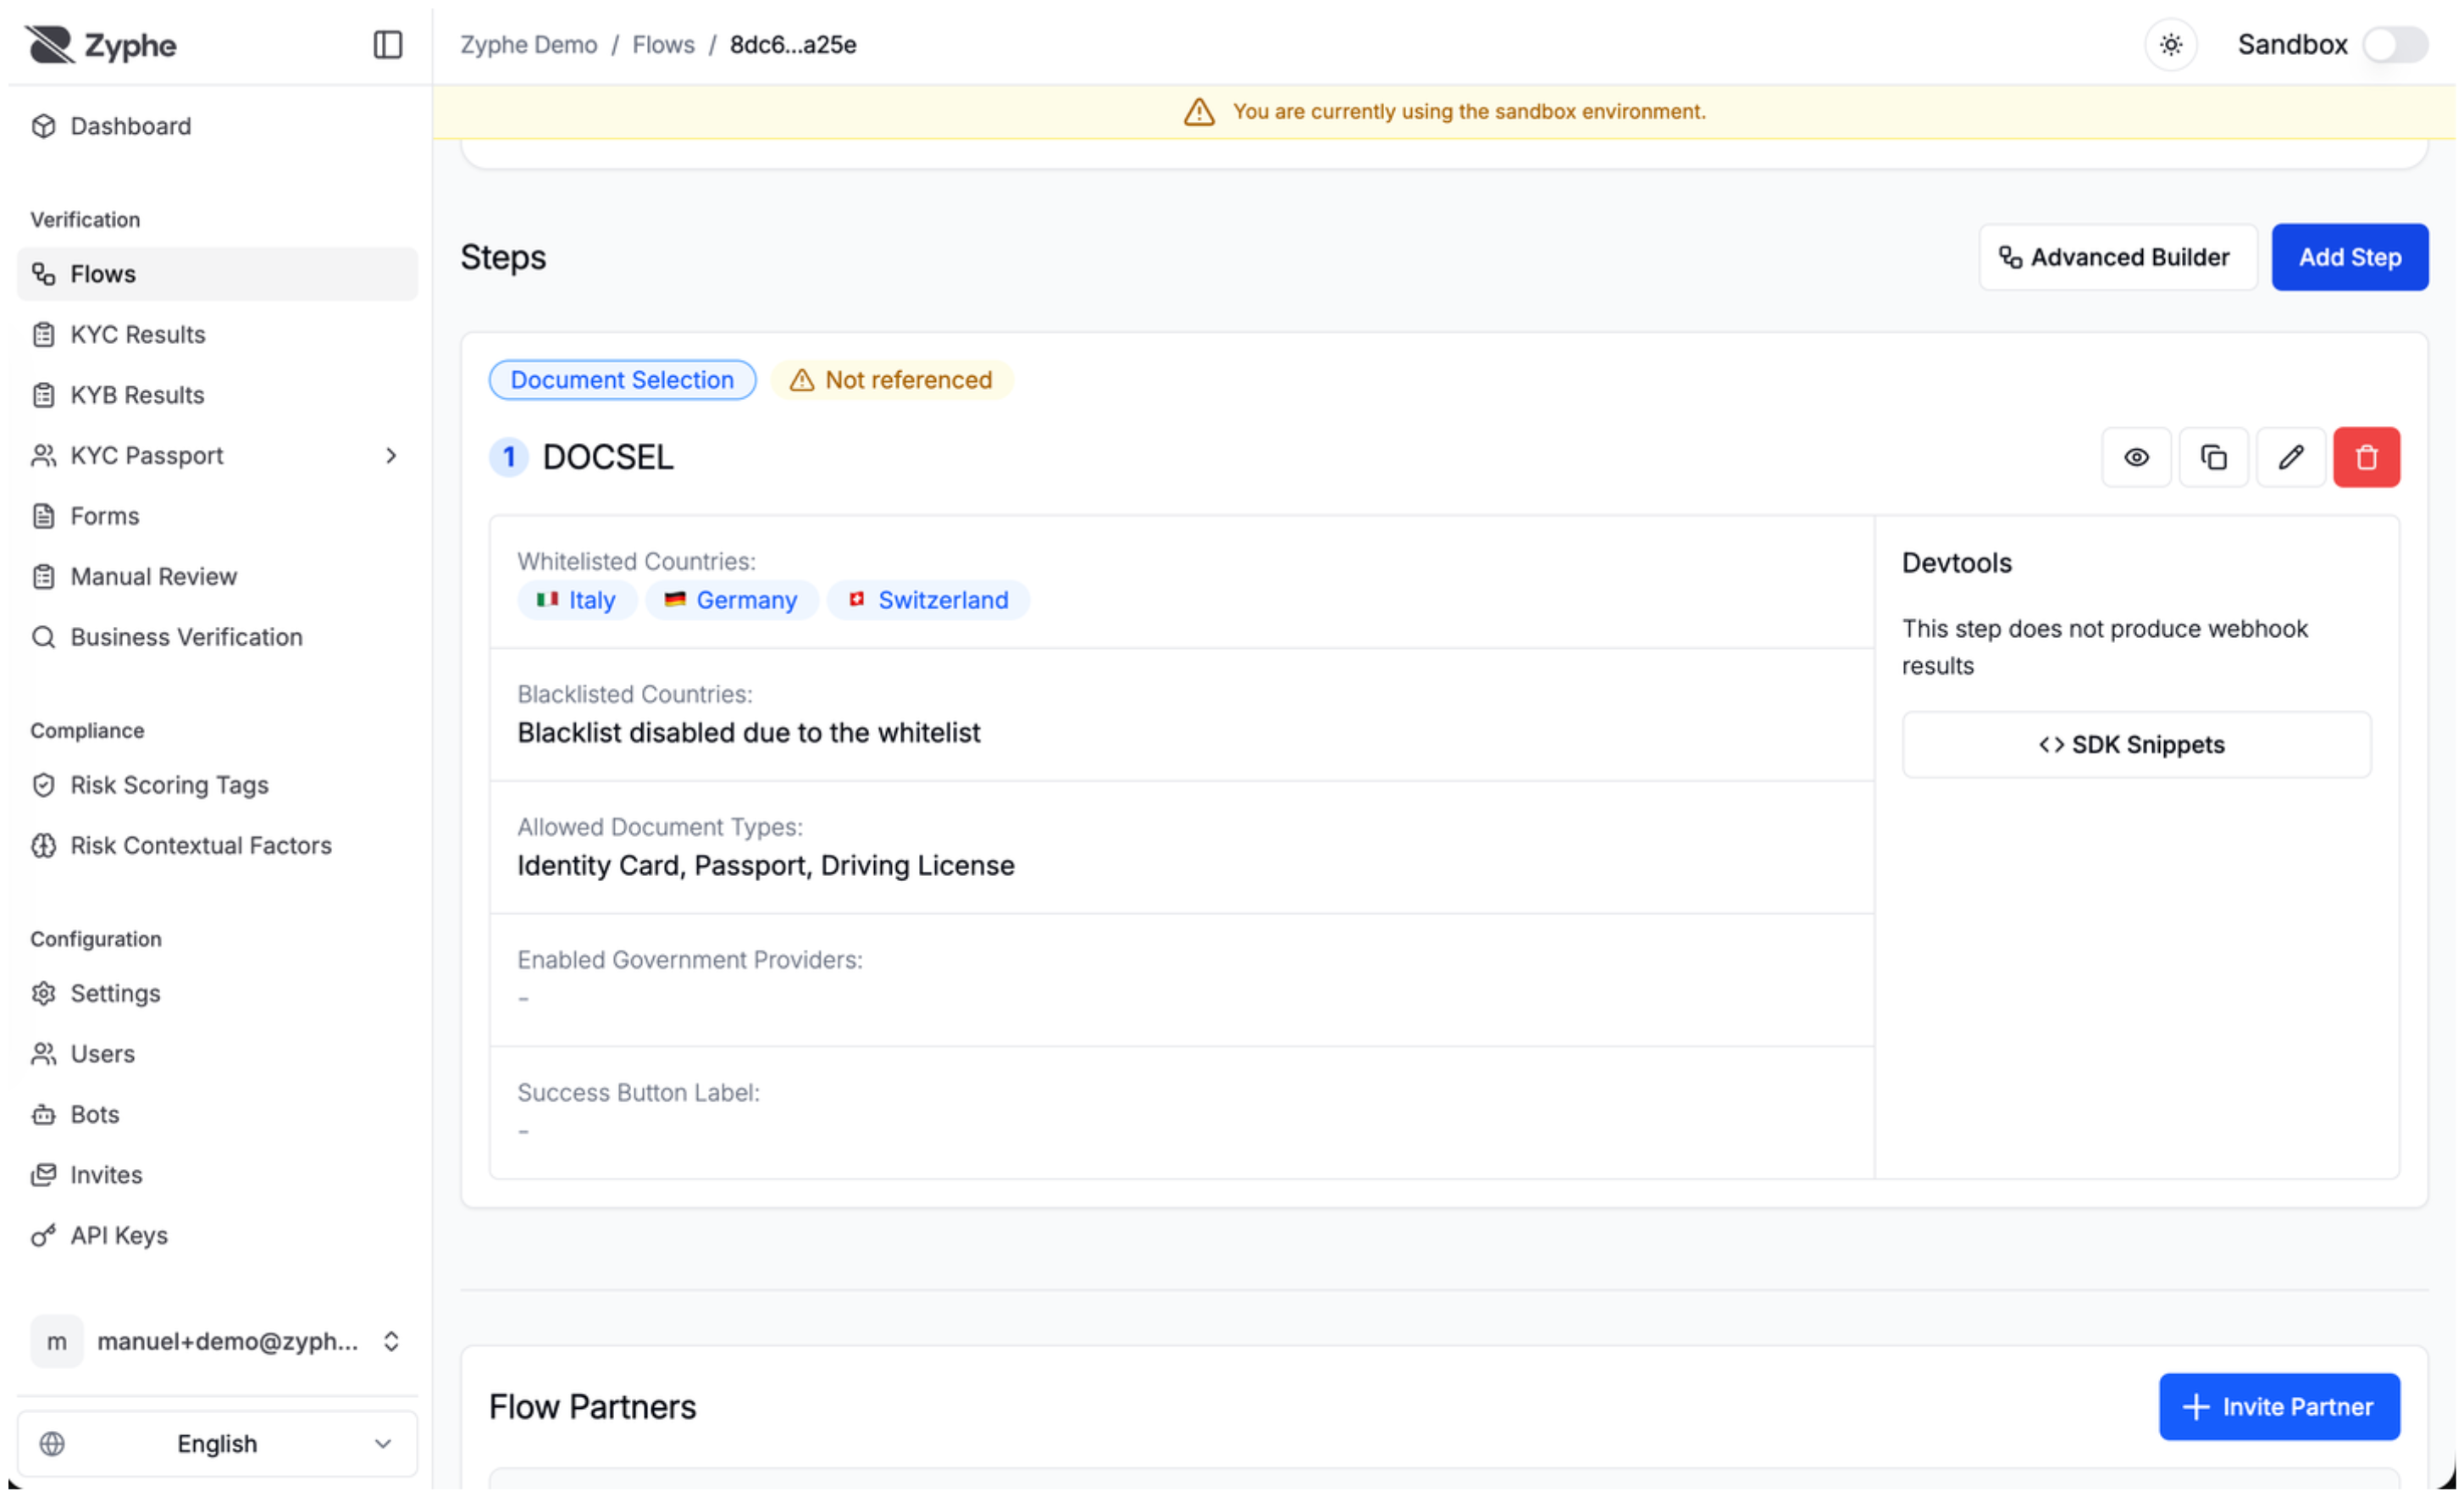
- Document Selection: Allows users to choose which type of identity document they want to use for verification. Acts as a routing step before Document Verification, SPID, or Proof of Address steps.
- Geolocation Verification: Verifies the physical location of a user by cross-referencing device GPS coordinates with network-level IP data.
- Sharing: Enables the secure transfer of previously verified identity data to partner organizations, supporting reusable credentials and one-click KYC flows.
Let's start by creating a new Document Verification step

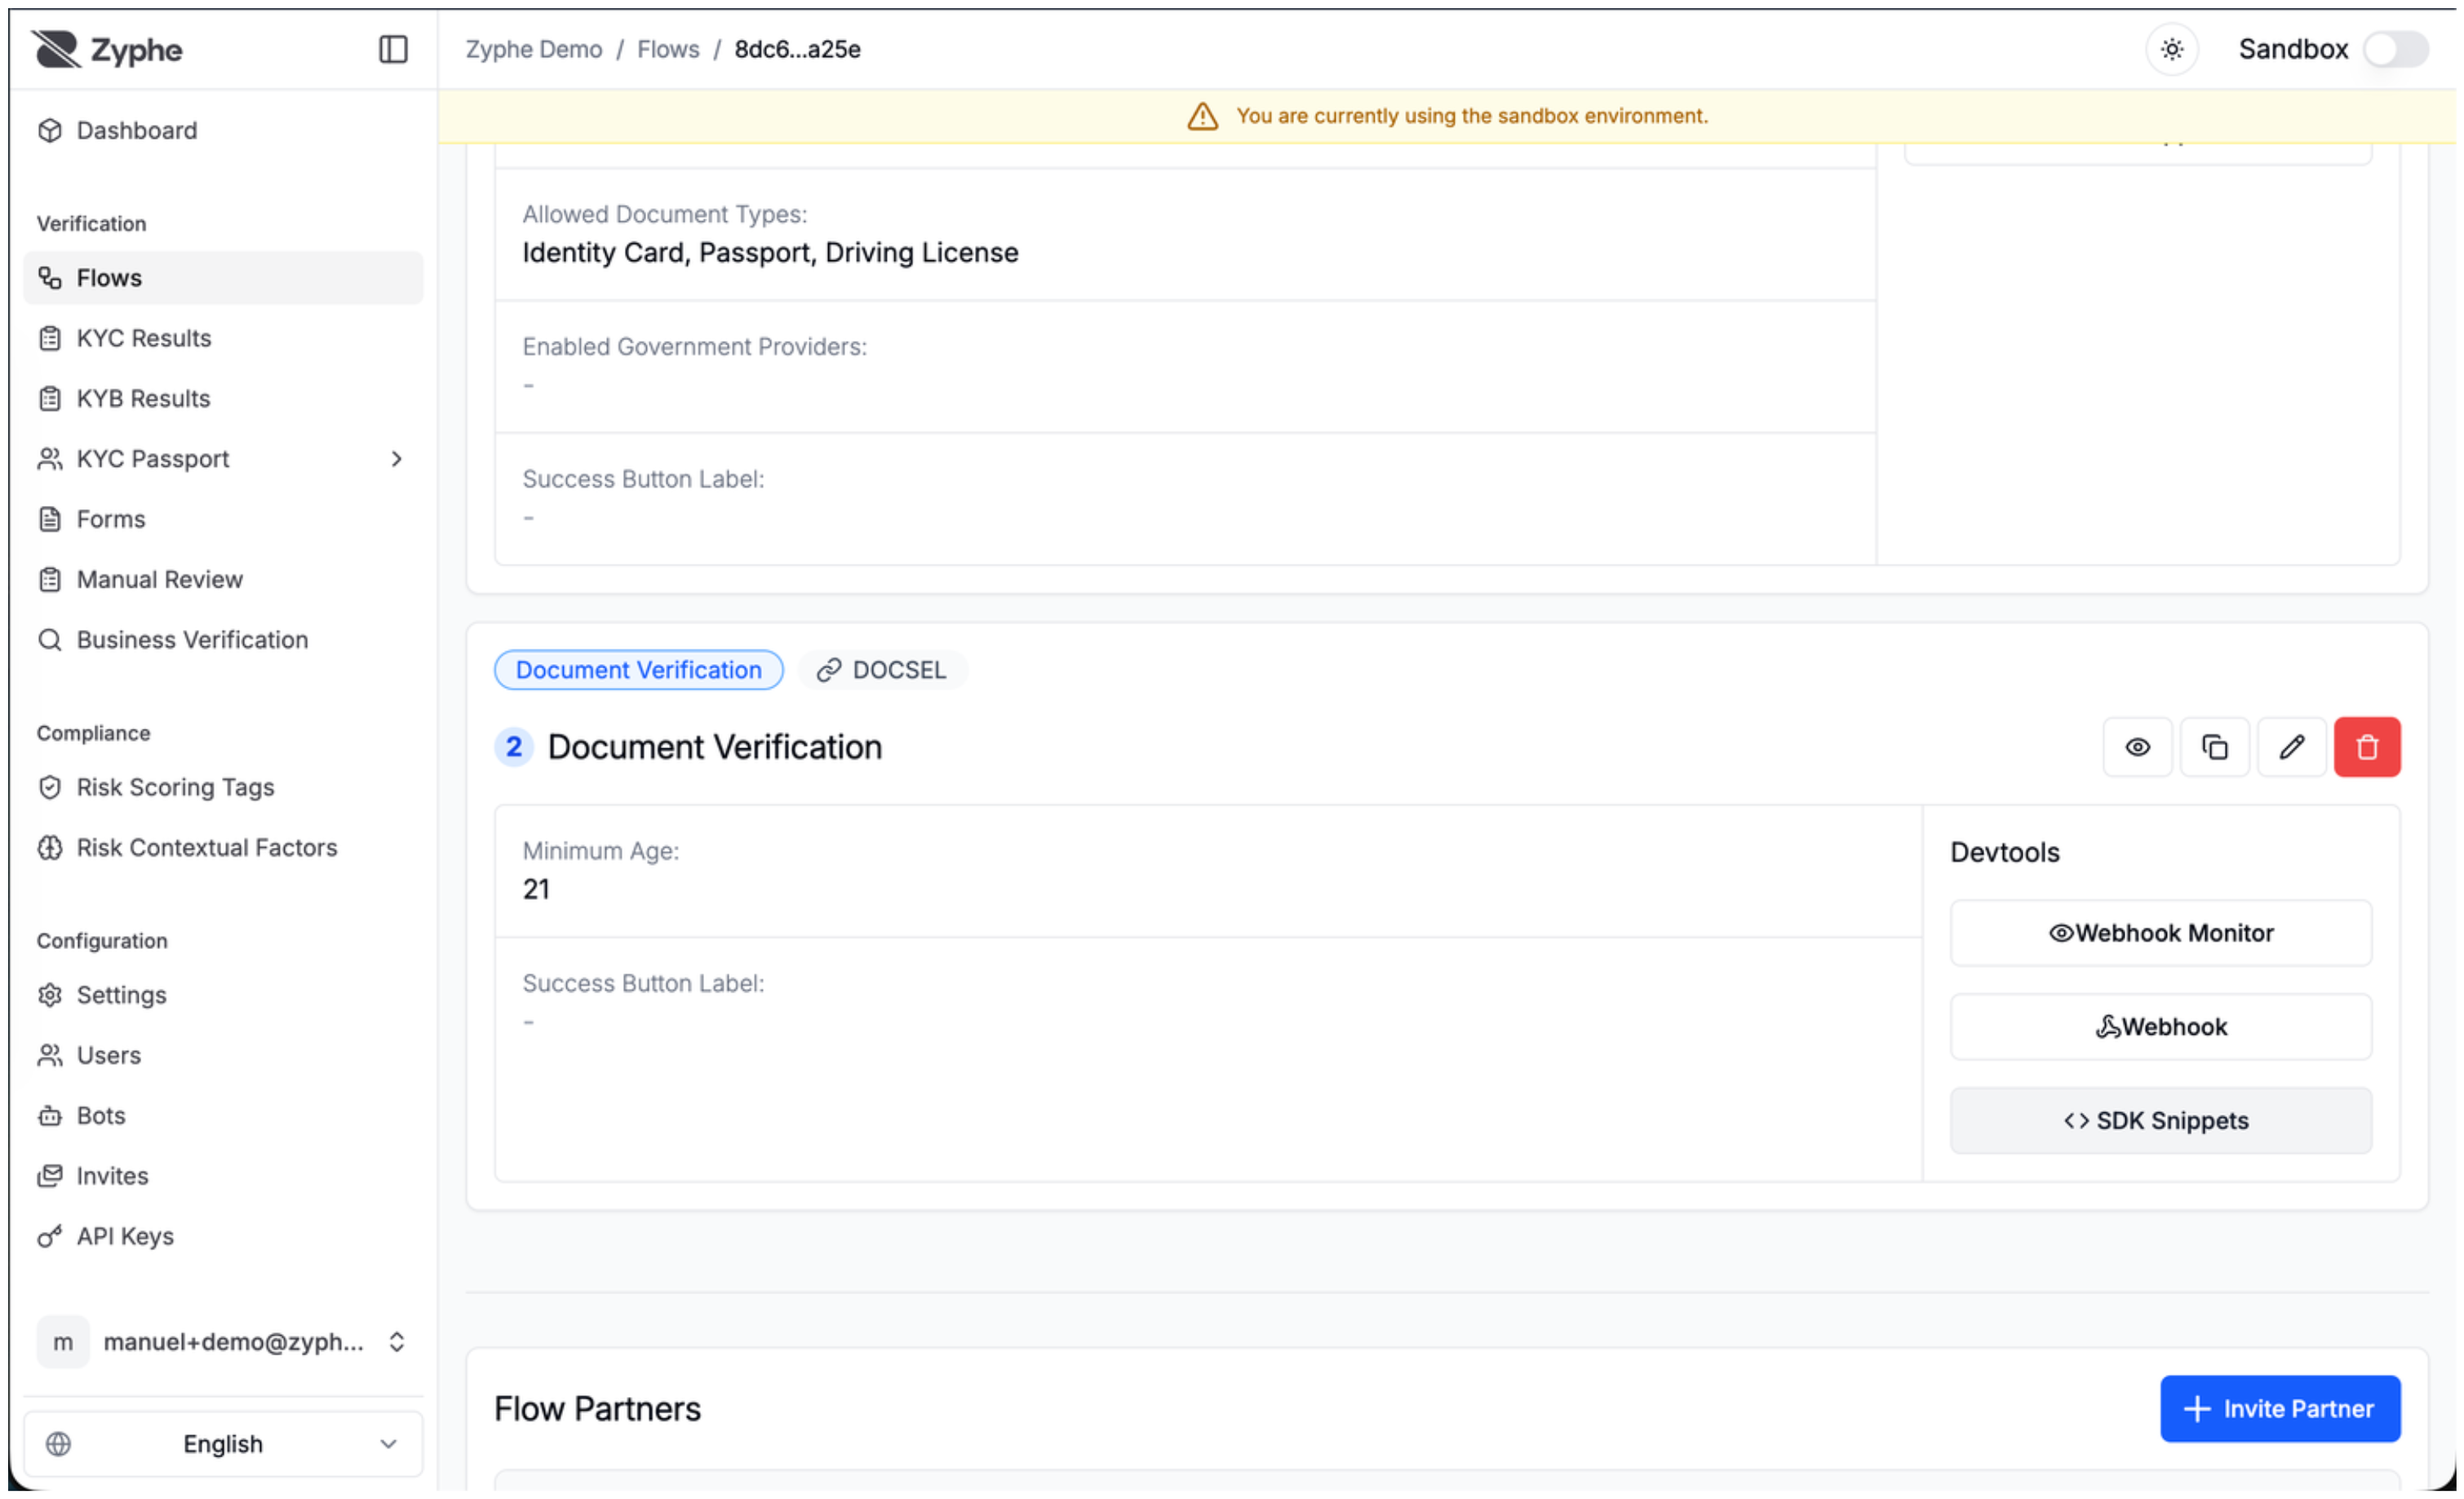
After that we can proceed with adding the Document Verification step
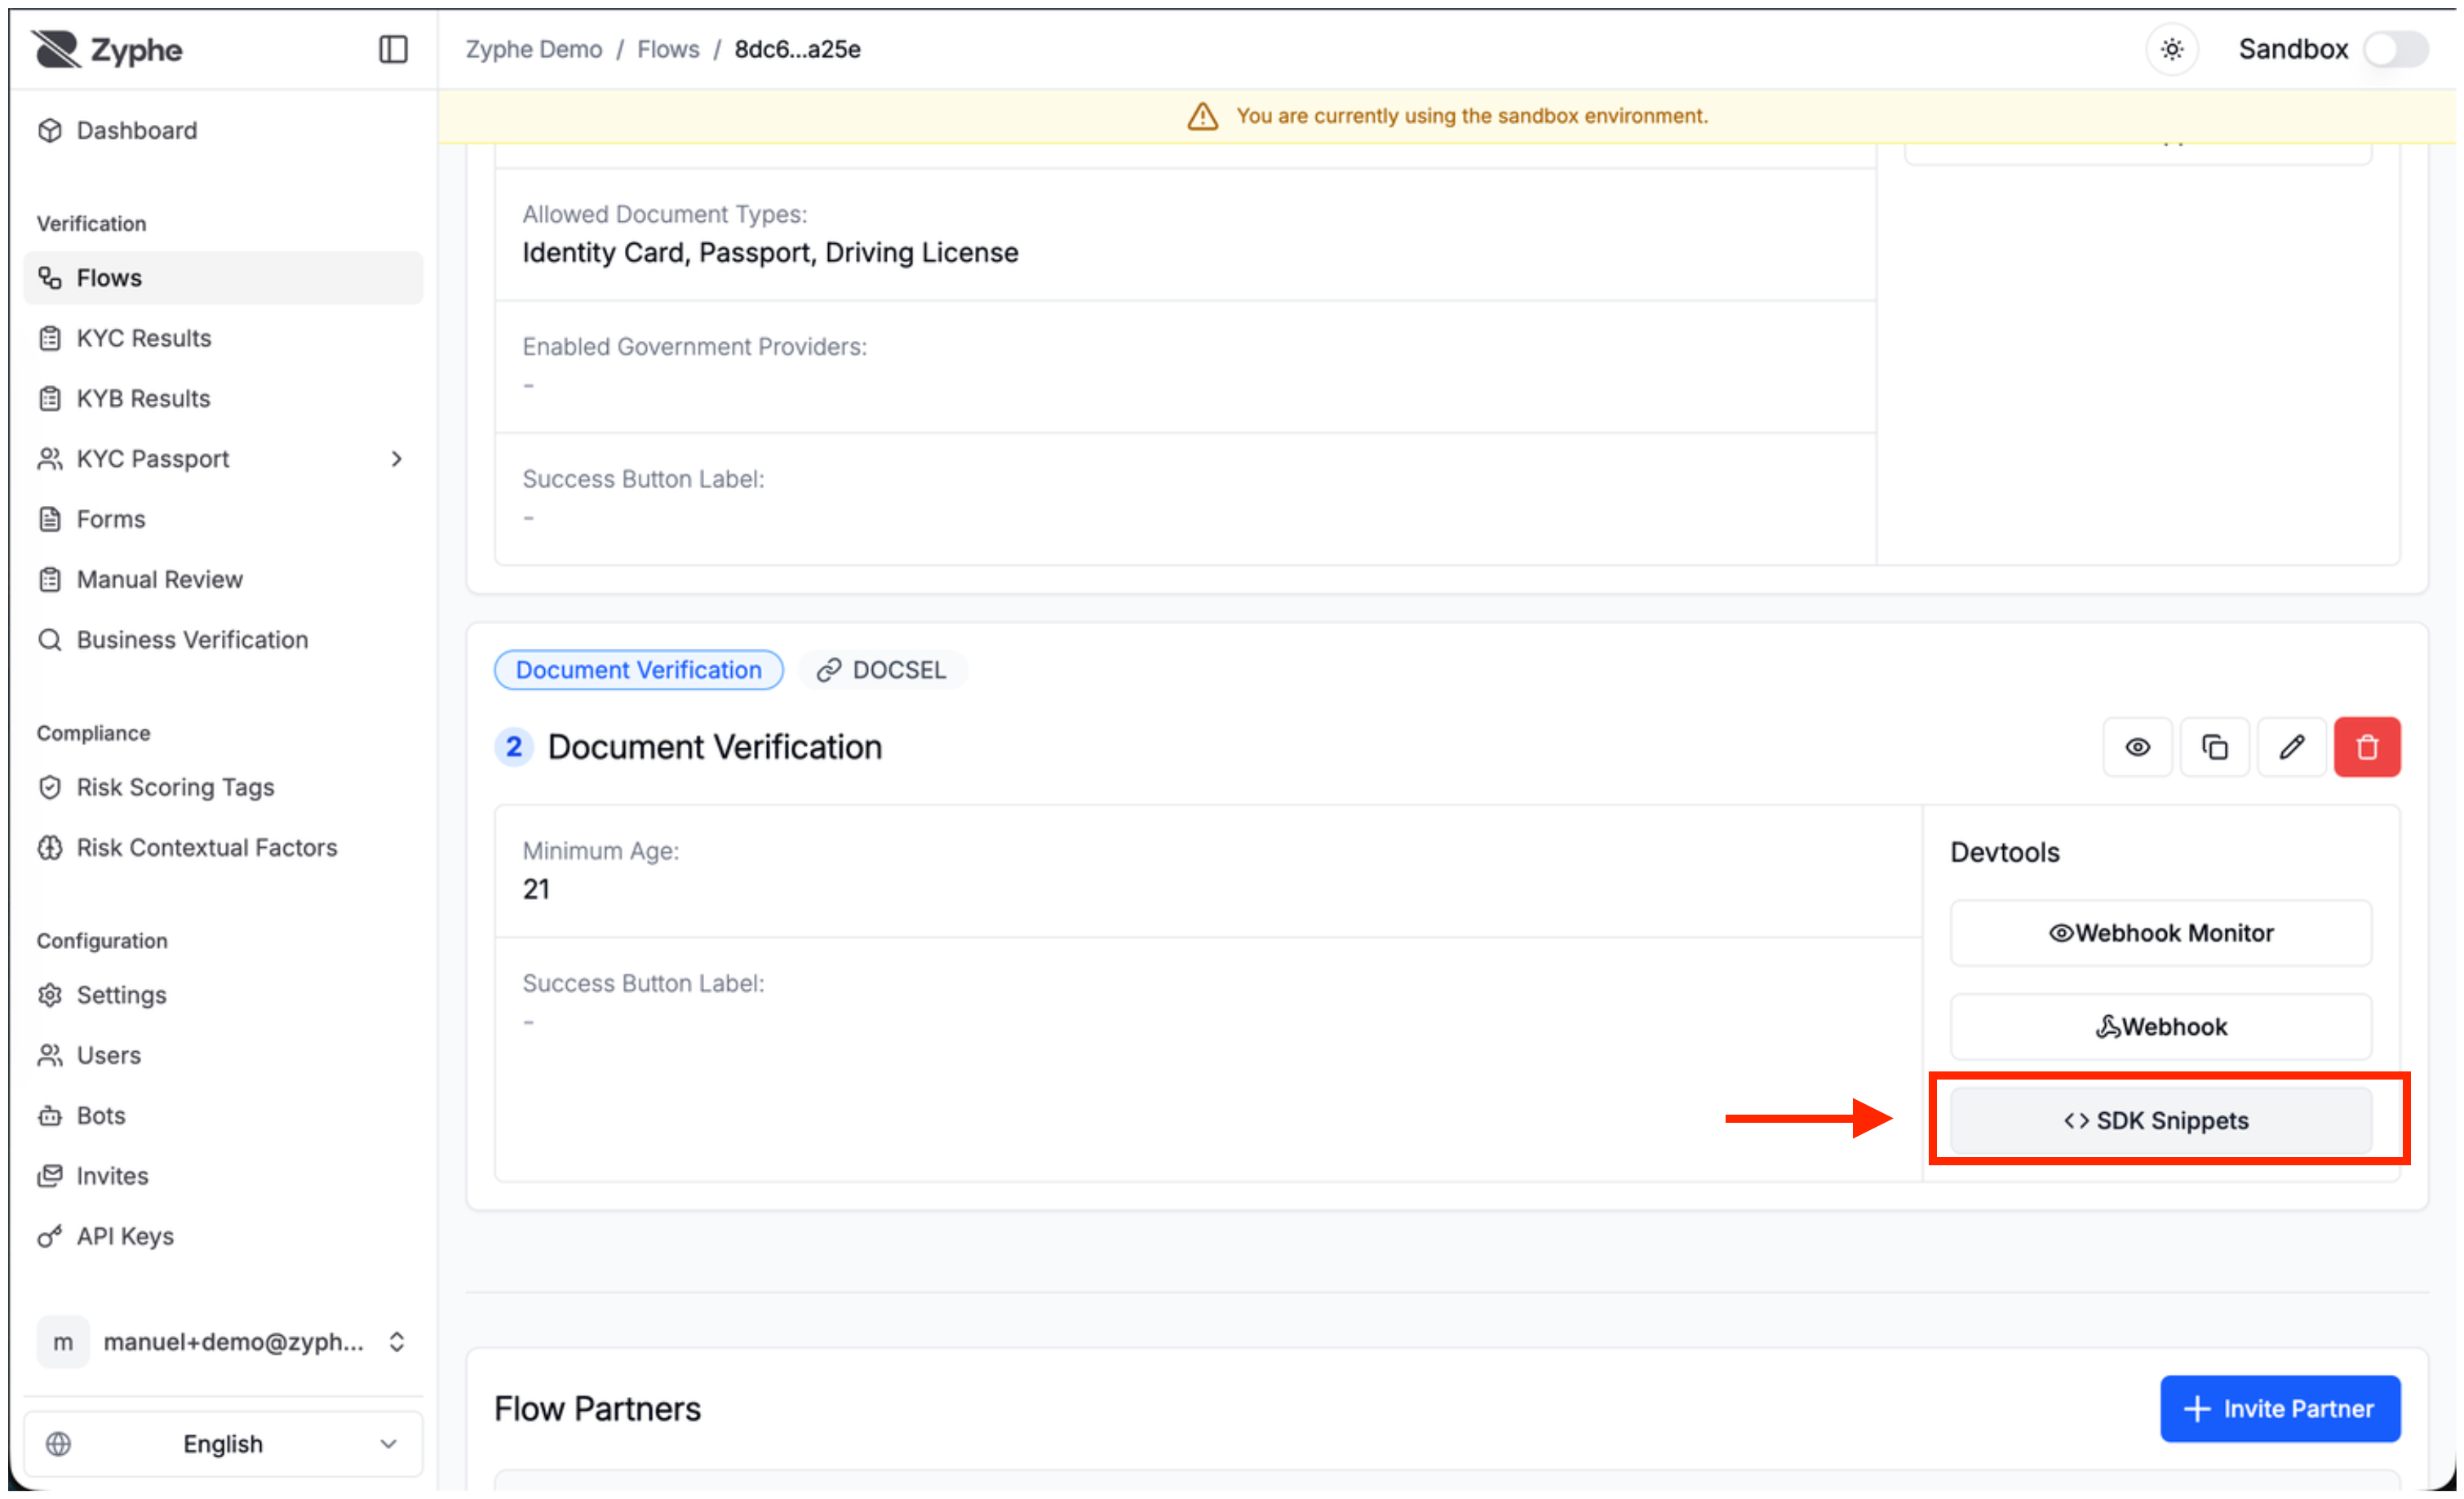
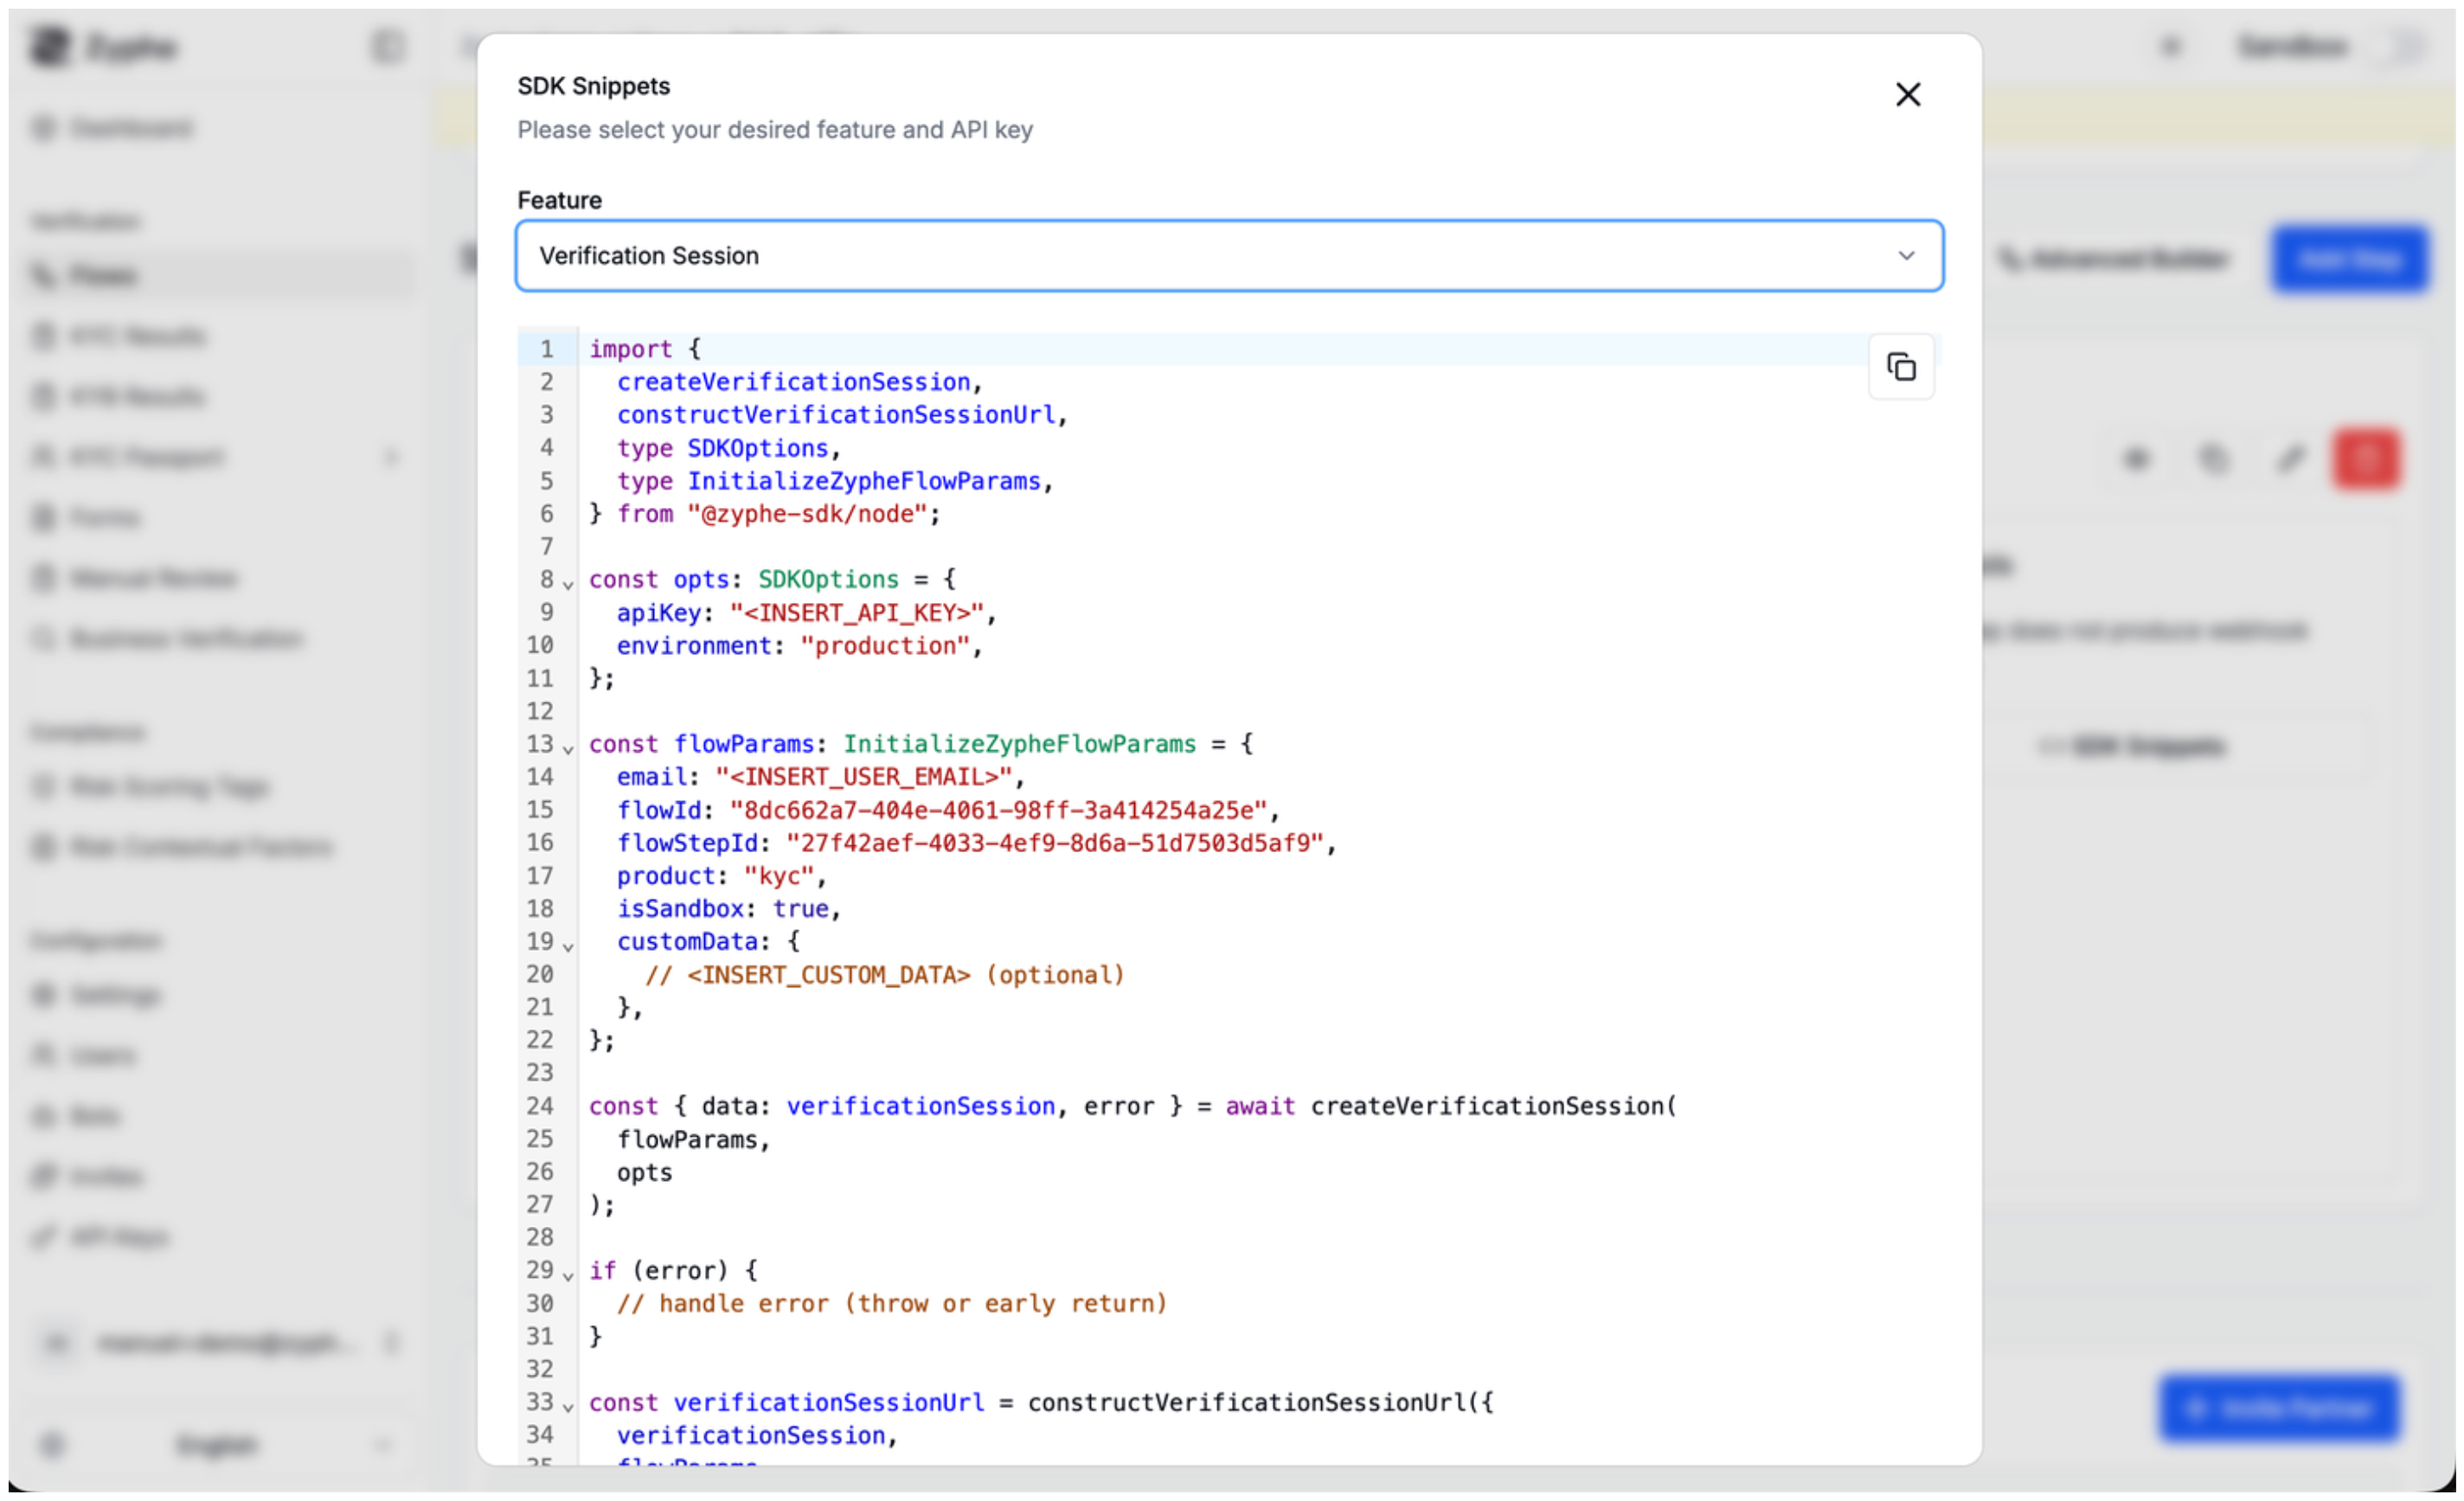
7. SDK Snippets
Use the SDK snippets panel to generate implementation examples for the selected flow and step. These snippets help you start an SDK integration with the correct identifiers and environment values.
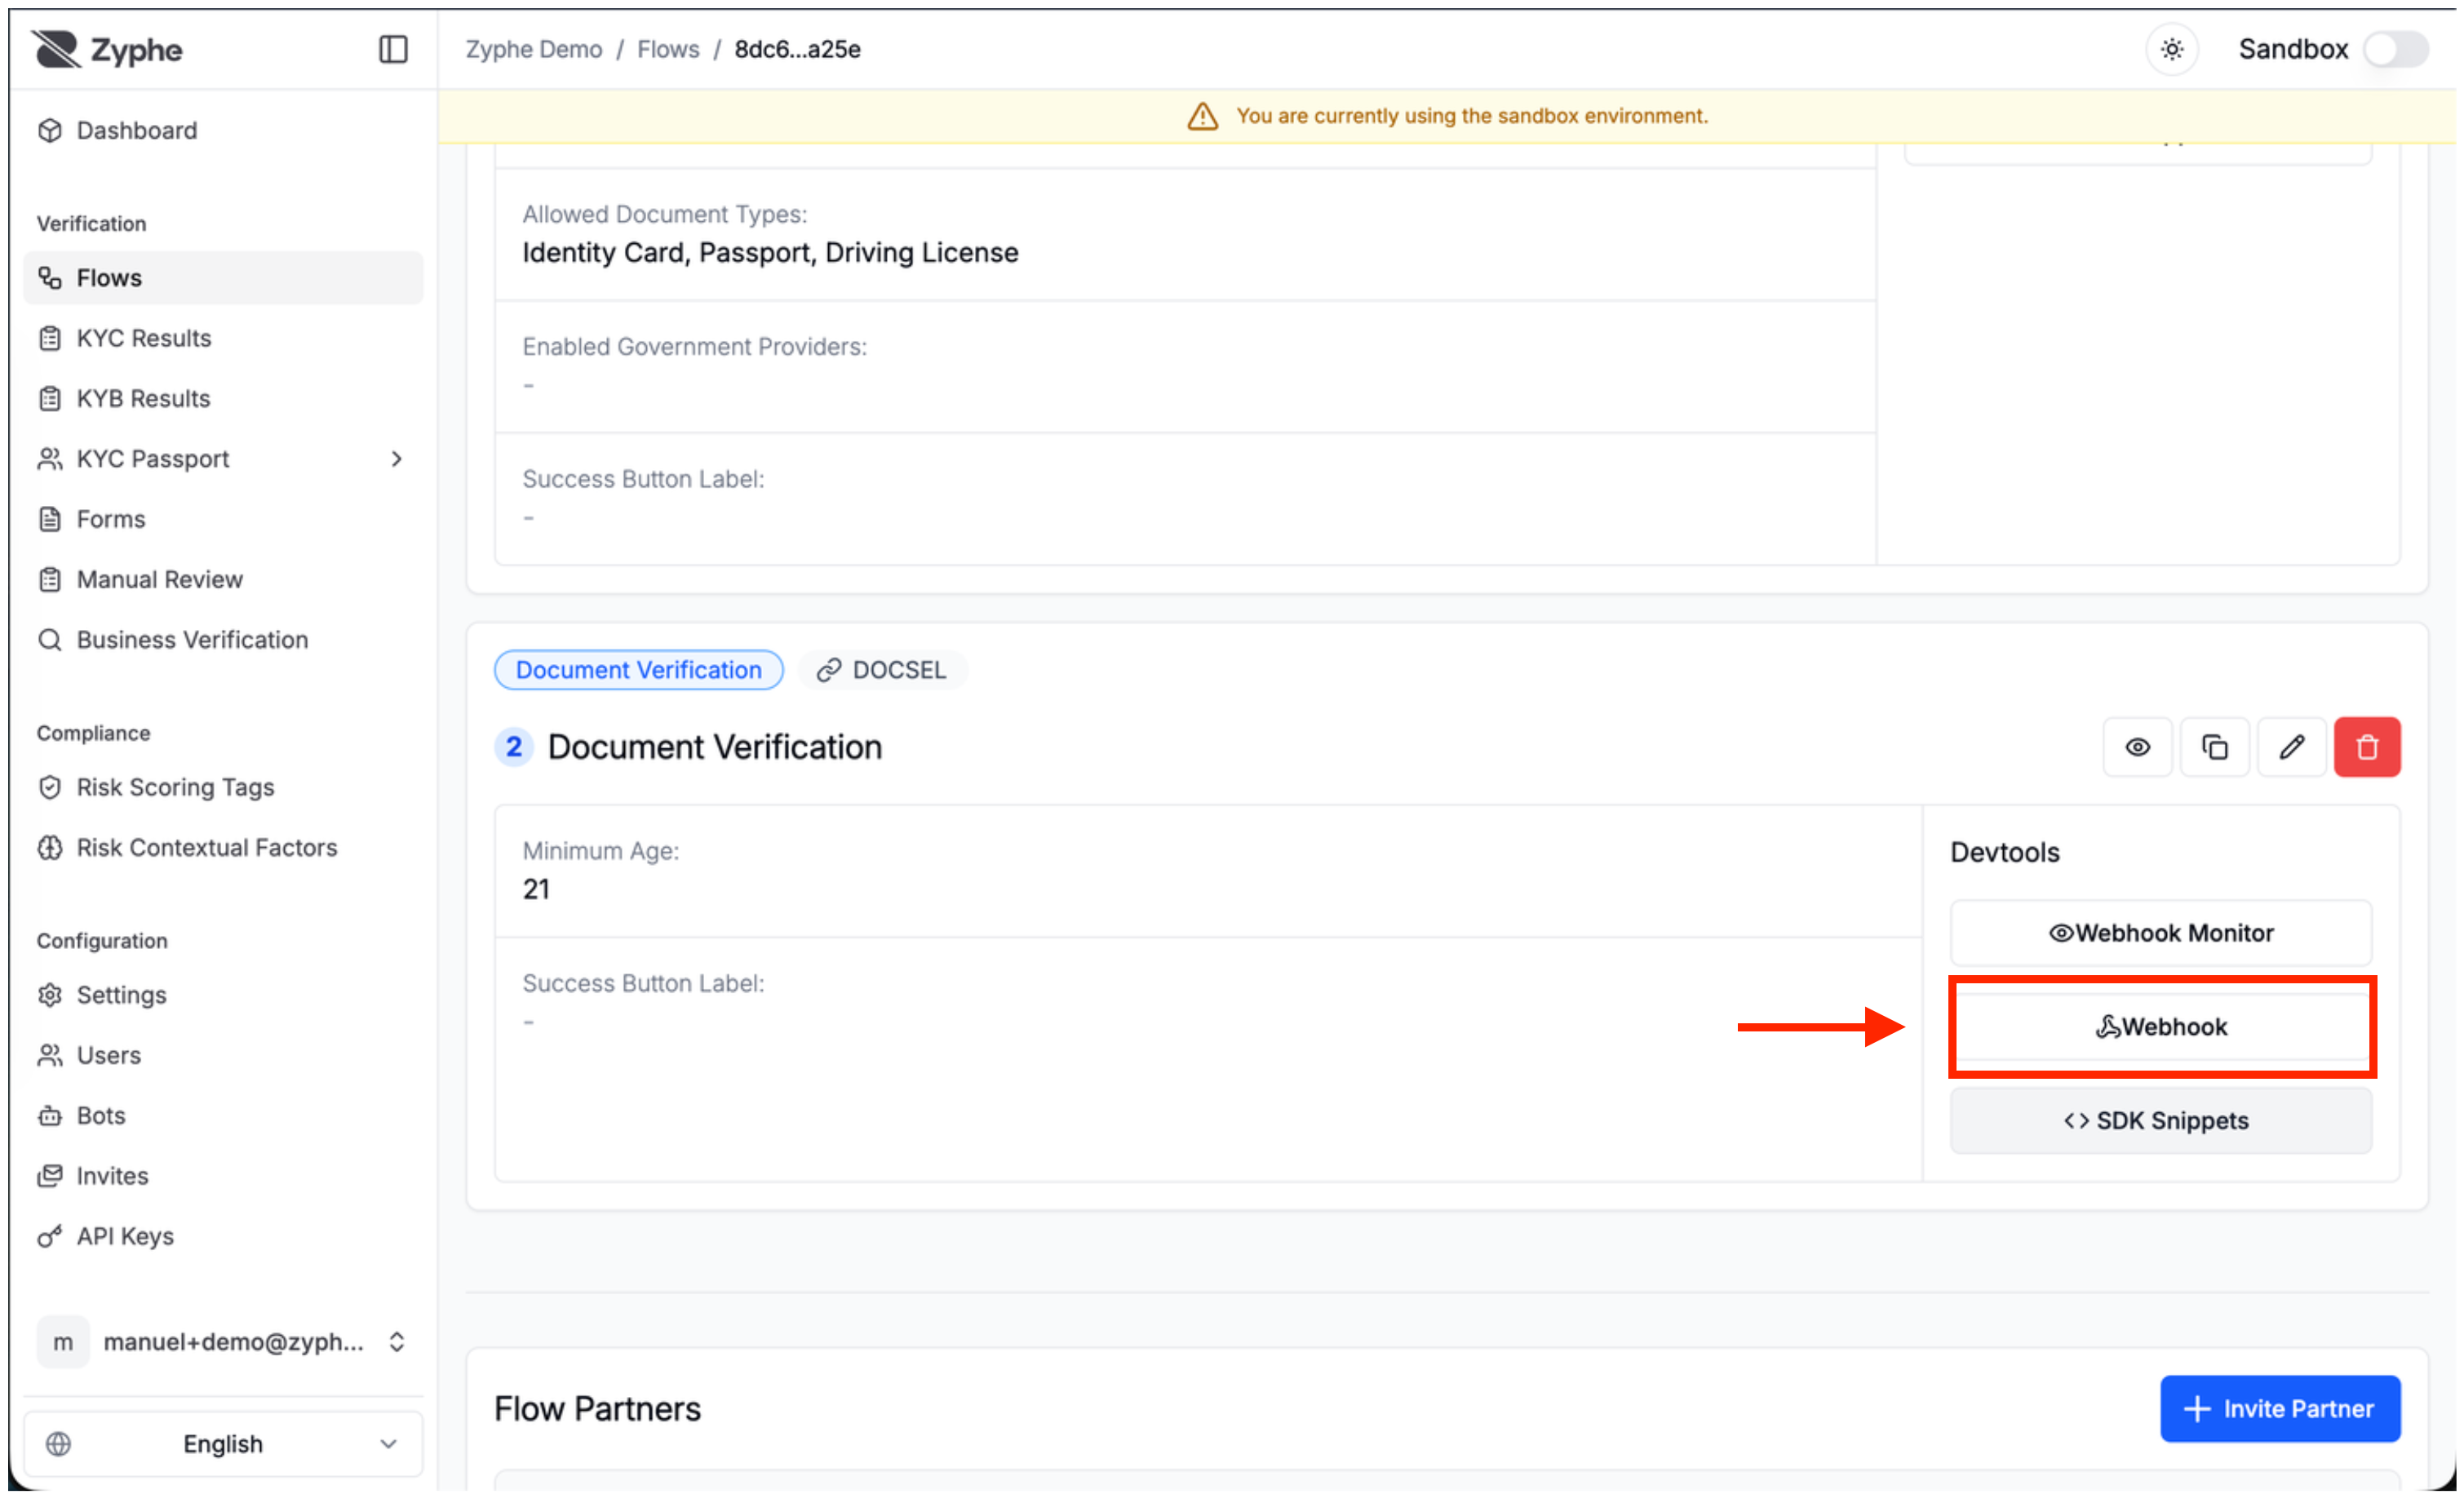
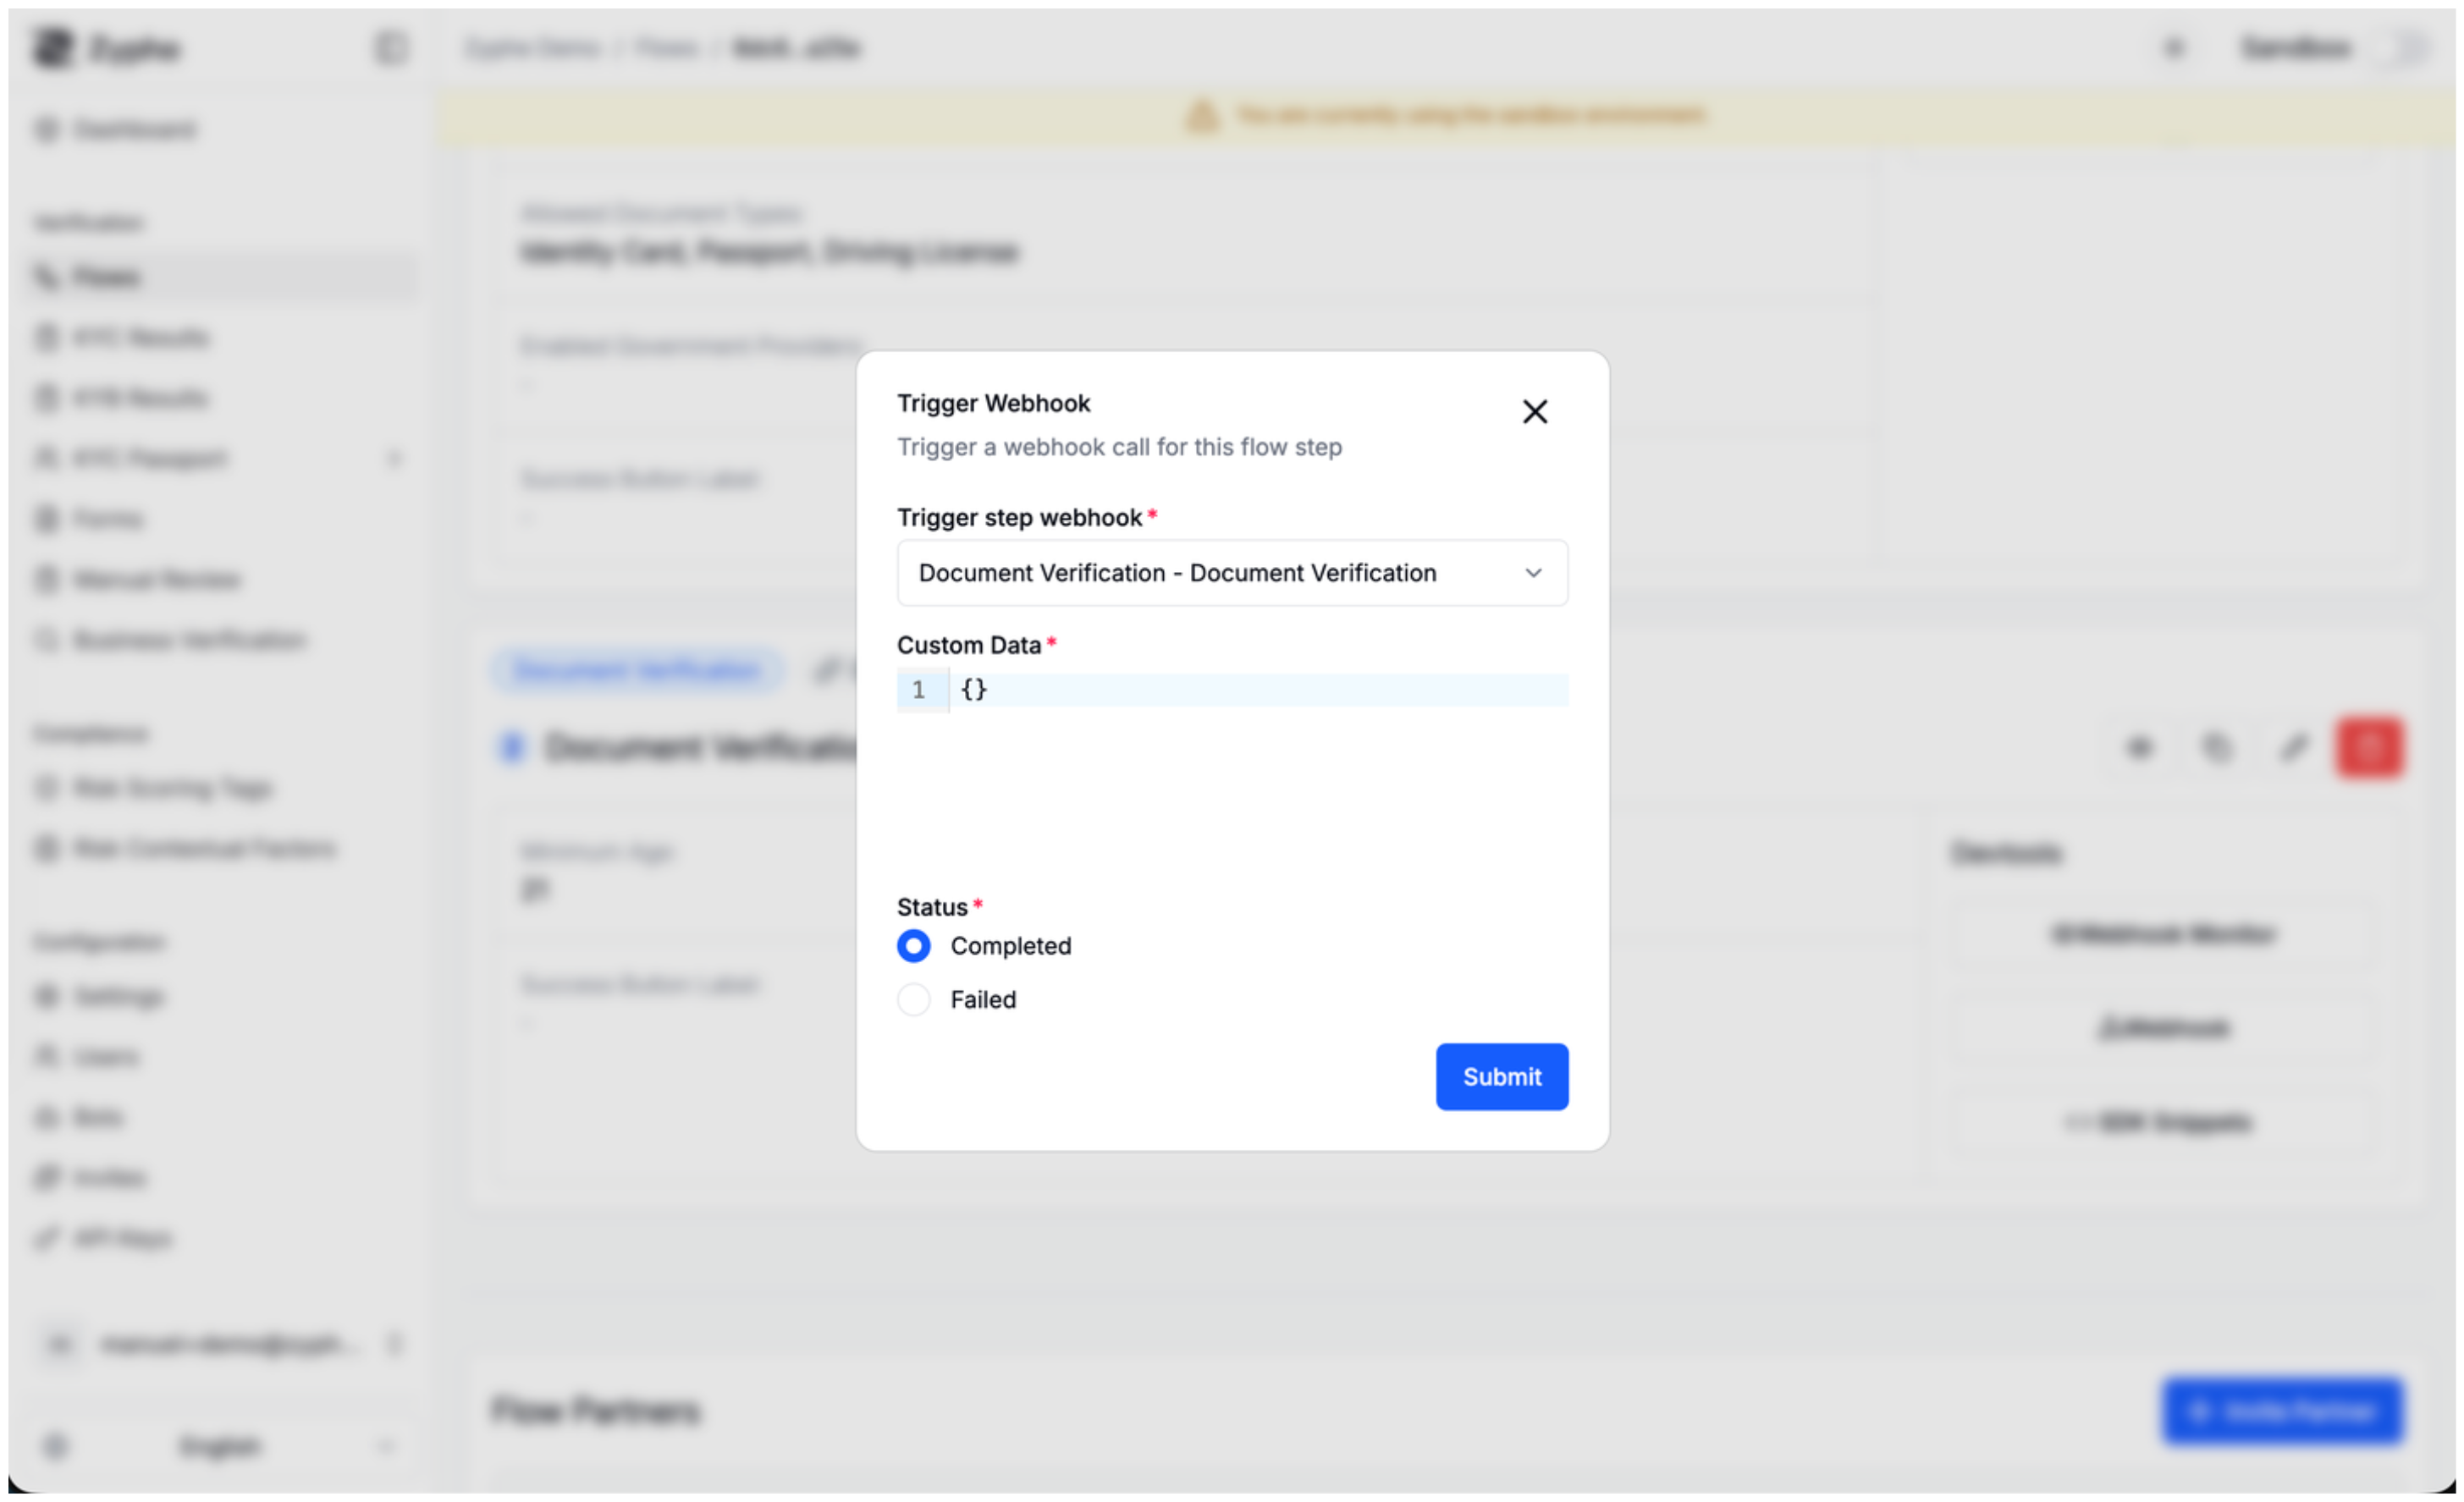
8. Webhook Trigger
Use the webhook trigger tool to manually send a webhook event for a flow step. This is useful when testing your webhook endpoint before sending users through the flow.
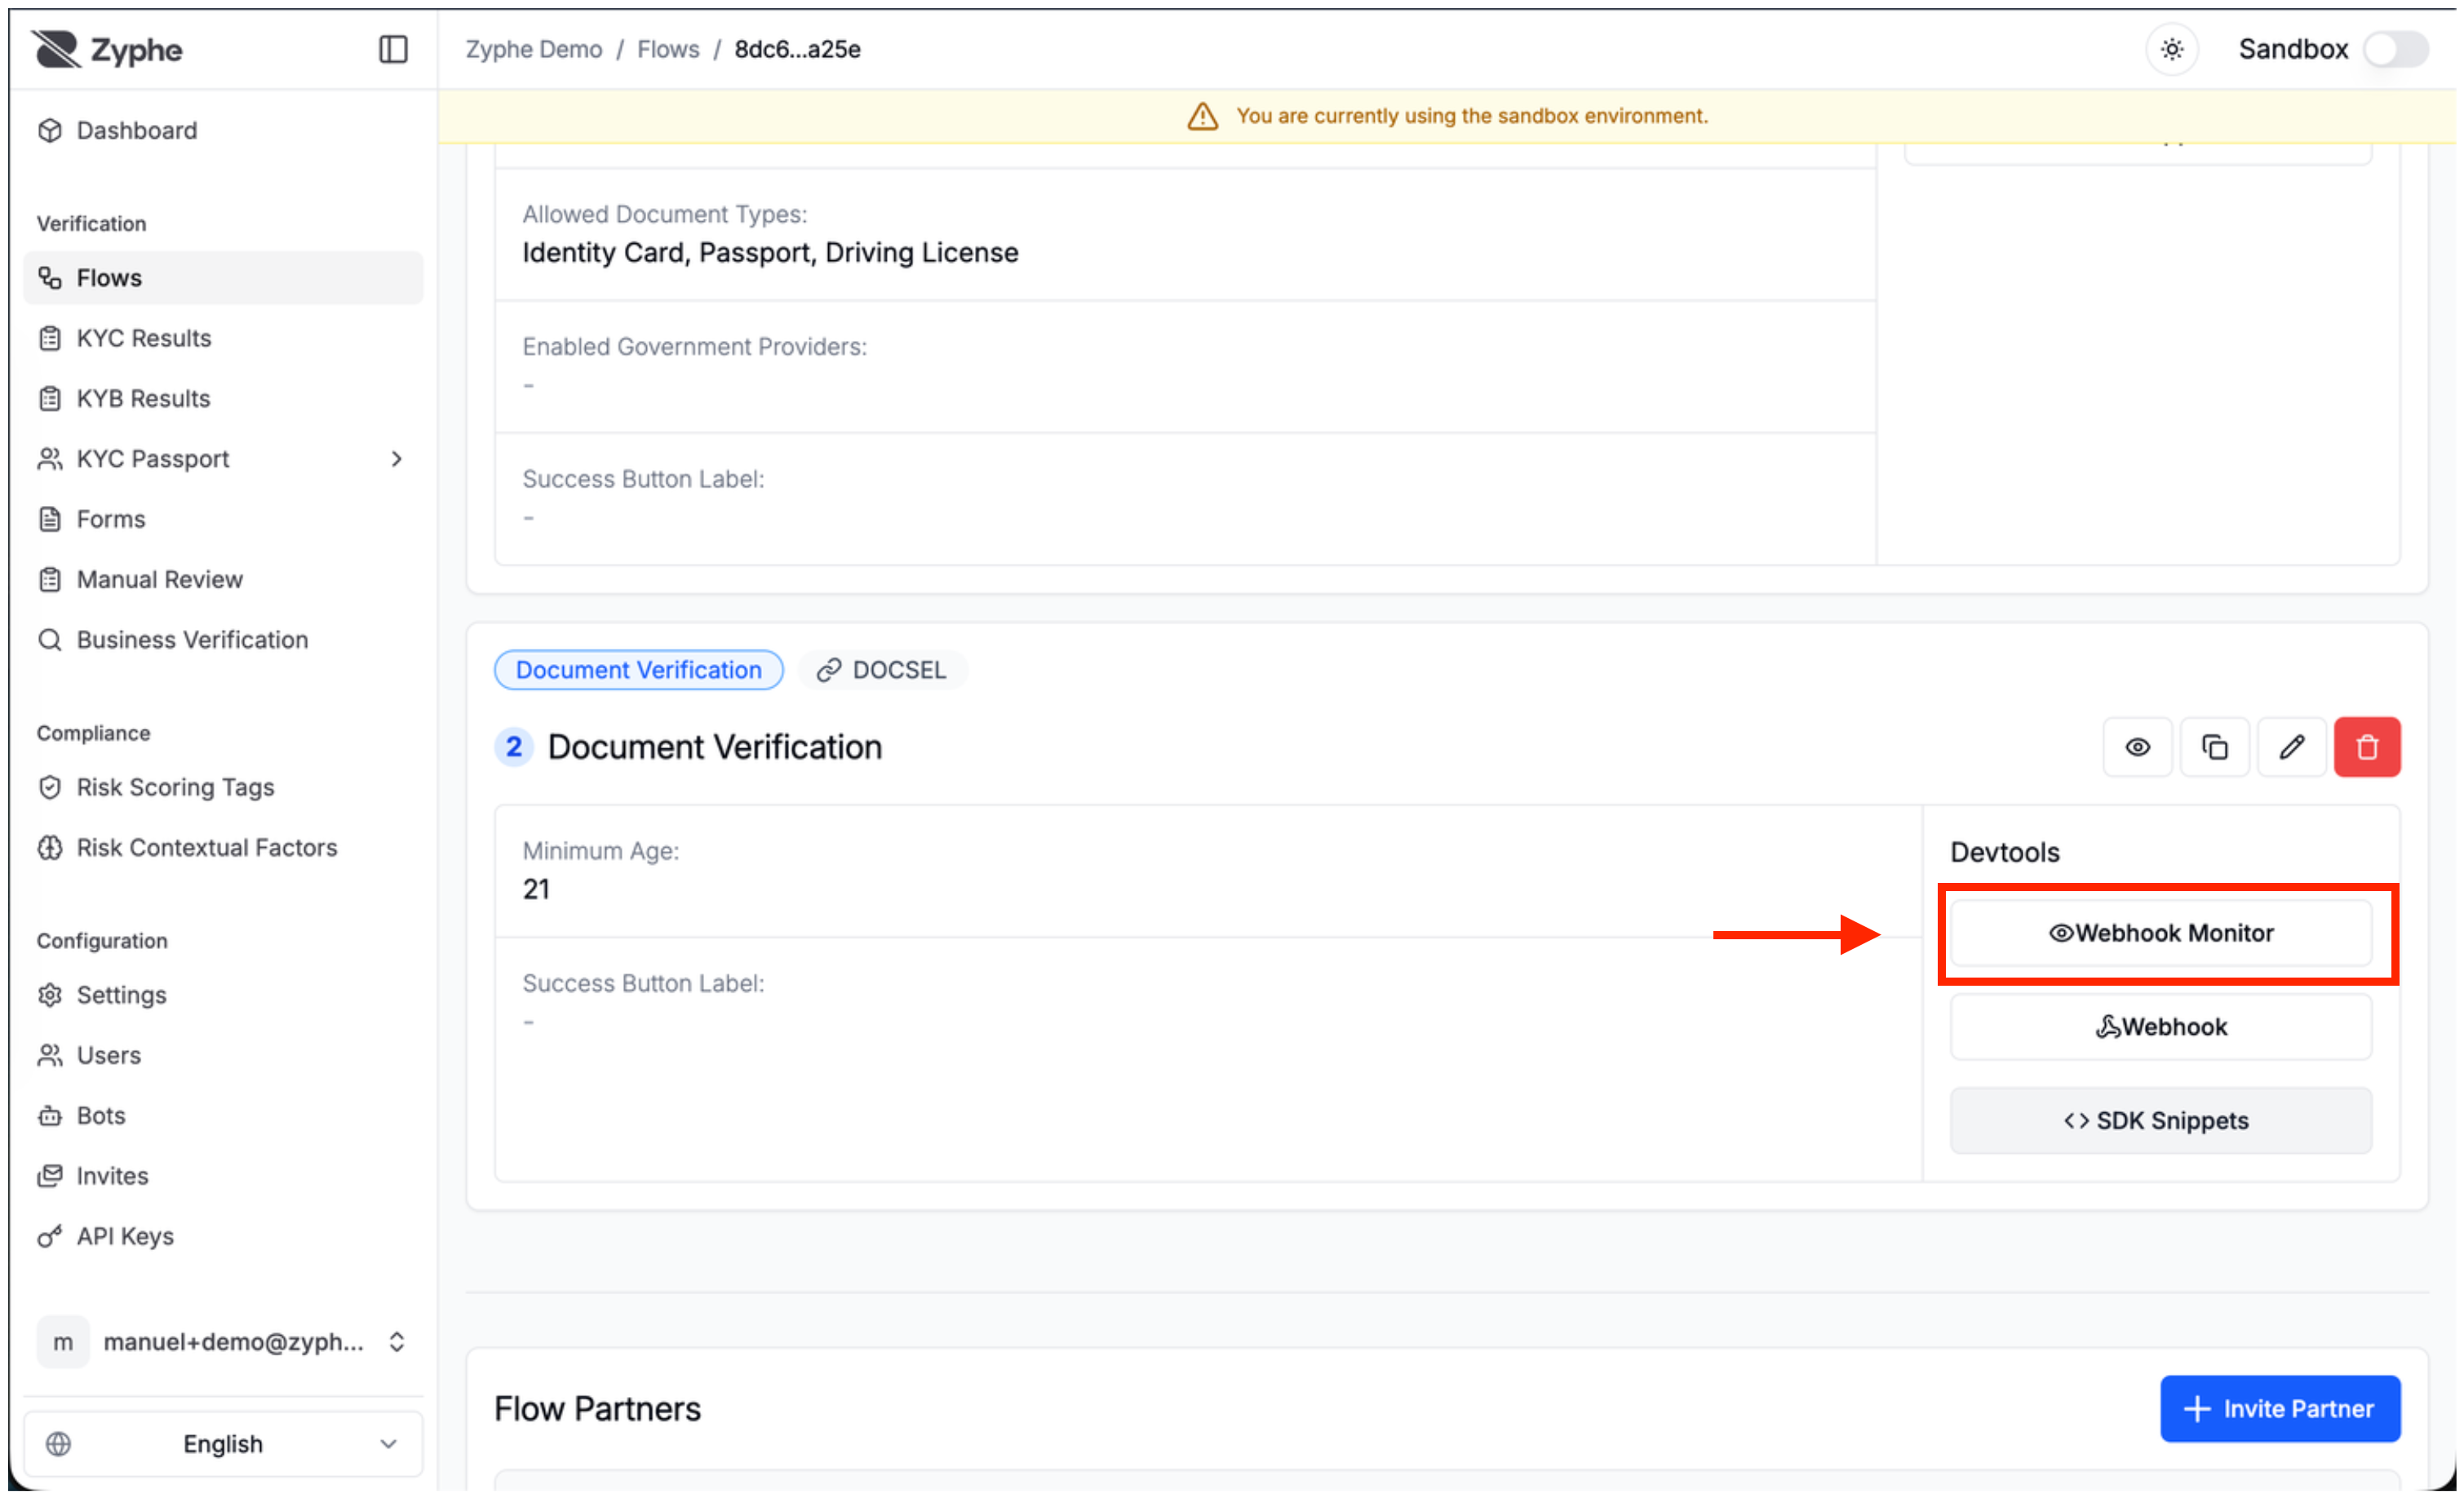
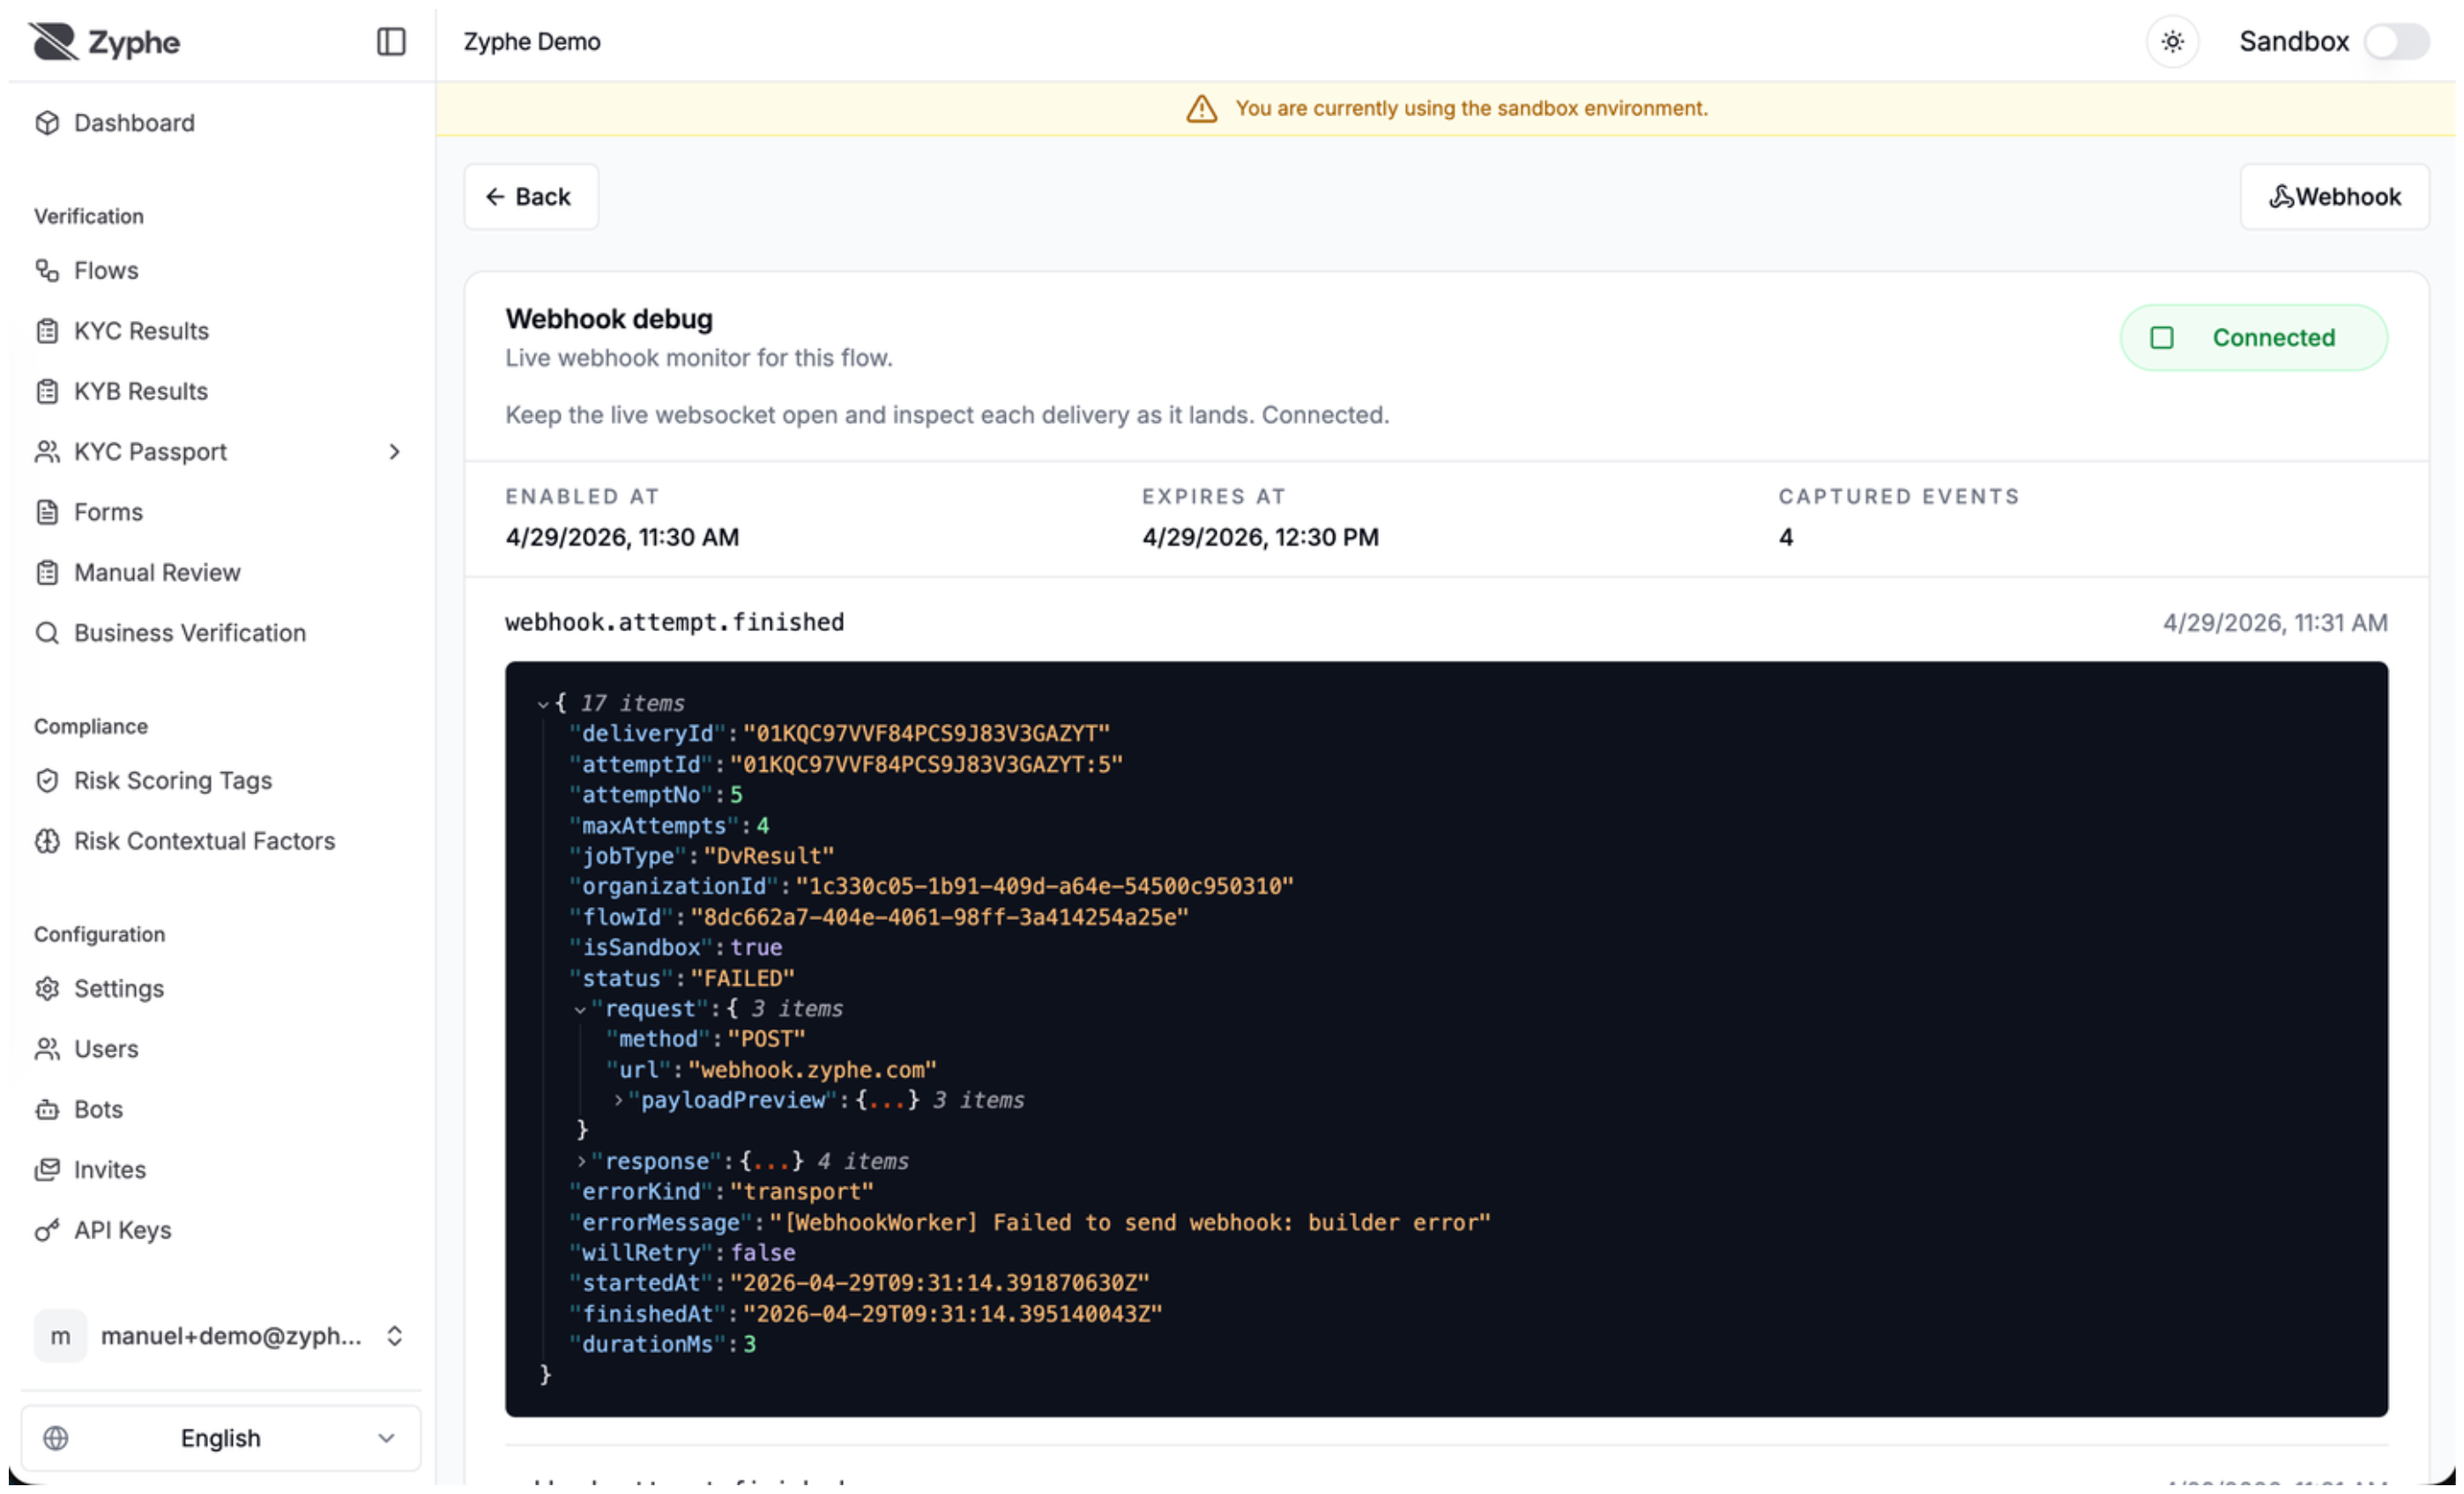
9. Webhook Monitor
Use the webhook monitor to inspect webhook delivery attempts, payloads, responses, and errors while testing your integration.
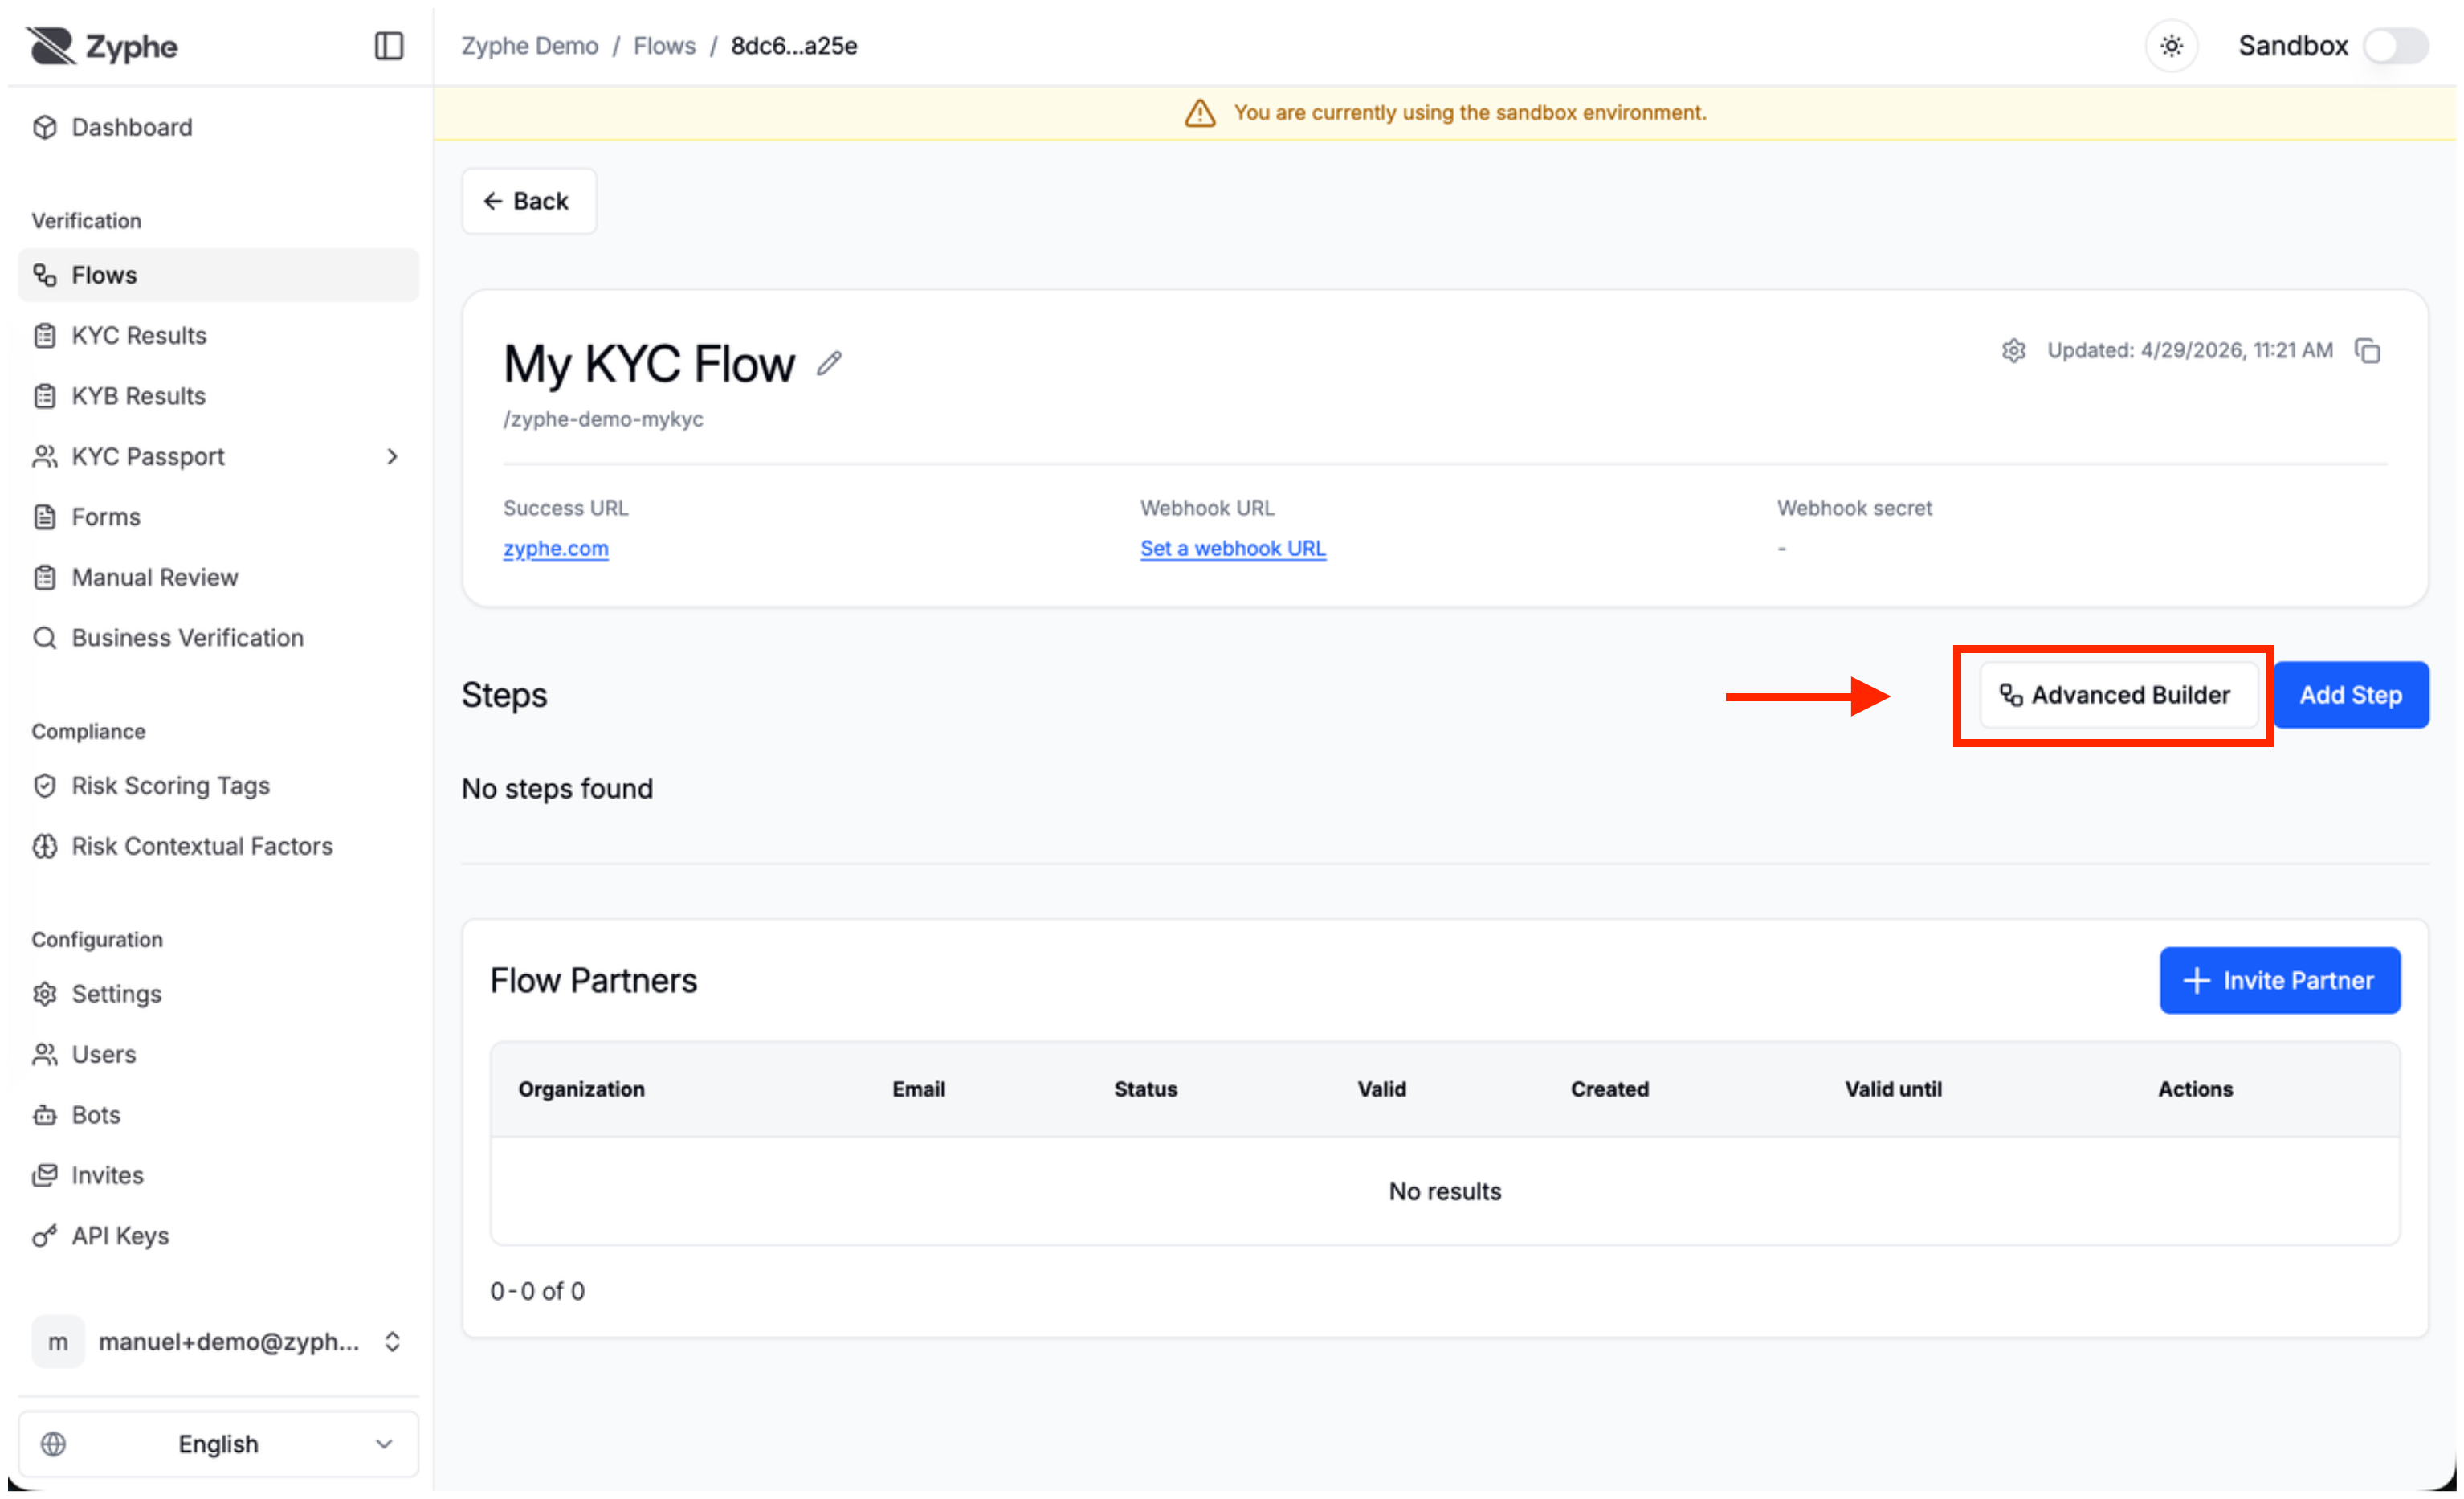
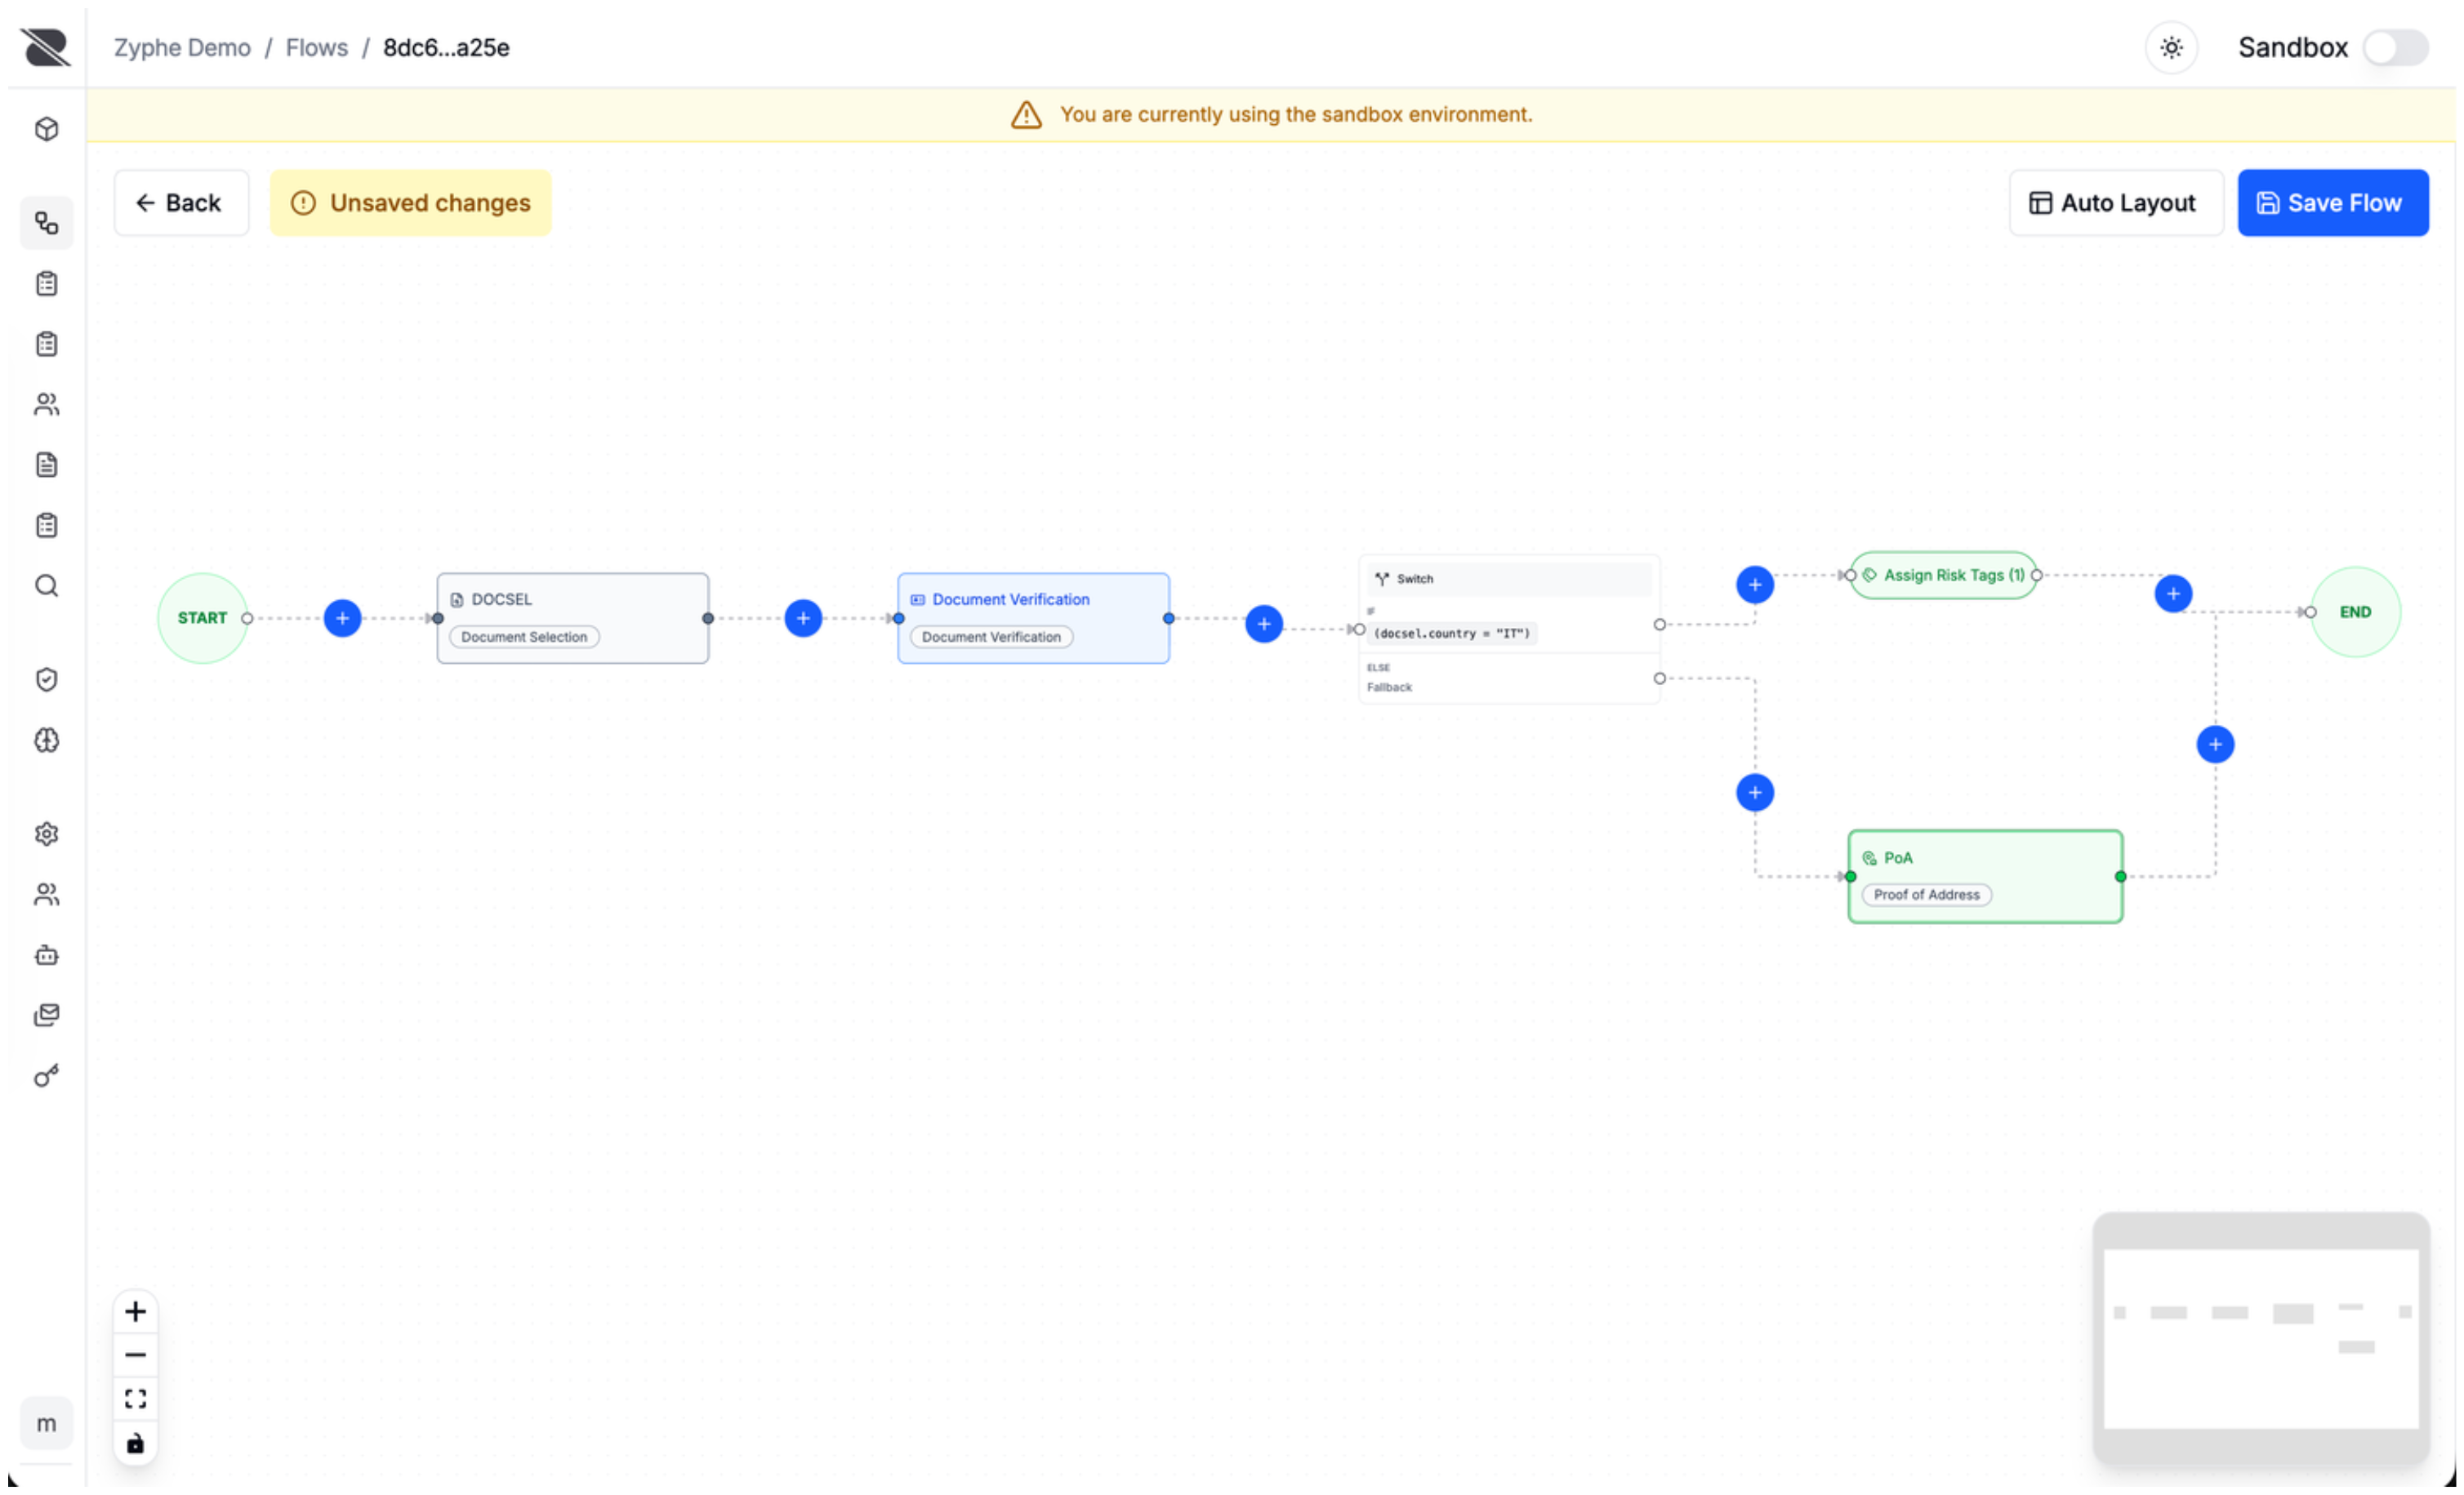
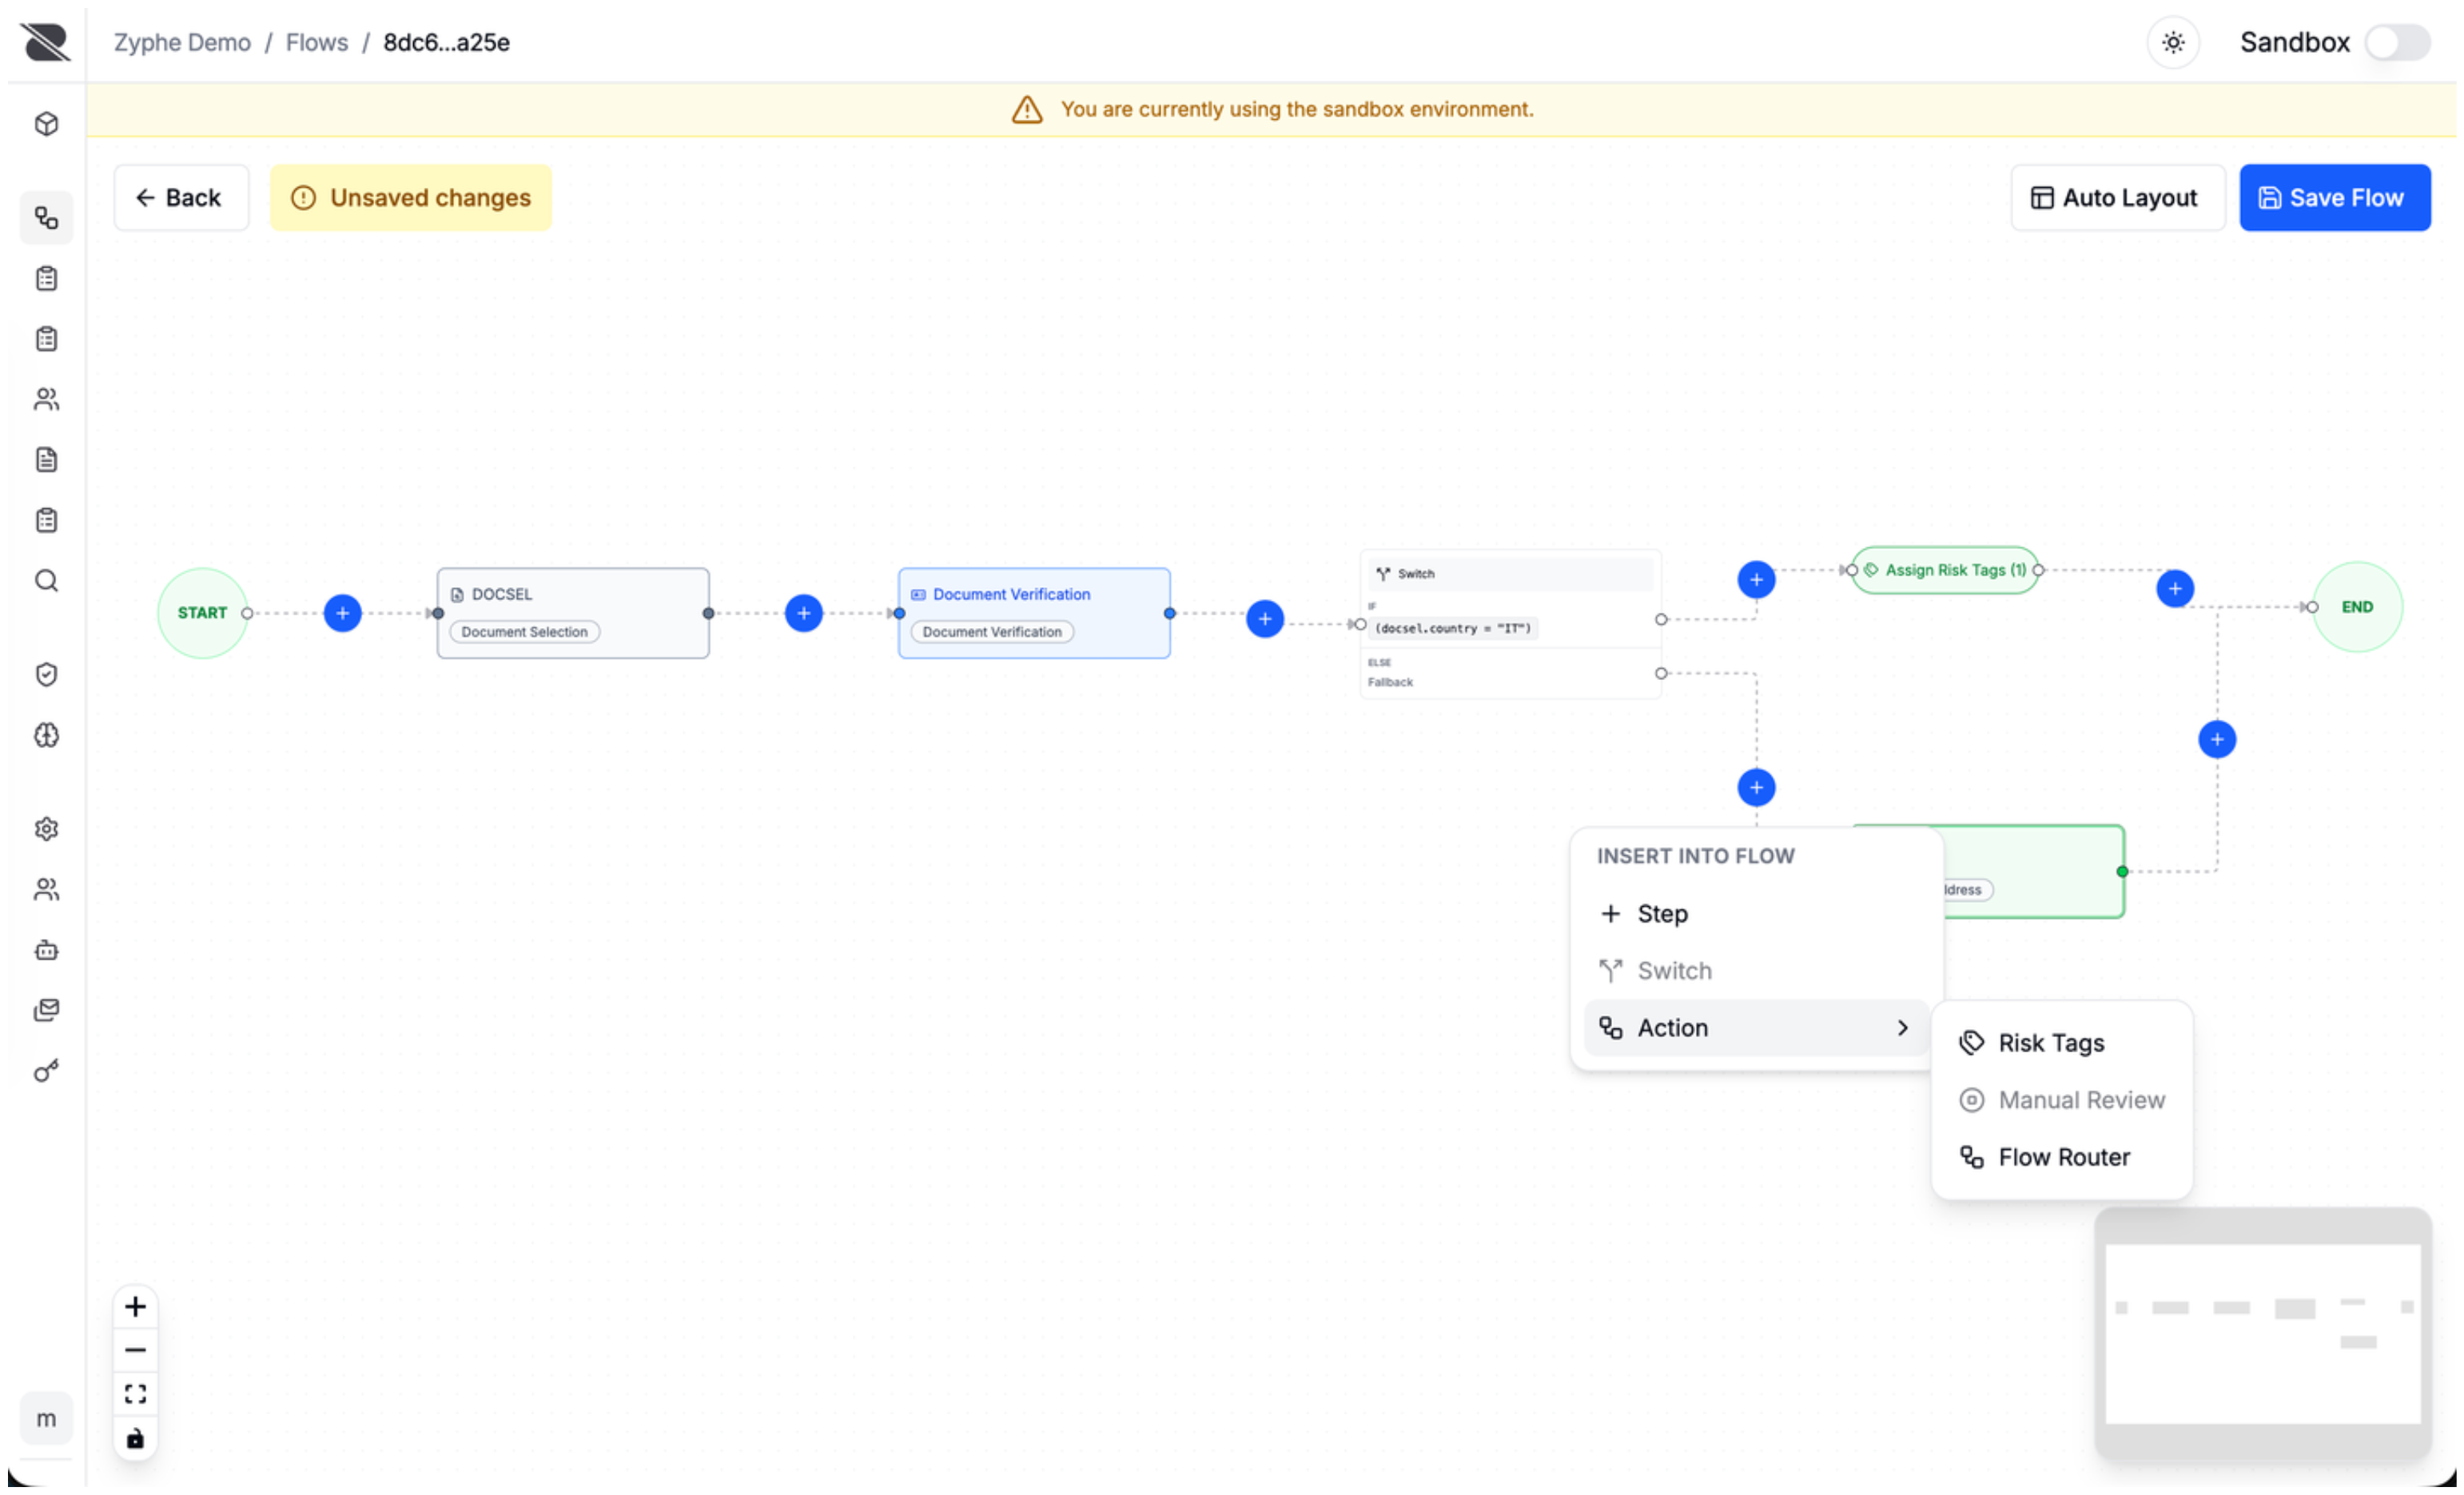
10. Flow Builder
Flow Builder is an alternative way to build flows. Use it when you need advanced patterns such as if conditions, custom logic, branching paths, and more complex step orchestration.
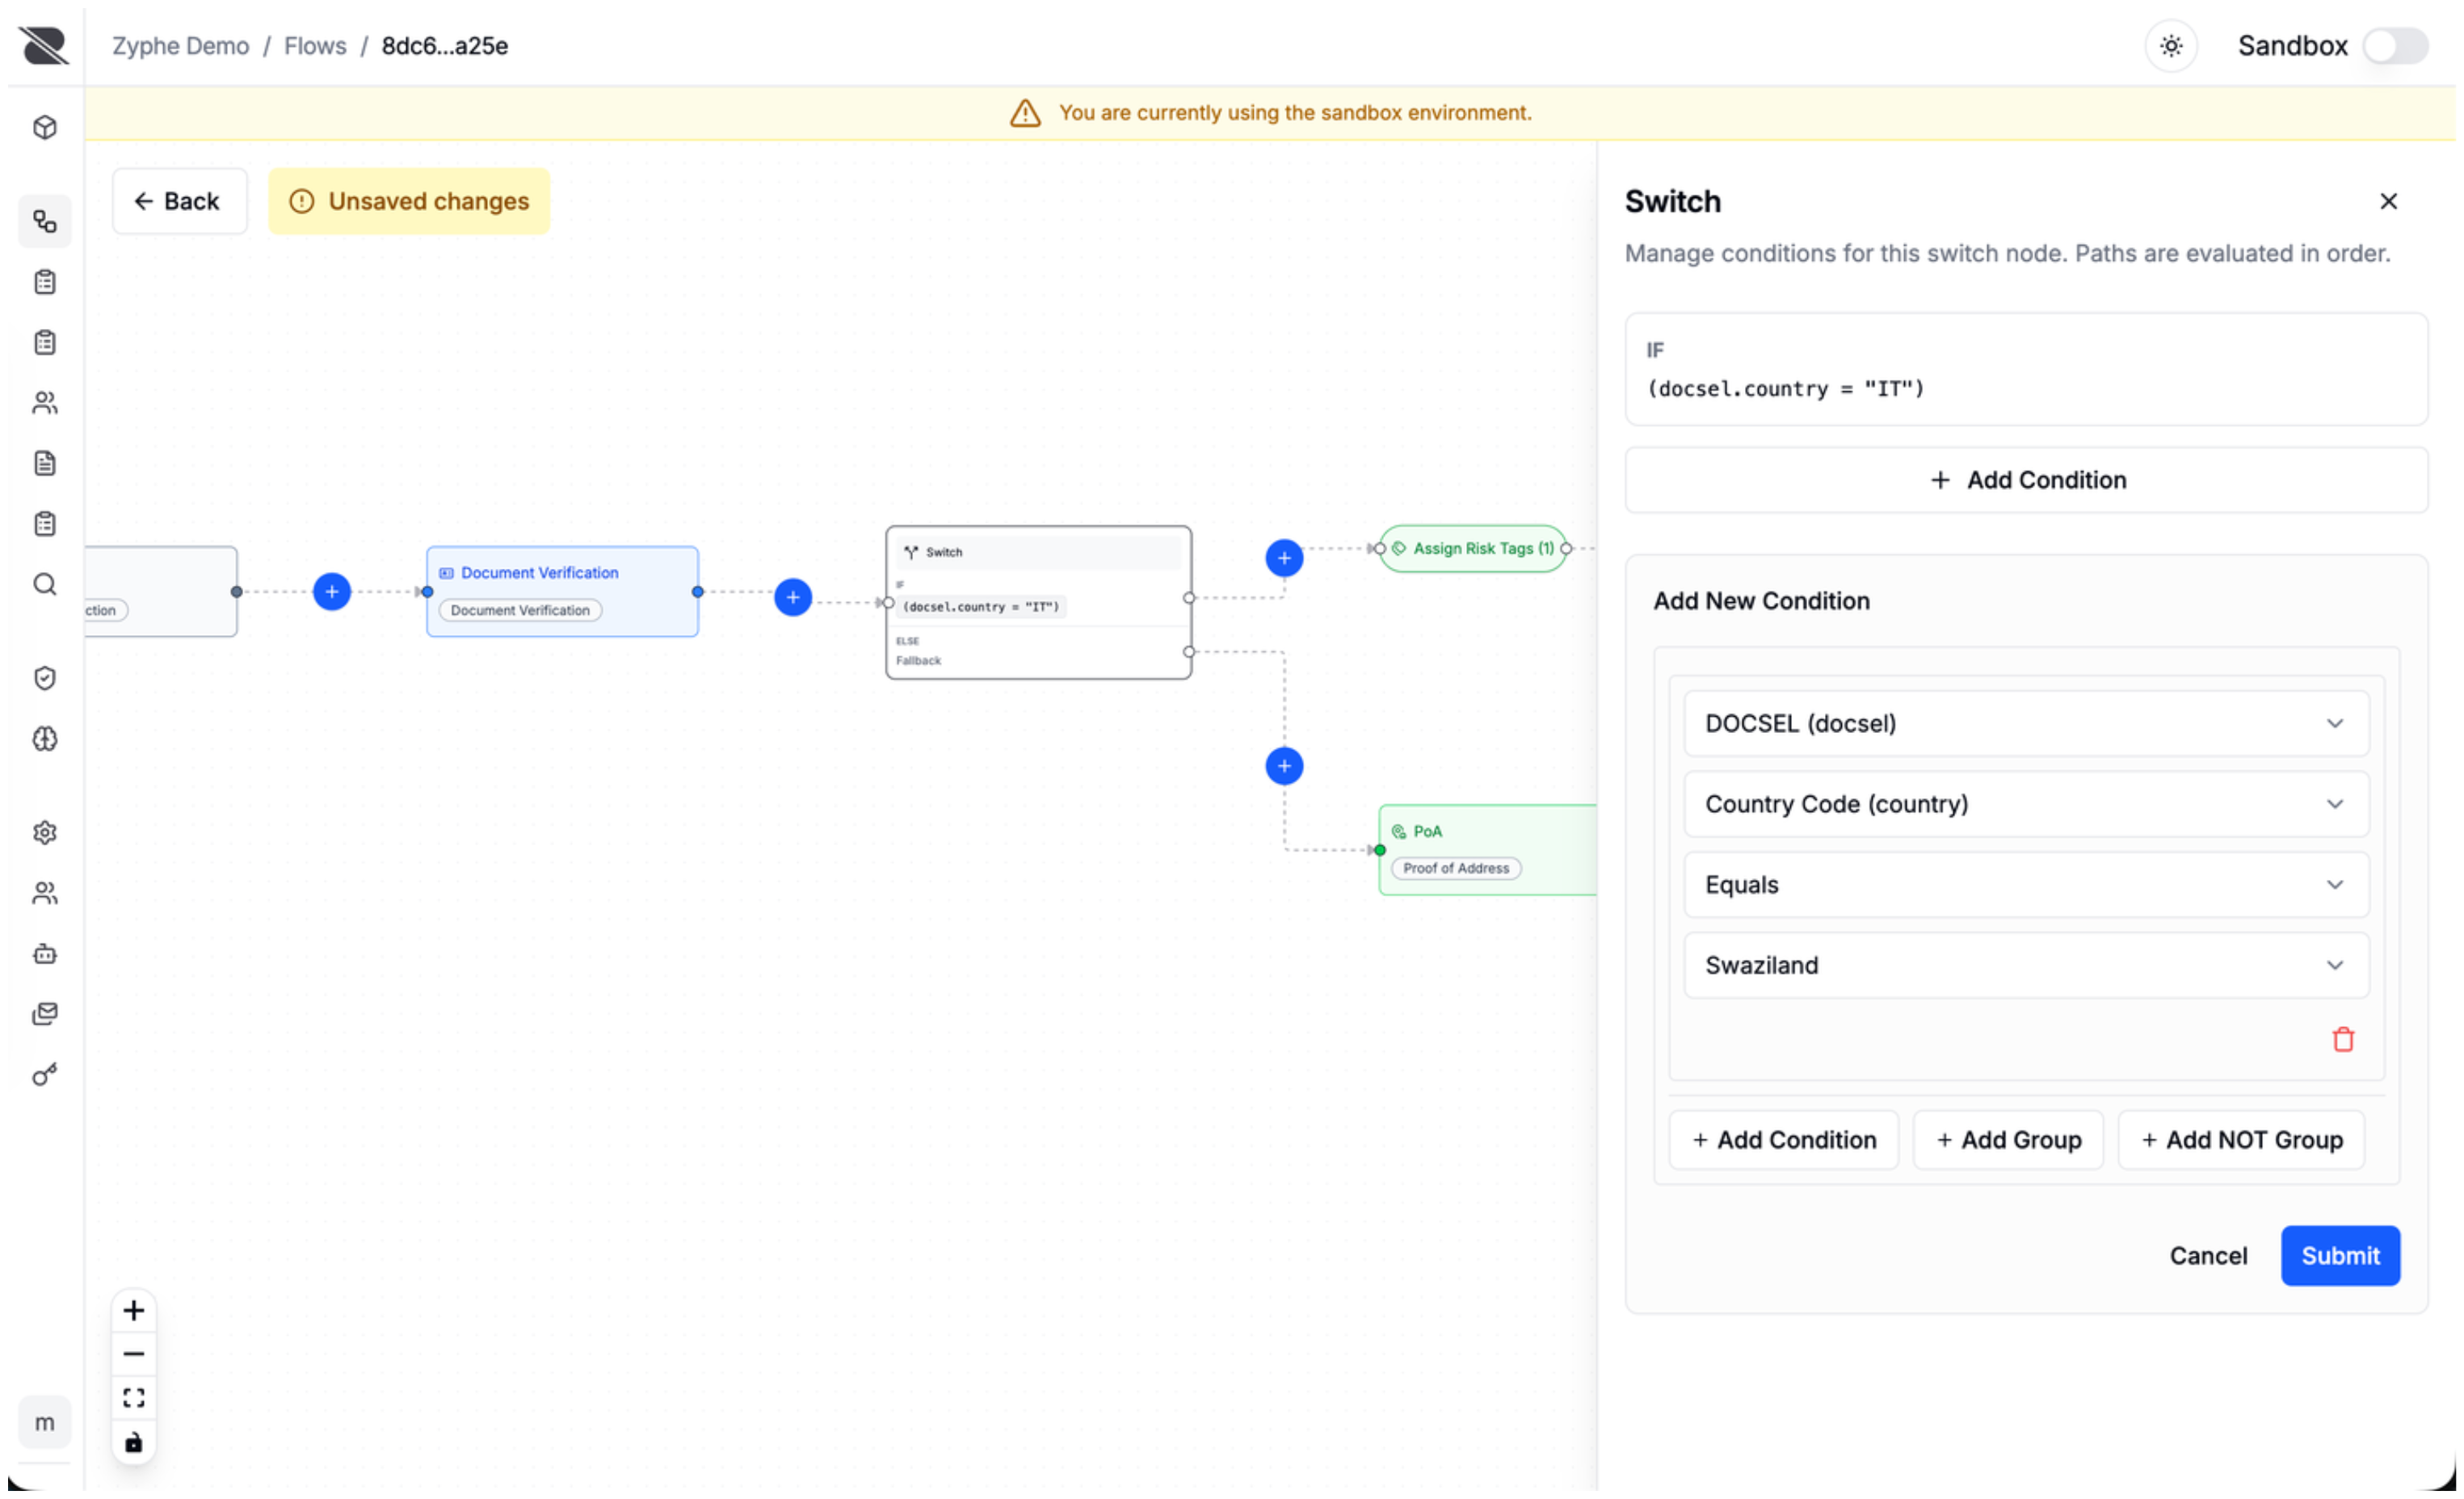
Conditions with custom data and vault fields
Flow Builder conditions can use custom data passed into the verification flow. This is useful when you want to route users based on information from your own system, such as customer segment, onboarding type, product plan, or other context attached to the verification session.
Conditions can also use selected fields extracted from vault documents, such as age, nationality, document metadata, or address-related values. These fields are handled with privacy in mind: Zyphe does not store the document details unencrypted just to make workflow decisions. Instead, the relevant condition is evaluated securely when the verified document data is available, and the workflow keeps only the outcome needed to continue routing the flow.